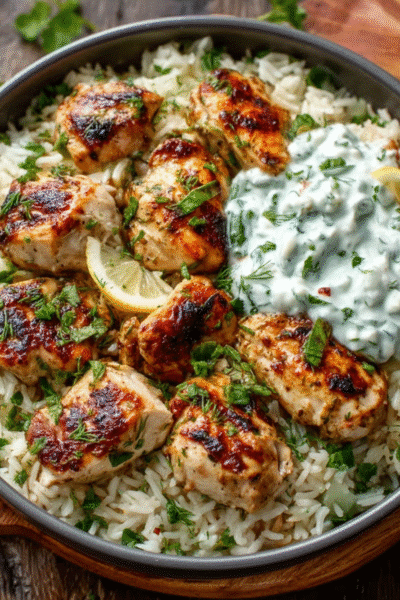
Deviled Egg Pasta Salad: A Low-Carb Delight You’ll Love!

How to Make Deviled Egg Pasta Salad
Now that you’re all set with the ingredients, let’s dive into the fun part—making this delightful Deviled Egg Pasta Salad! I promise, it’s as easy as pie (or should I say, as easy as pasta salad?). With just a few simple steps, you’ll have a dish that’s not only delicious but also perfect for those busy weeknights or potluck gatherings.
Step 1 – Prep Ingredients
First things first, let’s get our ingredients prepped. If you haven’t already, cook your konjac noodles according to the package instructions. They usually take just a few minutes, so keep an eye on them! Once they’re done, drain them in a colander and rinse them under cold water. This helps to cool them down and prevents them from getting too sticky.
While the noodles are cooking, it’s time to tackle those hard-boiled eggs. If you’re like me, you might have a love-hate relationship with peeling eggs. Here’s a little tip: if you let them sit in cold water for a few minutes after boiling, they peel much easier! Once peeled, chop them into bite-sized pieces and set them aside.
Step 2 – Begin Cooking
Now that your noodles are cooked and your eggs are chopped, let’s get mixing! In a large mixing bowl, combine the chopped hard-boiled eggs, mayonnaise, Dijon mustard, apple cider vinegar, garlic powder, onion powder, and a sprinkle of salt and pepper. This is where the magic happens! Mix everything together until it’s well combined. You want that creamy, dreamy texture that makes deviled eggs so irresistible.
Step 3 – Combine Ingredients
Next, it’s time to add those cooled konjac noodles to the egg mixture. Gently fold the noodles into the egg mixture, being careful not to break them apart too much. You want every noodle to be coated in that delicious dressing! It’s like giving each noodle a warm hug of flavor.
Once everything is mixed, it’s time to add in the chopped green onions and diced pickles, if you’re using them. These add a nice crunch and a pop of flavor that really elevates the dish. Give it another gentle stir to make sure everything is evenly distributed.
Step 4 – Finish and Serve
Now for the finishing touches! If you’re feeling a little indulgent, sprinkle some crumbled bacon on top for that extra crunch and flavor. Who doesn’t love bacon, right? Cover the salad and pop it in the fridge for at least 30 minutes. This chilling time allows all those flavors to meld together beautifully. Trust me, it’s worth the wait!
When you’re ready to serve, just scoop it into bowls and enjoy! You can serve it as a main dish, a side, or even as a light lunch. It’s versatile, delicious, and sure to be a hit with your family and friends.
Introduction to Deviled Egg Pasta Salad
Welcome to the world of Deviled Egg Pasta Salad, where classic flavors meet modern convenience! If you’re like me, juggling a busy life while trying to whip up something delicious for your family can feel like a high-wire act. But fear not! This delightful dish is here to save the day.
Imagine the creamy, tangy goodness of deviled eggs, but in a pasta salad form. It’s a match made in culinary heaven! This recipe combines the beloved flavors of deviled eggs with the satisfying texture of pasta, all while keeping it low-carb. Perfect for those of us who want to enjoy our favorite tastes without the guilt!
What I love most about this Deviled Egg Pasta Salad is how quick and easy it is to prepare. In just about 25 minutes, you can have a vibrant, flavorful dish ready to serve. Whether you’re hosting a family gathering, packing a lunch for work, or just looking for a quick weeknight dinner, this salad fits the bill. Plus, it’s a fantastic way to sneak in some protein and veggies without anyone batting an eye!
For busy American women aged 40 to 70, this recipe is a lifesaver. We all know how hectic life can get—between work, family commitments, and everything in between, finding time to cook can be a challenge. But with this Deviled Egg Pasta Salad, you can have a delicious meal on the table in no time, leaving you more time to relax and enjoy your evening.
So, let’s roll up our sleeves and dive into this delightful dish that’s sure to become a staple in your kitchen. Trust me, once you try it, you’ll be hooked!
Why You’ll Love This Deviled Egg Pasta Salad
Let’s talk about why this Deviled Egg Pasta Salad is going to become your new best friend in the kitchen. First off, it’s all about the quick prep time. With just 15 minutes of prep and 10 minutes of cooking, you can whip up this delightful dish faster than you can scroll through your social media feed! Seriously, it’s like a culinary magic trick that leaves you with more time to kick back and relax.
And let’s not forget about minimal cleanup. I don’t know about you, but after a long day, the last thing I want to do is spend an hour scrubbing pots and pans. This recipe requires just a few simple tools—a pot for cooking the noodles, a colander for draining, and a mixing bowl. That’s it! You’ll be in and out of the kitchen in no time, leaving you with more time to enjoy your meal and less time worrying about the dishes.
Now, let’s get to the good stuff—the family-friendly flavors. This salad is a crowd-pleaser, and I can almost guarantee that even your pickiest eaters will be asking for seconds. The creamy dressing, the crunch of the green onions, and the savory notes from the bacon (if you choose to add it) create a symphony of flavors that will have everyone coming back for more. Plus, it’s a great way to sneak in some protein and veggies without anyone noticing. It’s like a stealthy little health boost in a delicious disguise!
And here’s the cherry on top: this Deviled Egg Pasta Salad is low-carb. For those of us who are watching our carb intake or following a keto lifestyle, this recipe is a dream come true. Using konjac noodles or any low-carb pasta alternative means you can indulge in the flavors you love without the guilt. It’s a win-win situation! You can enjoy a hearty meal that fits your dietary preferences while still feeling satisfied and nourished.
So, whether you’re looking for a quick weeknight dinner, a dish to impress at your next potluck, or just something delicious to enjoy on a sunny afternoon, this Deviled Egg Pasta Salad has got you covered. It’s easy, tasty, and perfect for busy American women like us who want to make mealtime enjoyable without the hassle. Trust me, once you give it a try, you’ll be singing its praises just like I do!
Ingredients You’ll Need
Alright, let’s gather our ingredients for this scrumptious Deviled Egg Pasta Salad! I promise, you won’t need to make a special trip to the grocery store for anything fancy. Most of these items are probably already hanging out in your kitchen, just waiting to be transformed into something delicious!
- 8 ounces of konjac noodles (or any low-carb pasta alternative): These noodles are the star of the show! They’re low in carbs and calories, making them a fantastic choice for a guilt-free pasta salad. If you can’t find konjac noodles, feel free to use zucchini noodles or any other low-carb pasta you prefer.
- 6 large hard-boiled eggs, peeled and chopped: The heart and soul of our salad! They add protein and that classic deviled egg flavor we all love. If you’re short on time, you can buy pre-cooked hard-boiled eggs at the store—no shame in that game!
- 1/2 cup mayonnaise: This creamy goodness binds everything together and gives the salad its rich texture. If you’re looking for a lighter option, Greek yogurt is a great substitute that still keeps it creamy while adding a protein boost.
- 2 tablespoons Dijon mustard: This adds a tangy kick that elevates the flavor profile. If you’re not a fan of Dijon, regular yellow mustard works just fine, or you can even skip it if you prefer a milder taste.
- 1 tablespoon apple cider vinegar: A splash of acidity to brighten up the flavors! If you don’t have apple cider vinegar, white wine vinegar or even lemon juice can do the trick.
- 1/4 teaspoon garlic powder: This adds a subtle garlic flavor without the fuss of chopping fresh garlic. If you’re feeling adventurous, fresh minced garlic can be used instead—just be careful not to overpower the dish!
- 1/4 teaspoon onion powder: Another flavor booster that complements the eggs beautifully. You can swap this for finely chopped green onions if you want a bit of crunch.
- Salt and pepper to taste: Essential for bringing all the flavors together. Don’t be shy—season to your liking!
- 1/4 cup chopped green onions: These add a fresh, crunchy element to the salad. If you’re not a fan of green onions, feel free to use chopped celery or bell peppers for a different crunch.
- 1/4 cup diced pickles (optional): For those who love a little tang, diced pickles are a fantastic addition! If pickles aren’t your thing, you can leave them out or substitute with diced olives for a briny twist.
- 1/4 cup crumbled bacon (optional): Because who doesn’t love bacon? It adds a savory crunch that takes this salad to the next level. If you’re looking for a healthier option, turkey bacon works well too!
And there you have it! A simple list of ingredients that come together to create a delightful dish. Remember, you can always mix and match based on your preferences or what you have on hand. Cooking should be fun and flexible, right?
For your convenience, I’ve included printable measurements at the end of this article, so you can easily whip up this Deviled Egg Pasta Salad whenever the craving strikes. Let’s get cooking!
How to Make Deviled Egg Pasta Salad
Now that you’re all set with the ingredients, let’s dive into the fun part—making this delightful Deviled Egg Pasta Salad! I promise, it’s as easy as pie (or should I say, as easy as pasta salad?). With just a few simple steps, you’ll have a dish that’s not only delicious but also perfect for those busy weeknights or potluck gatherings.
Step 1 – Prep Ingredients
First things first, let’s get our ingredients prepped. If you haven’t already, cook your konjac noodles according to the package instructions. They usually take just a few minutes, so keep an eye on them! Once they’re done, drain them in a colander and rinse them under cold water. This helps to cool them down and prevents them from getting too sticky.
While the noodles are cooking, it’s time to tackle those hard-boiled eggs. If you’re like me, you might have a love-hate relationship with peeling eggs. Here’s a little tip: if you let them sit in cold water for a few minutes after boiling, they peel much easier! Once peeled, chop them into bite-sized pieces and set them aside.
Step 2 – Begin Cooking
Now that your noodles are cooked and your eggs are chopped, let’s get mixing! In a large mixing bowl, combine the chopped hard-boiled eggs, mayonnaise, Dijon mustard, apple cider vinegar, garlic powder, onion powder, and a sprinkle of salt and pepper. This is where the magic happens! Mix everything together until it’s well combined. You want that creamy, dreamy texture that makes deviled eggs so irresistible.
Step 3 – Combine Ingredients
Next, it’s time to add those cooled konjac noodles to the egg mixture. Gently fold the noodles into the egg mixture, being careful not to break them apart too much. You want every noodle to be coated in that delicious dressing! It’s like giving each noodle a warm hug of flavor.
Once everything is mixed, it’s time to add in the chopped green onions and diced pickles, if you’re using them. These add a nice crunch and a pop of flavor that really elevates the dish. Give it another gentle stir to make sure everything is evenly distributed.
Step 4 – Finish and Serve
Now for the finishing touches! If you’re feeling a little indulgent, sprinkle some crumbled bacon on top for that extra crunch and flavor. Who doesn’t love bacon, right? Cover the salad and pop it in the fridge for at least 30 minutes. This chilling time allows all those flavors to meld together beautifully. Trust me, it’s worth the wait!
When you’re ready to serve, just scoop it into bowls and enjoy! You can serve it as a main dish, a side, or even as a light lunch. It’s versatile, delicious, and sure to be a hit with your family and friends.
Tips for Perfect Results
Now that you’ve got the basics down, let’s talk about some tips to elevate your Deviled Egg Pasta Salad to the next level! These little nuggets of wisdom will help you enhance the flavor, speed up your prep time, and make storage a breeze. Trust me, these tips are like the secret sauce that takes your dish from good to absolutely fabulous!
- Add a teaspoon of hot sauce for a spicy kick: If you’re someone who loves a bit of heat, don’t be shy! A teaspoon of your favorite hot sauce can add a delightful zing to the salad. It’s like a party in your mouth! Just remember to start small—you can always add more if you like it spicy!
- Substitute mayonnaise with Greek yogurt for a lighter version: If you’re looking to lighten things up a bit, Greek yogurt is a fantastic swap for mayonnaise. It still gives you that creamy texture but with added protein and fewer calories. Plus, it adds a nice tang that complements the other flavors beautifully. It’s a win-win!
- Serve with crunchy sides like pork rinds or cucumber slices: To make your meal even more satisfying, consider serving your Deviled Egg Pasta Salad with some crunchy sides. Pork rinds are a great low-carb option that adds a satisfying crunch. If you prefer something lighter, fresh cucumber slices or celery sticks are perfect for dipping into the salad. They add a refreshing crunch that pairs wonderfully with the creamy pasta salad!
These tips are all about making your cooking experience easier and more enjoyable. After all, we’re busy women who deserve delicious meals without the fuss! So, go ahead and give these suggestions a try. I promise you won’t regret it!
Essential Equipment Needed
Before we dive into making our delicious Deviled Egg Pasta Salad, let’s take a moment to gather the essential kitchen tools you’ll need. Don’t worry; you won’t need any fancy gadgets or high-tech appliances—just some trusty basics that most of us already have in our kitchens!
- Large mixing bowl: This is where all the magic happens! A big mixing bowl is essential for combining all your ingredients without making a mess. If you don’t have a large bowl, you can use two smaller bowls to mix everything together. Just make sure you have enough space to stir without sending ingredients flying!
- Cooking pot for noodles: You’ll need a pot to cook your konjac noodles (or any low-carb pasta alternative). A medium-sized pot works perfectly for this. If you’re in a pinch, you can even use a microwave-safe bowl to cook the noodles in the microwave, following the package instructions. Just be careful not to overcook them!
- Colander for draining noodles: After cooking your noodles, you’ll want to drain them to get rid of any excess water. A colander is perfect for this task. If you don’t have one, you can use a slotted spoon to scoop the noodles out of the pot, or even a fine mesh sieve if you have one on hand. Just make sure you let them cool down before adding them to the salad!
- Mixing spoon: A sturdy mixing spoon is essential for combining all your ingredients. Whether it’s a wooden spoon, a silicone spatula, or even a large fork, just make sure it’s something you can use to gently fold the noodles into the egg mixture without breaking them apart. If you’re feeling fancy, a rubber spatula works wonders for scraping down the sides of the bowl!
And there you have it! A simple list of essential equipment that will make your cooking experience smooth and enjoyable. Remember, cooking should be fun and stress-free, so don’t hesitate to use what you have on hand. Happy cooking!
Delicious Variations of Deviled Egg Pasta Salad
Now that you’ve mastered the classic Deviled Egg Pasta Salad, let’s have some fun with it! One of the best things about this recipe is its versatility. You can easily tweak it to suit your taste buds or dietary needs. Here are some delicious variations that will keep your meals exciting and fresh!
- Add avocado for creaminess: If you’re a fan of creamy textures, why not toss in some ripe avocado? It adds a rich, buttery flavor that pairs beautifully with the other ingredients. Just dice up half an avocado and gently fold it into the salad right before serving. It’s like a little taste of heaven in every bite!
- Use different herbs like dill or parsley for freshness: Fresh herbs can elevate your salad to a whole new level! Try adding chopped dill or parsley for a burst of freshness. Dill complements the egg flavor perfectly, while parsley adds a lovely pop of color and taste. You can even mix and match herbs to find your favorite combination!
- Substitute bacon with turkey bacon for a leaner option: If you’re looking to cut back on fat or calories, turkey bacon is a fantastic alternative to traditional bacon. It still gives you that savory crunch without the extra grease. Just cook it up until crispy, crumble it, and sprinkle it on top of your salad. Your taste buds won’t even know the difference!
- Make it gluten-free by ensuring the noodles are certified gluten-free: For those of you who are gluten-sensitive or following a gluten-free diet, it’s super easy to adapt this recipe. Just make sure to choose konjac noodles or any other low-carb pasta that’s certified gluten-free. This way, everyone can enjoy this delicious dish without any worries!
These variations are all about making the recipe your own. Feel free to experiment and get creative! Cooking should be a joyful experience, and there’s no right or wrong way to enjoy your Deviled Egg Pasta Salad. So, go ahead and try out these tweaks, and let your culinary imagination run wild!
Serving Suggestions
Now that you’ve whipped up your delicious Deviled Egg Pasta Salad, let’s talk about how to serve it up in style! Presentation can make all the difference, and pairing your salad with the right sides can elevate your meal from good to absolutely fabulous. Here are some practical, family-friendly serving suggestions that will have everyone at the table smiling!
- Serve with a side of fresh vegetable sticks: Nothing says “healthy and refreshing” quite like a colorful platter of fresh vegetable sticks! Think crunchy carrots, crisp celery, and vibrant bell peppers. Not only do they add a nice crunch to your meal, but they also provide a lovely contrast to the creamy texture of the pasta salad. Plus, they’re perfect for dipping right into the salad! It’s a win-win for both taste and nutrition.
- Pair with a light vinaigrette salad: To complement the rich flavors of your Deviled Egg Pasta Salad, consider serving it alongside a light vinaigrette salad. A simple mix of greens, cherry tomatoes, and cucumbers drizzled with a tangy vinaigrette will balance out the creaminess of the pasta salad beautifully. It’s like a refreshing hug for your taste buds! You can even toss in some nuts or seeds for added crunch and nutrition.
- Offer sparkling water or iced tea as refreshing drink options: To wash it all down, why not offer some refreshing beverages? Sparkling water with a slice of lemon or lime adds a bubbly touch that feels fancy without the fuss. If you prefer something a bit sweeter, a glass of iced tea—whether it’s classic black tea, herbal, or even a fruity blend—pairs perfectly with the flavors of the salad. It’s a delightful way to keep everyone hydrated and happy!
These serving suggestions are all about making your meal enjoyable and satisfying for the whole family. They’re easy to prepare and add a lovely touch to your dining experience. So, go ahead and set the table with these delightful pairings, and watch as your loved ones dig in with smiles on their faces!
FAQs About Deviled Egg Pasta Salad
As you embark on your culinary journey with this delightful Deviled Egg Pasta Salad, you might have a few questions swirling around in your mind. Don’t worry; I’ve got you covered! Here are some common questions I often hear, along with concise answers to help you navigate your way through this delicious recipe.
- Can I make this salad ahead of time?
Absolutely! In fact, making this salad ahead of time is a great idea. It allows the flavors to meld together beautifully, making each bite even more delicious. You can prepare it a day in advance and store it in the fridge. Just be sure to give it a good stir before serving to redistribute the dressing! - How long does it last in the fridge?
This Deviled Egg Pasta Salad will last in the fridge for about 3 to 5 days, provided it’s stored in an airtight container. Just keep an eye (and nose) out for any signs of spoilage. If it starts to smell off or looks questionable, it’s best to toss it. But trust me, it’s so tasty, it’ll likely be gone before you know it! - Can I use regular pasta instead of low-carb options?
Of course! If you’re not following a low-carb diet, feel free to use regular pasta. Just cook it according to the package instructions and proceed with the recipe as usual. Keep in mind that the texture and carb content will change, but it’ll still be delicious. It’s all about what works best for you and your family! - What can I add for extra protein?
If you’re looking to boost the protein content of your salad, there are plenty of tasty options! You can add shredded rotisserie chicken, diced turkey, or even some canned tuna for a protein-packed punch. If you want to keep it vegetarian, consider tossing in some chickpeas or edamame. They’ll add a nice texture and a healthy dose of protein!
These FAQs should help clear up any uncertainties you might have about making your Deviled Egg Pasta Salad. Remember, cooking is all about experimenting and finding what works best for you. So, don’t hesitate to make this recipe your own and enjoy every delicious bite!

Final Thoughts on Deviled Egg Pasta Salad
As we wrap up our culinary adventure with this delightful Deviled Egg Pasta Salad, I can’t help but reflect on just how easy and delicious this recipe truly is. It’s like a warm hug from your favorite comfort food, but without the guilt! With its creamy texture, tangy flavors, and satisfying crunch, this salad is sure to become a staple in your kitchen.
What I love most about this recipe is its simplicity. In just 25 minutes, you can whip up a dish that not only tastes amazing but also fits perfectly into your busy lifestyle. Whether you’re preparing a quick weeknight dinner, a potluck dish, or a light lunch, this salad has got you covered. Plus, it’s versatile enough to adapt to your family’s preferences, making it a win-win for everyone!
So, I encourage you to give this Deviled Egg Pasta Salad a try. Don’t be afraid to experiment with the ingredients and make it your own. Whether you add a spicy kick, swap in some fresh herbs, or toss in extra protein, the possibilities are endless! Cooking should be a joyful experience, and this recipe is all about enjoying the flavors without the hassle of complicated cooking.
Trust me, once you take that first bite, you’ll be hooked! So roll up your sleeves, gather your ingredients, and let’s create something delicious together. I can’t wait to hear how much you love it!
“`
PrintDeviled Egg Pasta Salad: A Low-Carb Delight You’ll Love!
- Total Time: 25 minutes
- Yield: 4 servings 1x
- Diet: Low Calorie
Description
A delicious low-carb pasta salad that combines the classic flavors of deviled eggs with a healthy twist.
Ingredients
- 8 ounces of konjac noodles (or any low-carb pasta alternative)
- 6 large hard-boiled eggs, peeled and chopped
- 1/2 cup mayonnaise
- 2 tablespoons Dijon mustard
- 1 tablespoon apple cider vinegar
- 1/4 teaspoon garlic powder
- 1/4 teaspoon onion powder
- Salt and pepper to taste
- 1/4 cup chopped green onions
- 1/4 cup diced pickles (optional)
- 1/4 cup crumbled bacon (optional)
Instructions
- Cook the konjac noodles according to package instructions, then drain and rinse under cold water. Set aside to cool.
- In a large mixing bowl, combine the chopped hard-boiled eggs, mayonnaise, Dijon mustard, apple cider vinegar, garlic powder, onion powder, salt, and pepper. Mix until well combined.
- Add the cooled konjac noodles to the egg mixture and gently fold until the noodles are evenly coated.
- Stir in the chopped green onions and diced pickles, if using. Mix until evenly distributed.
- If desired, sprinkle crumbled bacon on top for added flavor and crunch.
- Cover the salad and refrigerate for at least 30 minutes to allow the flavors to meld before serving.
Notes
- For a spicy kick, add a teaspoon of hot sauce or a pinch of cayenne pepper to the egg mixture.
- Substitute the mayonnaise with Greek yogurt for a lighter version while keeping it keto-friendly.
- Serve with pork rinds, celery sticks, or cucumber slices for a refreshing crunch.
- Prep Time: 15 minutes
- Cook Time: 10 minutes
- Category: Salad
- Method: Mixing
- Cuisine: American
Nutrition
- Serving Size: 1 serving
- Calories: 290
- Sugar: 1g
- Sodium: varies
- Fat: 25g
- Saturated Fat: varies
- Unsaturated Fat: varies
- Trans Fat: 0g
- Carbohydrates: 3g
- Fiber: 0g
- Protein: 12g
- Cholesterol: varies
Keywords: Deviled Egg Pasta Salad, Low-Carb Salad, Keto Recipe
