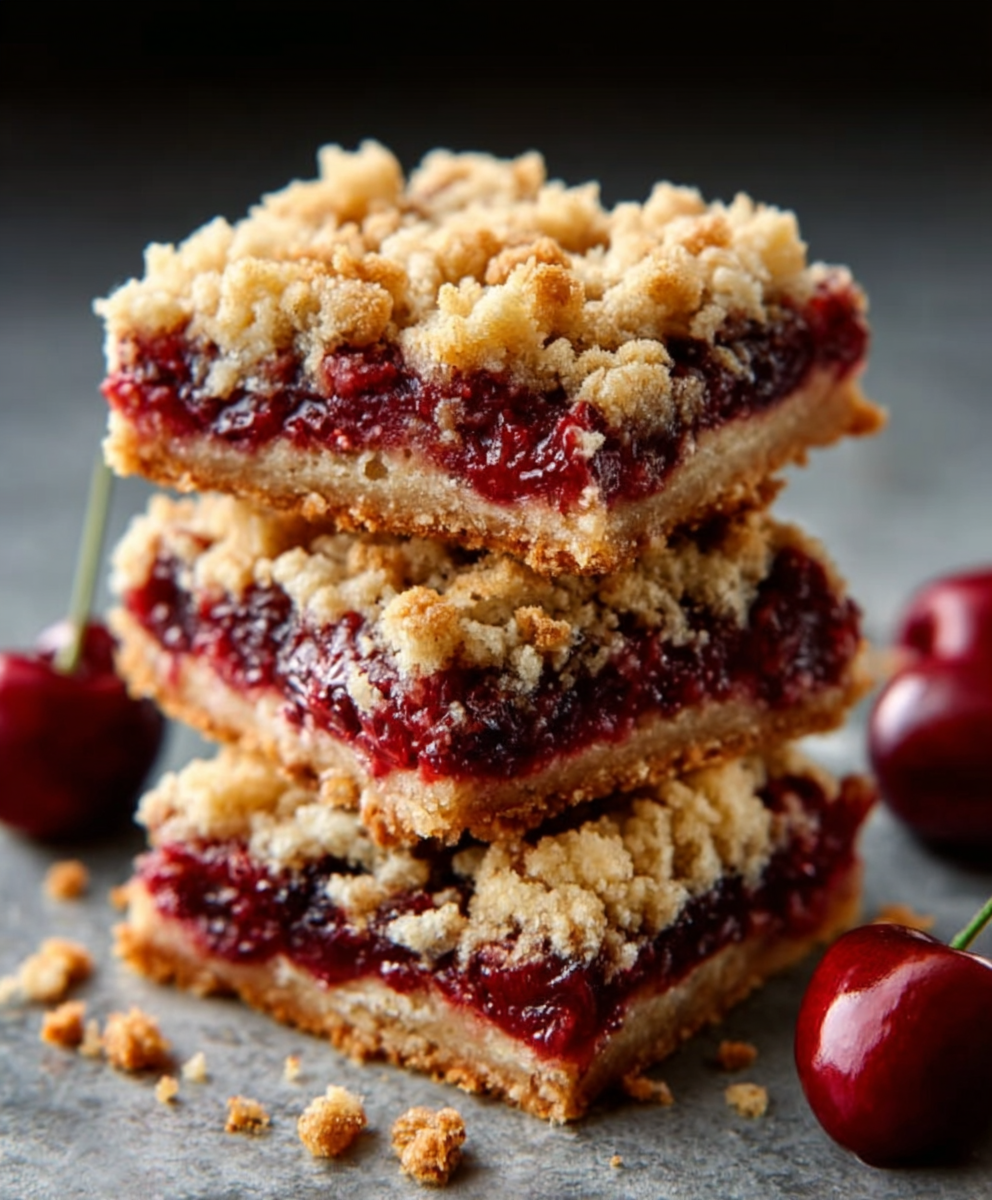
Cherry Crumble Bars: Delight in This Easy Recipe!
gutenberg
Why You’ll Love This Cherry Crumble Bars
Let me tell you, if you’re a busy woman juggling work, family, and everything in between, these Cherry Crumble Bars are about to become your new best friend in the kitchen. Seriously, they’re like a warm hug on a plate! Not only are they delicious, but they also come together in a snap, making them perfect for those hectic days when you need a sweet treat without the fuss.
First off, the prep time is a mere 15 minutes. That’s less time than it takes to scroll through social media! And the best part? You only need one mixing bowl. That means minimal cleanup, which is a huge win in my book. I don’t know about you, but after a long day, the last thing I want to do is spend an hour scrubbing pots and pans.
Now, let’s talk about flavor. These bars are a delightful blend of sweet and tart, thanks to the cherries. They’re not just for the kids; I promise you’ll find yourself sneaking a few bites when no one is looking. Plus, they’re versatile! You can serve them warm with a scoop of vanilla ice cream for a cozy dessert or let them cool and pack them in lunchboxes for a sweet afternoon pick-me-up. They’re a hit with both kids and adults, making them a fantastic family-friendly option.
And if you’re worried about picky eaters, fear not! The crumble topping is a crowd-pleaser, and the cherries can be swapped out for whatever fruit your family loves. Blueberries, peaches, or even apples can work wonders in this recipe. It’s all about making it your own and keeping everyone happy.
So, whether you’re looking for a quick dessert to impress guests or a simple treat to enjoy with your morning coffee, these Cherry Crumble Bars are the answer. They’re easy, delicious, and sure to become a staple in your dessert rotation. Trust me, once you try them, you’ll be hooked!
Introduction to Cherry Crumble Bars
Welcome to the world of Cherry Crumble Bars, where sweet meets simple in the most delightful way! If you’re anything like me, you know that life can get a bit hectic, especially when you’re balancing work, family, and a million other responsibilities. That’s why I’m so excited to share this recipe with you. These bars are not just a dessert; they’re a little slice of joy that you can whip up in no time!
Imagine this: it’s a busy Tuesday afternoon, and you’ve just come home from a long day at work. The kids are asking for a snack, and you’re feeling the weight of the world on your shoulders. Instead of reaching for that bag of chips, why not treat them (and yourself!) to something homemade and delicious? With just a handful of ingredients and a quick 15 minutes of prep, you can have these Cherry Crumble Bars baking away in the oven, filling your home with the most heavenly aroma.
What I love most about these bars is their versatility. They’re perfect for any occasion—whether you’re hosting a last-minute gathering, looking for a sweet treat to pack in lunchboxes, or simply craving something delightful with your afternoon coffee. Plus, they’re a hit with everyone! Kids love the sweet, juicy cherries, while adults appreciate the crumbly, buttery topping. It’s a win-win!
And let’s be real: as busy women, we deserve a little indulgence without the hassle. These bars are designed for those of us who want to enjoy a homemade dessert without spending hours in the kitchen. They’re quick, satisfying, and oh-so-delicious. So, grab your apron, and let’s dive into the wonderful world of Cherry Crumble Bars. Trust me, your taste buds will thank you!
Why You’ll Love This Cherry Crumble Bars
Let me tell you, if you’re a busy woman juggling work, family, and everything in between, these Cherry Crumble Bars are about to become your new best friend in the kitchen. Seriously, they’re like a warm hug on a plate! Not only are they delicious, but they also come together in a snap, making them perfect for those hectic days when you need a sweet treat without the fuss.
First off, the prep time is a mere 15 minutes. That’s less time than it takes to scroll through social media! And the best part? You only need one mixing bowl. That means minimal cleanup, which is a huge win in my book. I don’t know about you, but after a long day, the last thing I want to do is spend an hour scrubbing pots and pans.
Now, let’s talk about flavor. These bars are a delightful blend of sweet and tart, thanks to the cherries. They’re not just for the kids; I promise you’ll find yourself sneaking a few bites when no one is looking. Plus, they’re versatile! You can serve them warm with a scoop of vanilla ice cream for a cozy dessert or let them cool and pack them in lunchboxes for a sweet afternoon pick-me-up. They’re a hit with both kids and adults, making them a fantastic family-friendly option.
And if you’re worried about picky eaters, fear not! The crumble topping is a crowd-pleaser, and the cherries can be swapped out for whatever fruit your family loves. Blueberries, peaches, or even apples can work wonders in this recipe. It’s all about making it your own and keeping everyone happy.
So, whether you’re looking for a quick dessert to impress guests or a simple treat to enjoy with your morning coffee, these Cherry Crumble Bars are the answer. They’re easy, delicious, and sure to become a staple in your dessert rotation. Trust me, once you try them, you’ll be hooked!
Ingredients You’ll Need
Before we dive into the magic of baking, let’s gather our ingredients for these delightful Cherry Crumble Bars. Trust me, you won’t need a treasure map to find them! Here’s what you’ll need:
- 2 cups fresh or frozen cherries, pitted: The star of the show! Cherries bring a sweet-tart flavor that makes these bars irresistible. If you’re using frozen cherries, just make sure they’re thawed and pitted. You can even use other fruits if cherries aren’t your jam—blueberries, peaches, or even apples work beautifully!
- 1 cup all-purpose flour: This is the backbone of our crumble. It gives structure to the bars. If you’re looking for a healthier option, feel free to swap it out for whole wheat flour. It adds a nutty flavor and extra fiber!
- 1 cup rolled oats: These little gems add a delightful chewiness and texture to the crumble topping. Plus, they’re a great source of whole grains. If you’re gluten-free, just make sure to grab certified gluten-free oats!
- 1/2 cup brown sugar: This adds a rich, caramel-like sweetness to the bars. If you’re in a pinch, you can use granulated sugar instead, but the flavor won’t be quite as deep. You could also try coconut sugar for a healthier twist!
- 1/2 cup granulated sugar: This balances the sweetness of the cherries and complements the brown sugar. If you prefer a less sweet treat, feel free to reduce the amount a bit.
- 1/2 cup unsalted butter, melted: Butter is what makes everything better! It adds richness and helps bind the crumble together. If you’re looking for a dairy-free option, coconut oil works like a charm here.
- 1 teaspoon vanilla extract: A splash of vanilla elevates the flavor profile, making everything taste more delicious. You can also use almond extract for a different twist!
- 1/2 teaspoon salt: Just a pinch! Salt enhances the sweetness and balances the flavors. Don’t skip it, or your bars might taste a bit flat.
- 1 teaspoon baking powder: This little leavening agent helps the bars rise slightly, giving them a nice texture. If you’re out of baking powder, you can substitute it with baking soda, but you’ll need to adjust the amount slightly.
Now that we have our ingredients lined up like a well-organized pantry, you’re one step closer to enjoying these scrumptious Cherry Crumble Bars. Remember, cooking is all about flexibility! Feel free to mix and match based on what you have on hand or what your family loves. Let’s get ready to bake some happiness!
How to Make Cherry Crumble Bars
Alright, my fellow busy women, it’s time to roll up our sleeves and get baking! Making these Cherry Crumble Bars is as easy as pie—well, easier, actually! With just a few simple steps, you’ll have a delicious dessert ready to impress your family or friends. Let’s dive in!
Step 1 – Prep Ingredients
First things first, let’s get our kitchen ready for some baking magic! Preheat your oven to 350°F (175°C). This is crucial because we want our bars to bake evenly and come out perfectly golden brown.
While the oven is warming up, gather all your ingredients. It’s like setting the stage for a great performance! Make sure your cherries are pitted and, if you’re using frozen ones, that they’re thawed. Trust me, you don’t want to be wrestling with frozen cherries when you’re trying to bake!
Step 2 – Begin Cooking
Now that we’re all set, grab a mixing bowl—preferably the biggest one you have, because we’re about to make some delicious chaos! In this bowl, combine the all-purpose flour, rolled oats, brown sugar, granulated sugar, salt, and baking powder. Give it a good stir with a spatula or wooden spoon until everything is well mixed. It should look like a sandy beach—crumbly and inviting!
Step 3 – Combine Ingredients
Next up, it’s time to add the magic ingredients: melted butter and vanilla extract. Pour them into the dry mixture and mix until it resembles coarse crumbs. You want it to be crumbly but still hold together when you squeeze it in your hand. If it’s too dry, don’t be shy—add a splash more melted butter. We want these bars to be rich and satisfying!
Step 4 – Finish and Serve
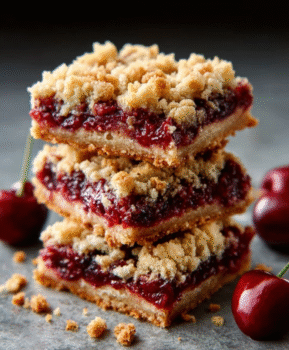
Now comes the fun part! Take half of that crumbly mixture and press it firmly into the bottom of a greased baking pan. This will be the base of our bars, so make sure it’s nice and even. Next, spread those beautiful cherries evenly over the crust. If you’re feeling adventurous, sprinkle a little extra sugar on top of the cherries for added sweetness!
Finally, sprinkle the remaining crumble mixture over the cherries, covering them like a cozy blanket. Pop the pan into the preheated oven and bake for 30-35 minutes, or until the top is golden brown and your kitchen smells like a cherry orchard in full bloom. Once they’re done, let them cool for a bit before cutting them into bars. Trust me, the wait will be worth it!
And there you have it! Your very own Cherry Crumble Bars are ready to be devoured. Whether you enjoy them warm with a scoop of ice cream or let them cool for a delightful snack later, I promise they’ll bring a smile to your face. Happy baking!
Tips for Perfect Results
Now that you’re all set to make your Cherry Crumble Bars, let’s talk about a few tips that will help you achieve perfection every time. After all, we want these bars to be the star of your dessert table, right? Here are some tried-and-true tips that I’ve gathered over the years:
1. Use Fresh Cherries for the Best Flavor: If you can get your hands on fresh cherries, do it! They bring a burst of flavor that frozen cherries just can’t match. Plus, there’s something so satisfying about pitting fresh cherries and watching them transform into a delicious filling. If fresh cherries aren’t available, frozen will work just fine—just make sure they’re thawed and pitted before using.
2. For a Sweeter Taste, Consider Adding More Sugar to the Cherries: If you like your desserts on the sweeter side, don’t hesitate to sprinkle a little extra sugar over the cherries before you layer them on the crust. This is especially helpful if your cherries are a bit tart. A little sugar can go a long way in enhancing their natural sweetness!
3. Allow Bars to Cool Completely for Easier Cutting: I know it’s tempting to dive right in, but patience is key here! Let your bars cool completely in the pan before cutting them into squares. This will help them hold their shape and make for cleaner cuts. If you try to cut them while they’re still warm, you might end up with a delicious but messy situation. Trust me, it’s worth the wait!
4. Store Leftovers in an Airtight Container for Up to 3 Days: If you happen to have any leftovers (which is rare in my house!), make sure to store them in an airtight container. They’ll stay fresh for up to three days, but I doubt they’ll last that long! You can also pop them in the fridge if you prefer them chilled. They make a great snack or dessert anytime!
With these tips in your back pocket, you’re well on your way to creating the most delightful Cherry Crumble Bars that your family will rave about. Happy baking, and enjoy every delicious bite!
Essential Equipment Needed
Before we dive into the delicious world of Cherry Crumble Bars, let’s make sure you have all the right tools at your fingertips. Trust me, having the right equipment can make your baking experience smoother and more enjoyable. Here’s a handy list of what you’ll need:
- Mixing Bowl: A good-sized mixing bowl is essential for combining all those lovely ingredients. I recommend using a large bowl so you have plenty of room to mix without making a mess. If you have a glass or stainless steel bowl, even better! They’re durable and easy to clean.
- Baking Pan (9×9 inch recommended): This is where the magic happens! A 9×9 inch baking pan is perfect for our Cherry Crumble Bars. It allows for even baking and gives you those nice, thick bars we all love. If you don’t have one, a similar-sized pan will work, but keep an eye on the baking time, as it may vary.
- Measuring Cups and Spoons: Accurate measurements are key to baking success! Make sure you have a set of measuring cups for dry ingredients and a set of measuring spoons for those smaller quantities. Trust me, a little extra flour or sugar can change the game!
- Spatula or Wooden Spoon: You’ll need something to mix your ingredients together, and a spatula or wooden spoon is perfect for the job. A spatula is great for scraping down the sides of the bowl, while a wooden spoon is sturdy for mixing. Choose whichever you prefer!
- Oven Mitts: Safety first! When it’s time to take your delicious Cherry Crumble Bars out of the oven, you’ll want a good pair of oven mitts to protect your hands. I can’t tell you how many times I’ve burned my fingers because I thought I could just grab the pan without them. Don’t make the same mistake!
With these essential tools in your kitchen arsenal, you’re all set to create some scrumptious Cherry Crumble Bars. Remember, the right equipment not only makes the process easier but also adds to the joy of baking. So, gather your tools, and let’s get ready to bake some happiness!
Delicious Variations of Cherry Crumble Bars
Now that you’ve mastered the classic Cherry Crumble Bars, let’s have some fun with variations! After all, variety is the spice of life, right? These bars are incredibly versatile, and you can easily switch things up to keep your family excited about dessert. Here are some delightful twists you can try:
1. Add Nuts for Extra Crunch: If you’re a fan of a little crunch in your desserts, consider adding some chopped nuts to the crumble topping. Walnuts or almonds work beautifully here! Just toss in about half a cup of your favorite nuts when you mix the dry ingredients. They’ll add a lovely texture and a nutty flavor that pairs perfectly with the sweet cherries. Plus, nuts are a great source of healthy fats, making your bars a bit more nutritious!
2. Substitute Cherries with Other Fruits: While cherries are the star of the show, don’t hesitate to experiment with other fruits! Blueberries, peaches, or even raspberries can be fantastic substitutes. Just make sure to adjust the sugar based on the sweetness of the fruit you choose. For instance, if you’re using tart blueberries, you might want to add a touch more sugar to balance things out. The possibilities are endless, and you can create a new favorite every time!
3. Make It Gluten-Free: If you or someone in your family is gluten-sensitive, you can easily make these bars gluten-free! Simply swap out the all-purpose flour for almond flour or a gluten-free all-purpose blend. Just keep in mind that the texture might be slightly different, but they’ll still be delicious! Also, make sure to use certified gluten-free oats if you’re going that route. It’s a simple switch that allows everyone to enjoy these tasty treats!
4. Incorporate Spices for Added Flavor: Want to take your Cherry Crumble Bars to the next level? Spice things up! Adding a teaspoon of cinnamon or nutmeg to the dry ingredients can elevate the flavor profile and give your bars a warm, cozy vibe. These spices pair wonderfully with the sweetness of the cherries and can make your kitchen smell like a bakery. It’s like a warm hug in every bite!
With these delicious variations, you can keep your baking adventures fresh and exciting. Whether you’re in the mood for something nutty, fruity, or spiced, these Cherry Crumble Bars can adapt to your cravings. So, roll up your sleeves, get creative, and enjoy the process of making these delightful treats your own!
Serving Suggestions
Now that you’ve whipped up a batch of those scrumptious Cherry Crumble Bars, let’s talk about how to serve them for maximum enjoyment! After all, presentation can elevate a simple dessert into something truly special. Here are some delightful serving suggestions that will have your family and friends raving:
1. Pair with a Scoop of Vanilla Ice Cream: If you want to take your Cherry Crumble Bars to the next level, there’s nothing quite like a scoop of creamy vanilla ice cream on top! The cold, velvety ice cream melts slightly into the warm bars, creating a heavenly combination of flavors and textures. It’s like a party in your mouth! Just imagine digging in with a spoon, the sweet cherries mingling with the rich ice cream—pure bliss!
2. Serve with a Dollop of Whipped Cream or Yogurt: For a lighter option, consider topping your bars with a generous dollop of whipped cream or a spoonful of yogurt. The fluffy creaminess adds a lovely contrast to the chewy crumble and juicy cherries. If you’re feeling fancy, you can even sprinkle a little cinnamon or cocoa powder on top for an extra touch. Greek yogurt is a great choice too, as it adds a bit of tanginess that complements the sweetness of the bars beautifully.
3. Enjoy with a Cup of Coffee or Tea: There’s something so comforting about enjoying a sweet treat with a warm beverage. Brew yourself a cup of coffee or tea, and settle in with a piece of your Cherry Crumble Bars. The rich flavors of the coffee or the soothing notes of herbal tea pair perfectly with the sweet and tart cherries. It’s the ideal way to unwind after a long day or to treat yourself during a cozy afternoon break. Trust me, this combo is a match made in heaven!
With these serving suggestions, you can turn your Cherry Crumble Bars into a delightful experience that everyone will love. Whether you’re hosting a gathering or simply enjoying a quiet moment at home, these bars are sure to impress. So, grab your favorite toppings, brew that coffee, and get ready to savor every delicious bite!
FAQs About Cherry Crumble Bars
As you embark on your journey to create these delightful Cherry Crumble Bars, you might have a few questions swirling in your mind. Don’t worry; I’ve got you covered! Here are some frequently asked questions that can help you navigate the baking process and enjoy your bars to the fullest:
1. Can I use frozen cherries?
Absolutely! Frozen cherries work wonderfully in this recipe. Just make sure they are pitted and thawed before using them. They’ll still provide that sweet-tart flavor we love, and you won’t have to worry about pitting fresh cherries if you’re short on time. It’s a win-win!
2. How do I store leftover bars?
If you happen to have any leftovers (which is rare in my house!), store them in an airtight container at room temperature for up to 3 days. If you prefer them chilled, you can pop them in the fridge. Just be sure to let them come to room temperature before serving, as they taste best when they’re slightly warm!
3. Can I make these bars ahead of time?
Absolutely! These Cherry Crumble Bars are perfect for making ahead of time. You can bake them a day in advance and store them properly. Just let them cool completely before cutting and storing. This way, you’ll have a delicious dessert ready to go whenever you need it. Perfect for those busy days when you want to impress without the last-minute rush!
With these FAQs in mind, you’re all set to tackle your Cherry Crumble Bars with confidence. Remember, baking is all about having fun and enjoying the process, so don’t hesitate to experiment and make this recipe your own. Happy baking!
Final Thoughts on Cherry Crumble Bars
As we wrap up our delightful journey into the world of Cherry Crumble Bars, I can’t help but reflect on just how easy and satisfying this recipe truly is. Seriously, it’s like a little miracle in a baking pan! With just a handful of ingredients and minimal effort, you can create a dessert that not only tastes amazing but also fills your home with the warm, inviting aroma of baked cherries and buttery crumble. It’s the kind of treat that makes you feel like a superstar in the kitchen, even on the busiest of days.
What I love most about these bars is their versatility. Whether you’re whipping them up for a family gathering, a potluck, or just a cozy night in, they’re sure to bring smiles all around. Plus, they’re a fantastic way to get the kids involved in the kitchen! Let them help with mixing, pressing, and, of course, taste-testing. It’s a wonderful opportunity to create memories together while enjoying a delicious treat.
So, if you’re looking for a quick dessert that brings joy to your family without much hassle, I wholeheartedly encourage you to give these Cherry Crumble Bars a try. They’re not just a recipe; they’re a way to share love and happiness through food. And let’s be honest, who doesn’t need a little more joy in their life? With every bite, you’ll be reminded of the simple pleasures that come from baking and sharing something homemade.
Now, go ahead and gather those ingredients, preheat that oven, and let the magic happen! I can’t wait for you to experience the deliciousness of these bars. Trust me, once you take that first bite, you’ll be hooked. Happy baking, my friends!
“`
Print
Cherry Crumble Bars: Delight in This Easy Recipe!
- Total Time: 50 minutes
- Yield: 12 bars 1x
- Diet: Vegetarian
Description
Delicious Cherry Crumble Bars that are easy to make and perfect for dessert.
Ingredients
- 2 cups fresh or frozen cherries, pitted
- 1 cup all-purpose flour
- 1 cup rolled oats
- 1/2 cup brown sugar
- 1/2 cup granulated sugar
- 1/2 cup unsalted butter, melted
- 1 teaspoon vanilla extract
- 1/2 teaspoon salt
- 1 teaspoon baking powder
Instructions
- Preheat the oven to 350°F (175°C).
- In a mixing bowl, combine flour, oats, brown sugar, granulated sugar, salt, and baking powder.
- Add melted butter and vanilla extract to the dry ingredients and mix until crumbly.
- Press half of the mixture into the bottom of a greased baking pan.
- Spread the cherries evenly over the crust.
- Sprinkle the remaining crumble mixture on top of the cherries.
- Bake for 30-35 minutes or until the top is golden brown.
- Allow to cool before cutting into bars.
Notes
- For a sweeter taste, add more sugar to the cherries.
- These bars can be served warm or cold.
- Store leftovers in an airtight container for up to 3 days.
- Prep Time: 15 minutes
- Cook Time: 35 minutes
- Category: Dessert
- Method: Baking
- Cuisine: American
Nutrition
- Serving Size: 1 bar
- Calories: 200
- Sugar: 15g
- Sodium: 150mg
- Fat: 8g
- Saturated Fat: 5g
- Unsaturated Fat: 3g
- Trans Fat: 0g
- Carbohydrates: 30g
- Fiber: 2g
- Protein: 3g
- Cholesterol: 20mg
Keywords: Cherry Crumble Bars, dessert, easy recipe
