Potato fingers: Discover the secret to crunchiness!

gutenberg
Why You’ll Love This Potato Fingers
Let me tell you, if you’re a busy woman juggling work, family, and everything in between, you’re going to adore these potato fingers! They’re not just any snack; they’re a crunchy, golden delight that can turn any ordinary day into something special. Seriously, who doesn’t love a good potato finger? They’re like the superhero of snacks—quick to make, easy to clean up, and they please even the pickiest of eaters!
First off, let’s talk about prep time. With just 15 minutes of hands-on work, you can whip up a batch of these crispy potato fingers. That’s less time than it takes to scroll through social media! And the best part? While they’re baking away in the oven, you can tackle that pile of laundry or enjoy a well-deserved cup of tea. It’s multitasking at its finest!
Now, I know how it is—after a long day, the last thing you want to do is spend hours in the kitchen. But with potato fingers, you can have a delicious snack or side dish ready in about 45 minutes total. Plus, they’re baked, not fried, so you can feel good about serving them to your family. It’s a win-win!
And let’s not forget about the versatility of these little gems. You can serve them as a snack while watching your favorite show, or as a side dish with dinner. They pair beautifully with everything from burgers to salads. You can even dress them up with different spices or dips to keep things exciting. One day they can be spicy with a kick of cayenne, and the next, they can be seasoned with Italian herbs for a completely different flavor profile. The possibilities are endless!
But what really makes potato fingers a hit in my house is how they cater to everyone’s tastes. My husband loves them crispy and seasoned, while my kids prefer them plain with a side of ketchup. It’s like having a snack that can adapt to everyone’s preferences without any extra effort on my part. Just toss them in the oven, and let them do their thing!
So, if you’re looking for a snack that’s not only easy to make but also a crowd-pleaser, look no further than these potato fingers. They’re the perfect solution for busy days, picky eaters, and anyone who just loves a good crunch. Trust me, once you try them, you’ll be adding them to your regular rotation!
Introduction to Potato Fingers
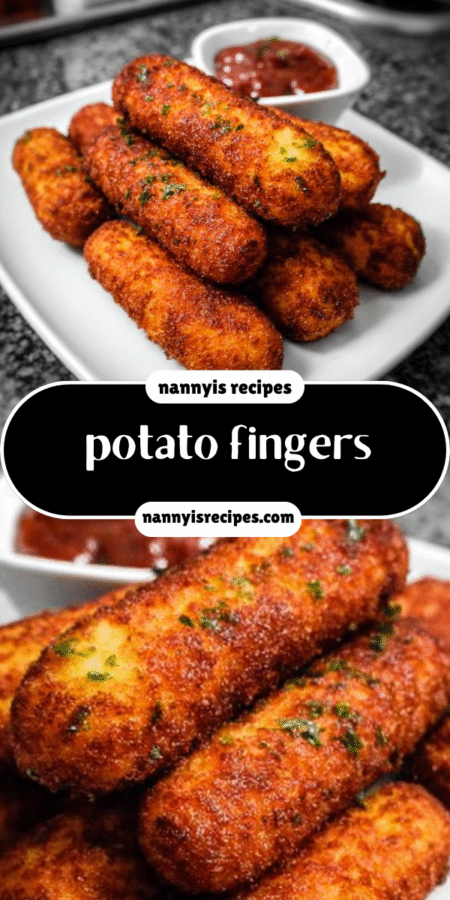
Welcome to the wonderful world of potato fingers! If you’ve never tried them, let me paint a picture for you: imagine golden, crispy strips of potato that are perfectly seasoned and baked to crunchy perfection. They’re not just a snack; they’re a delightful experience that can brighten up your day, whether you’re enjoying them solo or sharing with family.
Now, I know what you might be thinking—“Do I really have time to make these?” The answer is a resounding yes! Potato fingers are the epitome of convenience, especially for busy American women like us, who are often juggling work, family, and a million other responsibilities. With just a handful of ingredients and minimal prep time, you can whip up a batch of these tasty treats in no time. Seriously, it’s like having a secret weapon in your kitchen!
What I love most about potato fingers is how family-friendly they are. Kids adore them, and let’s be honest, they’re a great way to sneak in some veggies without any fuss. You can serve them as a snack while the kids are doing homework or as a side dish during dinner. They’re versatile enough to fit into any meal, and you can even customize the flavors to suit everyone’s tastes. Whether your family prefers them spicy, cheesy, or simply seasoned, potato fingers can do it all!
Plus, they’re baked, not fried, which means you can feel good about serving them. No greasy mess, just pure, crunchy goodness! And if you’re like me, you appreciate a recipe that doesn’t require a culinary degree to pull off. With potato fingers, you can impress your family without spending hours in the kitchen. It’s all about making life easier while still enjoying delicious food.
So, if you’re ready to discover the secret to making these crunchy delights, let’s dive in! I promise you’ll be hooked after the first bite, and your family will be begging for more. Potato fingers are not just a snack; they’re a game-changer in the kitchen!
Ingredients You’ll Need
Alright, let’s get down to the nitty-gritty of what you’ll need to whip up these delightful potato fingers! The beauty of this recipe is that it requires just a handful of simple ingredients that you probably already have in your kitchen. Here’s the lineup:
- 2 large russet potatoes: These are the stars of the show! Russets are perfect for achieving that crispy texture we all crave. They have a high starch content, which makes them ideal for baking. If you’re feeling adventurous, you can swap them out for sweet potatoes for a healthier twist!
- 2 tablespoons extra virgin olive oil: This liquid gold not only helps the potatoes crisp up beautifully but also adds a lovely flavor. You can use avocado oil or even melted coconut oil if you prefer a different taste.
- 1 teaspoon dried garlic: Garlic is like the fairy dust of the culinary world! It adds a savory depth to your potato fingers. If you have fresh garlic on hand, feel free to use that instead—just mince a clove or two!
- 1 teaspoon smoked paprika: This spice brings a warm, smoky flavor that elevates the dish. If you’re not a fan of smokiness, regular paprika will work just fine, or you can even try chili powder for a bit of heat.
- 1 teaspoon dried onion: Dried onion adds a subtle sweetness and enhances the overall flavor profile. If you have fresh onion, you can finely chop it and use that instead, but keep in mind it may add a bit more moisture.
- 1 teaspoon sea salt: Salt is essential for bringing out the flavors of the potatoes and the spices. Feel free to adjust the amount to your taste, or use a salt substitute if you’re watching your sodium intake.
- ½ teaspoon freshly ground black pepper: A little pepper adds a nice kick! You can also experiment with white pepper for a different flavor.
- ¼ teaspoon cayenne pepper (optional): If you like a bit of heat, this is your chance to spice things up! If not, you can leave it out or replace it with a pinch of Italian seasoning for a different twist.
- Chopped fresh parsley (for garnish): This is purely for presentation, but it adds a lovely pop of color and freshness. You can also use chives or cilantro if you prefer.
And there you have it! Each ingredient plays a vital role in creating those crunchy, golden potato fingers that you and your family will love. Plus, the best part? You can easily customize the flavors to suit your taste buds. Want to make them cheesy? Sprinkle some grated Parmesan on top before baking! Feeling adventurous? Try adding some curry powder for an exotic twist!
Don’t forget, if you’re looking for printable measurements, I’ve got you covered at the end of this article. Now, let’s get ready to dive into the fun part—making these delicious potato fingers!
How to Make Potato Fingers
Now that we’ve gathered all our ingredients, it’s time to roll up our sleeves and get cooking! Making potato fingers is as easy as pie—well, maybe easier! Follow these simple steps, and you’ll have a batch of crispy, golden potato fingers ready to enjoy in no time.
Step 1 – Prep Ingredients
First things first, let’s get that oven preheating! Set it to 425°F (220°C). While that’s warming up, grab a baking sheet and line it with parchment paper. This little trick will help prevent sticking and make cleanup a breeze—because who wants to scrub a baking sheet after a long day?
Next, it’s time to wash and peel those russet potatoes. I like to give them a good scrub under running water to remove any dirt. Once they’re clean, peel off the skin. Now, slice the potatoes into slender strips, about ¼ inch thick. Think of them as little soldiers ready to march into the oven! The thinner the strips, the crispier they’ll get, so don’t be shy with your knife skills.
Step 2 – Begin Cooking
With our potato strips ready, it’s time to get mixing! In a large mixing bowl, combine the potato strips with 2 tablespoons of extra virgin olive oil and all those delicious seasonings we talked about earlier: 1 teaspoon dried garlic, 1 teaspoon smoked paprika, 1 teaspoon dried onion, 1 teaspoon sea salt, ½ teaspoon freshly ground black pepper, and ¼ teaspoon cayenne pepper (if you’re feeling spicy).
Now, here’s where the fun begins! Use your hands (yes, get in there!) or a spatula to toss everything together. You want to make sure each potato strip is well-coated with that flavorful mixture. It’s like giving your potatoes a warm hug of seasoning!
Step 3 – Combine Ingredients
Once everything is nicely mixed, take a moment to admire your handiwork. Those potato strips should be glistening with olive oil and spices, ready to transform into crunchy goodness. Now, let’s move on to the next step!
Step 4 – Finish and Serve
Now it’s time to arrange those seasoned potato strips on the prepared baking sheet. Make sure to lay them out in a single layer, giving them a little space to breathe. This is crucial for achieving that perfect crunch! If they’re too crowded, they’ll steam instead of crisp up, and nobody wants soggy potato fingers.
Pop the baking sheet into your preheated oven and let them bake for 25-30 minutes. Halfway through, give them a gentle turn with a spatula to ensure even browning. You’ll know they’re ready when they’re golden and crispy, and your kitchen smells like a little slice of heaven!
Once they’re out of the oven, let them cool for a few minutes. This is the hardest part—waiting! But trust me, it’s worth it. Just before serving, sprinkle some chopped fresh parsley on top for a pop of color and freshness. And there you have it—your homemade potato fingers are ready to be devoured!
Now, gather your family around, serve them up with your favorite dipping sauces, and watch those potato fingers disappear in no time. Enjoy every crunchy bite!
Tips for Perfect Results
Now that you’re all set to make your potato fingers, let me share some tried-and-true tips that will take your crunchy snack game to the next level. Trust me, these little nuggets of wisdom will ensure your potato fingers come out perfectly every time!
First up, if you want to achieve that extra crunch that makes potato fingers so irresistible, consider soaking your potato strips in cold water for about 30 minutes before seasoning them. This simple step helps to remove excess starch, which can lead to a crispier texture when baked. Just think of it as giving your potatoes a refreshing spa day before they hit the oven!
While your potato strips are soaking, you can take this time to get creative with your seasonings. Don’t be afraid to experiment! Try adding Italian seasoning for a herby twist or sprinkle in some chili flakes if you’re in the mood for a little heat. The beauty of potato fingers is their versatility; you can customize the flavors to suit your family’s preferences. One day they can be zesty with lemon pepper, and the next, they can have a smoky barbecue vibe. The sky’s the limit!
And let’s not forget about the dipping sauces! Pairing your potato fingers with your favorite sauces can elevate the whole experience. Whether it’s classic ketchup, creamy ranch dressing, or a tangy homemade yogurt dip, having a delicious dip on the side can make your potato fingers even more enjoyable. It’s like the cherry on top of a sundae—totally necessary!
So, remember these tips as you embark on your potato finger journey. With a little soaking, some creative seasoning, and the right dipping sauce, you’ll be well on your way to creating the ultimate crunchy snack that your family will rave about. Happy cooking!
Essential Equipment Needed
Before we dive into making those delicious potato fingers, let’s talk about the essential equipment you’ll need. Don’t worry; it’s nothing fancy! Just a few basic kitchen tools that will make your cooking experience smooth and enjoyable. Here’s what you’ll need:
- Baking sheet: This is your trusty sidekick for baking those crispy potato fingers. A standard-sized baking sheet will do the trick, but if you have a larger one, feel free to use it! Just make sure it’s big enough to hold all those glorious potato strips in a single layer.
- Parchment paper: This is a game-changer! Lining your baking sheet with parchment paper not only prevents sticking but also makes cleanup a breeze. Trust me, you’ll thank yourself later when you don’t have to scrub off any baked-on mess!
- Mixing bowl: You’ll need a good-sized mixing bowl to combine your potato strips with the olive oil and seasonings. A large bowl gives you plenty of room to toss everything together without making a mess. Plus, it’s a great way to get your hands in there and really coat those potatoes!
- Knife and cutting board: A sharp knife and a sturdy cutting board are essential for slicing your russet potatoes into those perfect slender strips. Safety first, so make sure your knife is sharp enough to make clean cuts without too much effort. A dull knife can be a recipe for disaster!
- Optional: Mandoline slicer for uniform cuts: If you want to take your potato fingers to the next level, consider using a mandoline slicer. This handy tool allows you to achieve perfectly uniform cuts, which means even cooking and crispiness. Just be careful with those blades—they’re sharp!
And there you have it! With these essential tools in your kitchen arsenal, you’ll be well-equipped to whip up a batch of crunchy potato fingers that will impress your family and friends. So gather your gear, and let’s get cooking!
Delicious Variations of Potato Fingers
Now that you’ve mastered the classic potato fingers, let’s have some fun with variations! The beauty of this recipe is its versatility. You can easily switch things up to keep your family excited about snack time. Here are a few delicious variations that I absolutely love:
1. Cheesy Potato Fingers: If you’re a cheese lover like me, adding grated Parmesan cheese to your potato fingers is a game-changer! Just sprinkle a generous amount of freshly grated Parmesan over the seasoned potato strips before baking. As they cook, the cheese will melt and create a deliciously crispy, cheesy crust. It’s like a party for your taste buds! You can also experiment with other cheeses like cheddar or mozzarella for a different flavor profile.
2. Exotic Curry Potato Fingers: Want to take your potato fingers on a flavor adventure? Try adding curry powder to the seasoning mix! Just a teaspoon or two will infuse your potato fingers with a warm, aromatic flavor that’s simply irresistible. The vibrant yellow color of the curry will also make your dish visually appealing. Serve these with a cooling yogurt dip, and you’ve got a snack that’s both exciting and satisfying!
3. Veggie Alternatives: If you’re looking to sneak in some extra veggies, why not substitute the potatoes with zucchini or carrots? Both of these options can be sliced into sticks just like potatoes and will bake up beautifully. Zucchini fingers will have a lighter texture, while carrot sticks will add a natural sweetness. Just keep in mind that the cooking time may vary slightly, so keep an eye on them as they bake. You might just find a new family favorite!
These variations are just the tip of the iceberg! Feel free to get creative and experiment with different spices, herbs, and even dipping sauces. The key is to have fun in the kitchen and make these potato fingers your own. Whether you stick with the classic recipe or venture into new territory, I promise you’ll end up with a delicious snack that everyone will love!
Serving Suggestions
Now that you’ve got your crispy potato fingers fresh out of the oven, let’s talk about how to serve them up for maximum enjoyment! These little delights are incredibly versatile, and the right accompaniments can elevate your snacking experience to a whole new level.
First up, let’s talk dips! What’s a potato finger without a delicious dip to accompany it? You can’t go wrong with the classic ketchup—it’s a timeless favorite that pairs perfectly with the crunchy texture of the potato fingers. But if you’re looking to switch things up, consider serving them with ranch dressing. The creamy, tangy flavor of ranch complements the savory spices beautifully, making each bite even more satisfying.
If you’re feeling a bit adventurous, why not whip up a homemade yogurt dip? Just mix some plain yogurt with a squeeze of lemon juice, a pinch of garlic powder, and a sprinkle of fresh herbs like dill or parsley. It’s refreshing, light, and adds a nice contrast to the warm, crispy potato fingers. Plus, it’s a healthier option that your family will love!
Now, let’s not forget about balancing out your meal. Potato fingers can easily be paired with a fresh salad or some crunchy vegetable sticks for a well-rounded snack or side dish. A simple green salad with mixed greens, cherry tomatoes, and a light vinaigrette can add a burst of freshness to your plate. It’s like a little garden on your table, and it complements the hearty potato fingers perfectly!
If you want to keep things simple, serve your potato fingers alongside some carrot sticks, cucumber slices, or bell pepper strips. Not only do they add a pop of color to your meal, but they also provide a satisfying crunch that pairs well with the crispy potatoes. It’s a great way to sneak in some extra veggies without any fuss!
So, whether you’re enjoying your potato fingers as a snack while binge-watching your favorite show or serving them as a side dish at dinner, these serving suggestions will help you create a delightful and satisfying meal. Get creative, have fun, and most importantly, enjoy every crunchy bite!
FAQs About Potato Fingers
As you embark on your journey to make these delightful potato fingers, you might have a few questions swirling around in your mind. Don’t worry; I’ve got you covered! Here are some frequently asked questions that will help you navigate the world of potato fingers with ease:
Can I make potato fingers ahead of time?
Absolutely! One of the best things about potato fingers is their flexibility. You can prepare and season them in advance, then simply pop them in the oven when you’re ready to enjoy. This is a lifesaver for busy days when you want to have a delicious snack or side dish without the last-minute rush. Just make sure to store them in the fridge until you’re ready to bake!
Are potato fingers gluten-free?
Yes, indeed! This recipe is naturally gluten-free, making it a fantastic option for those with gluten sensitivities or anyone looking to enjoy a wholesome snack. Just be sure to double-check any additional dips or sauces you plan to serve with them, as some may contain gluten. But as far as the potato fingers themselves go, you can enjoy them worry-free!
How can I store leftovers?
If you happen to have any potato fingers left after your snack session (which is a rare occurrence in my house!), you can store them in an airtight container in the fridge for up to 3 days. When you’re ready to enjoy them again, simply reheat them in the oven for the best results. This will help restore their crispiness, so you won’t be left with soggy leftovers. Just pop them in at 350°F (175°C) for about 10-15 minutes, and they’ll be as good as new!
So there you have it! These FAQs should help clear up any uncertainties you might have about making and enjoying your potato fingers. Now, let’s get back to the fun part—cooking and savoring those crunchy delights!
Final Thoughts on Potato Fingers
As I sit here reminiscing about the delightful crunch of those golden potato fingers, I can’t help but feel a sense of satisfaction. Making potato fingers is not just about whipping up a quick snack; it’s about creating a moment of joy in the kitchen. With just a handful of ingredients and a little bit of time, you can transform simple potatoes into a crunchy masterpiece that your whole family will adore.
What I love most about this recipe is its simplicity. It’s like a breath of fresh air in a busy week. You don’t need to be a culinary expert to pull it off—just a willingness to get your hands a little messy and have some fun! Plus, the versatility of potato fingers means you can customize them to suit your family’s tastes. Whether you prefer them spicy, cheesy, or simply seasoned, there’s a version for everyone.
So, if you’re looking for a satisfying snack that can bring smiles to your family’s faces, I wholeheartedly encourage you to give this recipe a try. It’s perfect for those hectic days when you need something quick and delicious. And let’s be honest, who doesn’t love a good crunch? Your kids will be begging for more, and you’ll feel like a kitchen rockstar for making it happen!
In the end, potato fingers are more than just a snack; they’re a way to connect with your loved ones over something delicious. So gather your ingredients, preheat that oven, and let the magic happen. I promise you won’t regret it. Happy cooking, and enjoy every crispy bite!
“`
Print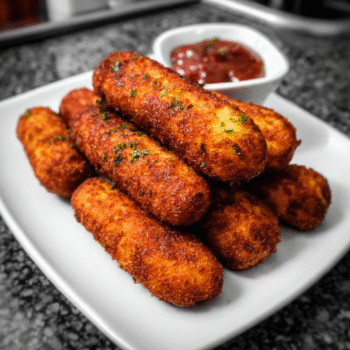
Potato fingers: Discover the secret to crunchiness!
- Total Time: 45 minutes
- Yield: 4 servings 1x
- Diet: Vegetarian
Description
Discover the secret to making golden crunchy potato fingers that are perfect for snacking.
Ingredients
- 2 large russet potatoes (approximately 1.5 pounds)
- 2 tablespoons extra virgin olive oil
- 1 teaspoon dried garlic
- 1 teaspoon smoked paprika
- 1 teaspoon dried onion
- 1 teaspoon sea salt
- ½ teaspoon freshly ground black pepper
- ¼ teaspoon cayenne pepper (optional, for a spicy kick)
- Chopped fresh parsley (for garnish)
Instructions
- Preheat your oven to 425°F (220°C) and line a baking sheet with parchment paper.
- Wash and peel the russet potatoes, then slice them into slender strips, about ¼ inch thick.
- In a mixing bowl, combine the potato strips with olive oil, dried garlic, smoked paprika, dried onion, sea salt, black pepper, and cayenne pepper. Toss until well-coated.
- Arrange the seasoned potato strips on the lined baking sheet in a single layer, ensuring space between them for optimal crispiness.
- Bake in the oven for 25-30 minutes, turning the potato sticks halfway through for even browning.
- Once golden and crispy, remove from the oven and let cool for a few minutes. Sprinkle with fresh parsley before serving.
Notes
- For extra crunch, soak the potato strips in cold water for 30 minutes before seasoning and baking.
- Experiment with different spices like Italian seasoning or chili flakes for a unique flavor.
- Pair with your favorite dipping sauce, such as ketchup or ranch.
- Prep Time: 15 minutes
- Cook Time: 30 minutes
- Category: Snack
- Method: Baking
- Cuisine: American
Nutrition
- Serving Size: 1 serving
- Calories: 180
- Sugar: 1g
- Sodium: 300mg
- Fat: 7g
- Saturated Fat: 1g
- Unsaturated Fat: 6g
- Trans Fat: 0g
- Carbohydrates: 30g
- Fiber: 3g
- Protein: 3g
- Cholesterol: 0mg
Keywords: potato fingers, crunchy potato sticks, baked potato fries


