Peanut Butter & Jelly Cheesecake Recipe
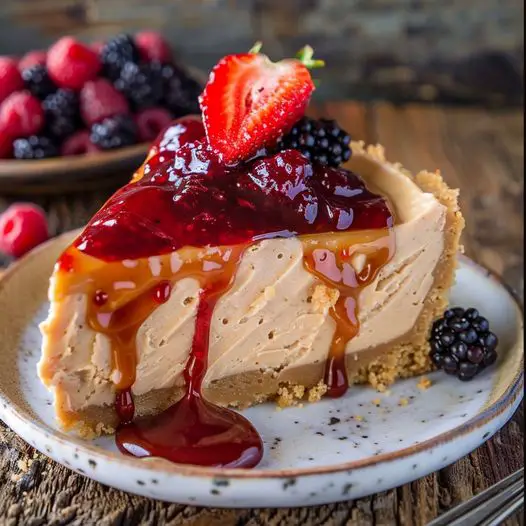
Peanut butter and jelly is a classic combo we all grew up with, but have you ever thought about transforming it into a decadent cheesecake? This Peanut Butter & Jelly Cheesecake takes everything you love about a PB&J sandwich and turns it into a rich, creamy dessert that’s perfect for any occasion. With a buttery crust, a smooth peanut butter filling, and a fruity jelly topping, this cheesecake is the ultimate comfort dessert.

Peanut Butter & Jelly Cheesecake
I have to say, this cheesecake has a special place in my heart. The peanut butter flavor in the creamy cheesecake layer pairs perfectly with the sweet, slightly tart jelly topping. The balance is just right, and it’s like a grown-up version of the classic sandwich we all know and love. This is the kind of dessert that surprises people—in the best way possible! When I made it for a family gathering, everyone was blown away by how nostalgic and delicious it was.
The beauty of this recipe is how each layer brings its own unique texture and flavor. You’ve got a buttery graham cracker crust at the base, a rich peanut butter filling in the middle, and a vibrant jelly layer on top. The combination of flavors and textures makes this cheesecake a standout dessert.
Why You’ll Love This Peanut Butter & Jelly Cheesecake Recipe
This cheesecake is a must-try for peanut butter and jelly fans or anyone looking for a fun twist on a classic dessert. I love how the rich peanut butter flavor shines through, balanced by the sweet and fruity jelly topping. Plus, the crust adds that perfect crunch, giving you a delightful bite every time. It’s a show-stopping dessert that’s surprisingly easy to make.
Key Features:
- Rich and Creamy: The peanut butter cheesecake filling is velvety smooth and full of flavor.
- Sweet & Fruity: The jelly topping adds just the right amount of sweetness to balance the richness of the cheesecake.
- No-Bake Option: You can even make this as a no-bake cheesecake by modifying the baking steps—perfect for warm days!
- Perfect for Sharing: This cheesecake is sure to impress at gatherings, family dinners, or even a cozy night in.
Main Ingredients for Peanut Butter & Jelly Cheesecake
- Peanut Butter – The star of this recipe! I love using smooth peanut butter for a creamy texture, but feel free to use chunky peanut butter if you want a bit of extra crunch.
- Cream Cheese – The base for our cheesecake filling, giving it that classic rich and smooth texture.
- Graham Cracker Crust – This buttery, slightly crunchy crust is the perfect contrast to the creamy filling. You can even swap it for a cookie crust if you’re feeling adventurous!
- Sugar – Balances the tartness of the jelly and enhances the flavor of the peanut butter.
- Jelly or Jam – Choose your favorite! I like using grape jelly for that true PB&J flavor, but strawberry or raspberry work just as well.
Step-by-Step Instructions for Peanut Butter & Jelly Cheesecake
Here’s how to make this unforgettable cheesecake at home. Follow along as I break down each step, making sure everything is clear and easy to follow!
- Prepare the Crust: Start by preheating your oven to 350°F (175°C). Crush graham crackers into fine crumbs using a food processor or by placing them in a ziplock bag and crushing them with a rolling pin. In a medium bowl, combine the crumbs with melted butter and a little sugar. Mix until the crumbs are coated and the texture resembles wet sand.
- Tip: Press the mixture firmly into the bottom of a 9-inch springform pan, making sure the crust is even. I like to use the bottom of a flat measuring cup to press the crust firmly. Bake the crust for 8-10 minutes until it’s lightly golden, then set it aside to cool while you prepare the filling.
- Make the Peanut Butter Filling: In a large bowl, beat the softened cream cheese and sugar until smooth and creamy. This step is crucial for achieving that velvety cheesecake texture, so be patient and beat until there are no lumps.
- Add the Peanut Butter: Once the cream cheese mixture is smooth, add in the peanut butter and beat again until well combined. The peanut butter should fully integrate into the cream cheese mixture, giving it a lovely, creamy consistency.
- Add the Eggs: One at a time, beat in the eggs, making sure each egg is fully incorporated before adding the next. This helps to create a light, airy texture in the cheesecake.
- Pro Tip: Make sure to scrape down the sides of the bowl between additions to ensure everything is mixed evenly.
- Add the Cream: Gently fold in the heavy cream to lighten the filling and make it extra smooth. The cream adds richness but also helps soften the texture of the peanut butter, creating a perfect balance.
- Bake the Cheesecake: Pour the filling over the prepared crust and smooth the top with a spatula. Bake in the preheated oven for 50–60 minutes, or until the center is set but still slightly jiggly. This is key to achieving a creamy texture without overbaking.
- Important: Let the cheesecake cool in the oven with the door slightly open for about an hour to prevent cracks. Once cooled to room temperature, refrigerate for at least 4 hours or overnight for the best results.
- Prepare the Jelly Layer: In a small saucepan, heat your chosen jelly or jam with a tablespoon of water over low heat until it becomes smooth and spreadable. This step is important to ensure the jelly spreads evenly over the top of the cheesecake.
- Spread the Jelly: Once the cheesecake is completely chilled, carefully spread the warm jelly over the top in an even layer. I like to add a thick layer of jelly to really bring out that PB&J flavor.
- Chill Again: After adding the jelly layer, return the cheesecake to the fridge for about 30 minutes to let the jelly set completely.
- Serve: When you’re ready to serve, carefully run a knife around the edges of the cheesecake before releasing it from the springform pan. Slice and enjoy!
- Garnish Idea: For a little extra flair, sprinkle chopped peanuts on top or drizzle some melted peanut butter for decoration.
Extra Tips and Variations
- Variation: If you want to go the no-bake route, simply skip the baking step for the cheesecake filling. Chill the cheesecake in the fridge for 6 hours instead!
- How to Store: Store this cheesecake in the fridge for up to 4 days. You can also freeze it for up to 2 months—just wrap it tightly to prevent freezer burn.
- How to Serve: This cheesecake is delicious on its own, but you can serve it with a dollop of whipped cream or even more jelly on the side for an extra treat.
- FAQs: Can I use crunchy peanut butter instead of smooth? Yes, you can! Just keep in mind that it will change the texture of the cheesecake slightly, adding a bit of crunch.
