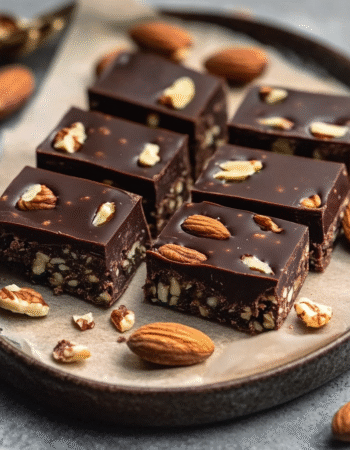
Chocolate Chip Cheesecake Bars that Wow Your Taste Buds!
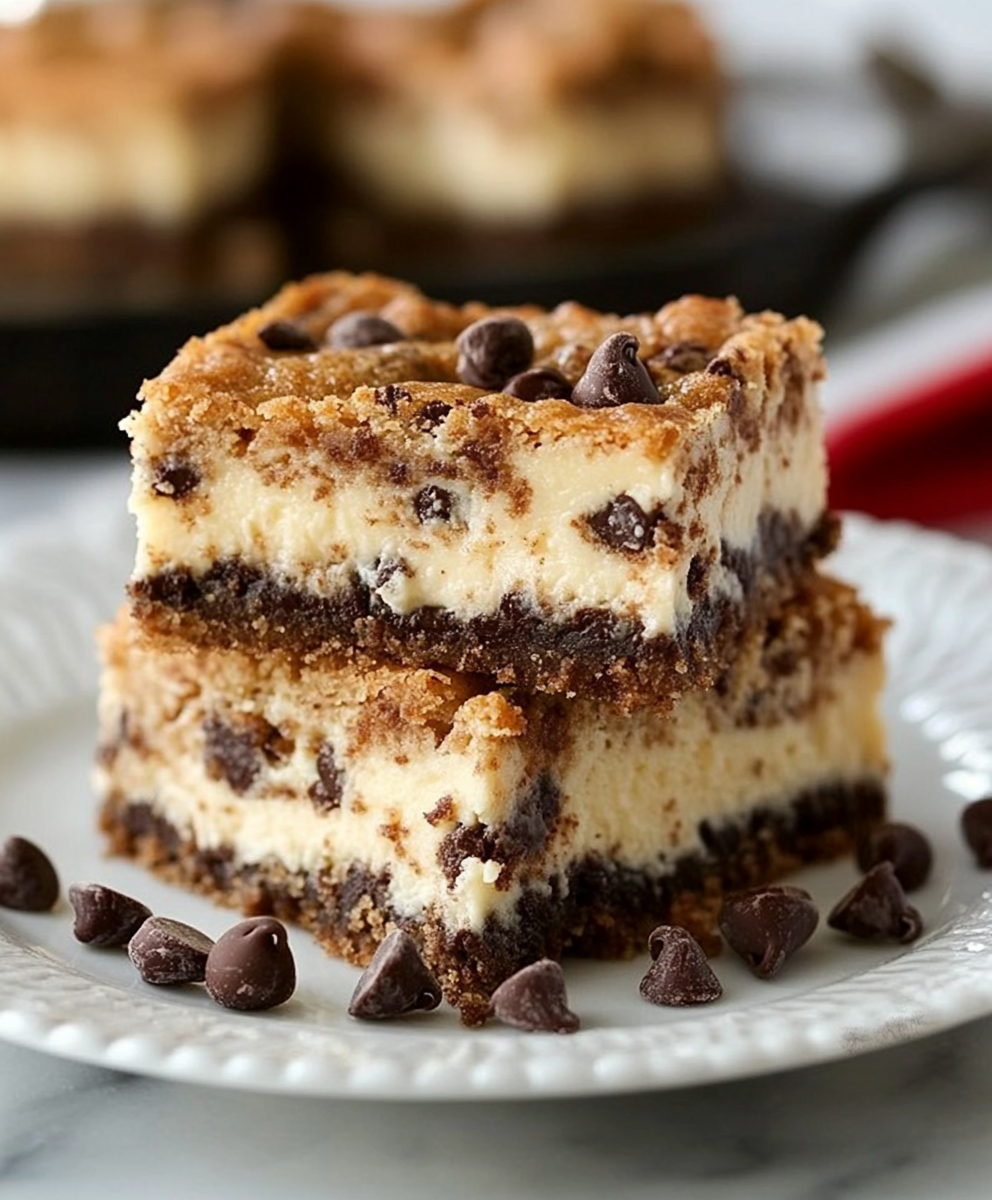
Why You’ll Love This Chocolate Chip Cheesecake Bars
Let me tell you, these Chocolate Chip Cheesecake Bars are a game changer! If you’re like me, juggling a busy life filled with work, family, and a million other responsibilities, you know how precious time can be. That’s why I’m excited to share why these bars will quickly become your go-to dessert.
First off, let’s talk about preparation time. With just 15 minutes of prep, you can whip up a batch of these delightful bars. That’s less time than it takes to scroll through social media! And the best part? You won’t be left with a mountain of dishes to tackle afterward. Just a few mixing bowls and a baking dish, and you’re done. It’s like a breath of fresh air in the kitchen!
Now, I know how important it is to please everyone at the dinner table. These bars are a hit with both kids and adults alike. The rich, creamy cheesecake paired with the sweet chocolate chips creates a flavor explosion that’s hard to resist. I’ve seen my picky eaters devour these bars in seconds, and trust me, that’s no small feat! It’s a dessert that brings the family together, and who doesn’t love that?
But wait, there’s more! These Chocolate Chip Cheesecake Bars are not just delicious; they’re also a healthier option. Made with almond flour and erythritol, they’re low in calories and sugar-free. You can indulge your sweet tooth without the guilt. It’s like having your cake and eating it too—without the extra calories weighing you down. I often find myself sneaking a bar (or two) after dinner, and I don’t feel a hint of remorse!
And let’s not forget about the versatility of this recipe. You can easily customize it to suit your family’s tastes. Want to add a little crunch? Toss in some chopped nuts. Prefer a different flavor? Swap out the chocolate chips for sugar-free peanut butter chips. The possibilities are endless, and that’s what makes this recipe so special.
In a world where we’re constantly on the go, these Chocolate Chip Cheesecake Bars offer a sweet escape. They’re perfect for a quick dessert after a long day or a delightful treat to share at gatherings. Plus, they’re easy to make ahead of time, so you can always have a batch ready to go. Just imagine the smiles on your loved ones’ faces when you serve them these delicious bars!
So, if you’re looking for a dessert that’s quick, easy, and family-approved, look no further. These Chocolate Chip Cheesecake Bars are sure to wow your taste buds and make your life a little sweeter. Trust me, once you try them, you’ll be hooked!
Introduction to Chocolate Chip Cheesecake Bars
Welcome to the world of Chocolate Chip Cheesecake Bars—a delightful treat that combines the creamy goodness of cheesecake with the irresistible charm of chocolate chips. If you’re anything like me, you know that life can get hectic, especially for busy women juggling careers, family, and everything in between. That’s where these bars come in, offering a sweet escape that’s both satisfying and simple to whip up.
Picture this: it’s been a long day, and you’re craving something sweet. You want to indulge, but you also don’t want to spend hours in the kitchen. Enter these Chocolate Chip Cheesecake Bars. With just a handful of ingredients and minimal prep time, you can create a dessert that feels indulgent without the fuss. It’s like having a little slice of heaven ready to go whenever you need it!
These bars are perfect for busy American women aged 40 to 70, whether you’re a mom trying to please picky eaters or a professional looking for a quick treat after a long day. They’re not just a dessert; they’re a solution to your sweet cravings that won’t derail your healthy eating goals. You can enjoy a rich, creamy dessert that’s low in calories and sugar-free, making it a guilt-free pleasure.
And let’s be honest—who doesn’t love a dessert that’s easy to prepare? With just 15 minutes of prep time, you can have these bars in the oven and be on your way to enjoying a well-deserved treat. Plus, they’re a hit with the whole family! I’ve seen my kids devour these bars in record time, and I can’t help but smile knowing I’ve made something they love that’s also good for them.
So, if you’re ready to impress your family and satisfy your sweet tooth without the hassle, let’s dive into the delicious world of Chocolate Chip Cheesecake Bars. Trust me, once you try them, you’ll wonder how you ever lived without this easy, delectable dessert in your life!
Why You’ll Love This Chocolate Chip Cheesecake Bars
Let me tell you, these Chocolate Chip Cheesecake Bars are a game changer! If you’re like me, juggling a busy life filled with work, family, and a million other responsibilities, you know how precious time can be. That’s why I’m excited to share why these bars will quickly become your go-to dessert.
First off, let’s talk about preparation time. With just 15 minutes of prep, you can whip up a batch of these delightful bars. That’s less time than it takes to scroll through social media! And the best part? You won’t be left with a mountain of dishes to tackle afterward. Just a few mixing bowls and a baking dish, and you’re done. It’s like a breath of fresh air in the kitchen!
Now, I know how important it is to please everyone at the dinner table. These bars are a hit with both kids and adults alike. The rich, creamy cheesecake paired with the sweet chocolate chips creates a flavor explosion that’s hard to resist. I’ve seen my picky eaters devour these bars in seconds, and trust me, that’s no small feat! It’s a dessert that brings the family together, and who doesn’t love that?
But wait, there’s more! These Chocolate Chip Cheesecake Bars are not just delicious; they’re also a healthier option. Made with almond flour and erythritol, they’re low in calories and sugar-free. You can indulge your sweet tooth without the guilt. It’s like having your cake and eating it too—without the extra calories weighing you down. I often find myself sneaking a bar (or two) after dinner, and I don’t feel a hint of remorse!
And let’s not forget about the versatility of this recipe. You can easily customize it to suit your family’s tastes. Want to add a little crunch? Toss in some chopped nuts. Prefer a different flavor? Swap out the chocolate chips for sugar-free peanut butter chips. The possibilities are endless, and that’s what makes this recipe so special.
In a world where we’re constantly on the go, these Chocolate Chip Cheesecake Bars offer a sweet escape. They’re perfect for a quick dessert after a long day or a delightful treat to share at gatherings. Plus, they’re easy to make ahead of time, so you can always have a batch ready to go. Just imagine the smiles on your loved ones’ faces when you serve them these delicious bars!
So, if you’re looking for a dessert that’s quick, easy, and family-approved, look no further. These Chocolate Chip Cheesecake Bars are sure to wow your taste buds and make your life a little sweeter. Trust me, once you try them, you’ll be hooked!
Ingredients You’ll Need
Before we dive into the deliciousness of these Chocolate Chip Cheesecake Bars, let’s gather our ingredients. Trust me, you’ll love how simple and straightforward this list is! Here’s what you’ll need:
- 1 ½ cups almond flour: This is the base of our crust. Almond flour is not only gluten-free but also adds a lovely nutty flavor and a nice texture to the bars.
- ½ cup unsweetened cocoa powder: This gives our bars that rich chocolatey goodness. It’s the secret ingredient that makes these bars feel indulgent without the extra sugar.
- ¼ cup granulated erythritol: A fantastic sugar substitute that keeps our bars low in calories and sugar-free. It sweetens without the guilt, making it perfect for those of us watching our sugar intake.
- ½ teaspoon baking powder: This little powerhouse helps our crust rise just enough to create a delightful texture.
- ¼ teaspoon salt: A pinch of salt enhances all the flavors, balancing the sweetness beautifully.
- ½ cup unsalted butter, melted: This adds richness to our crust and helps bind everything together. Plus, who doesn’t love the taste of butter?
- 1 large egg: Eggs are essential for binding the ingredients and giving our cheesecake filling that creamy texture.
- 1 teaspoon vanilla extract: A splash of vanilla adds warmth and depth to the flavor profile. It’s like a hug for your taste buds!
- 8 ounces cream cheese, softened: The star of our cheesecake filling! Cream cheese gives that luscious, creamy texture we all crave in a cheesecake.
- ½ cup granulated erythritol (again!): We’ll use this to sweeten our cheesecake filling, keeping it deliciously sweet without the sugar.
- 1 large egg (again!): Yes, we need another egg for the filling to ensure it sets perfectly.
- 1 teaspoon vanilla extract (again!): Because you can never have too much vanilla, right?
- ½ cup sugar-free chocolate chips: These little gems are the finishing touch, adding bursts of chocolatey goodness throughout the bars.
Now, if you’re looking to switch things up a bit, here are some optional substitutions and healthy swaps:
- For a nut-free option, you can use oat flour instead of almond flour. Just keep in mind that the texture will be slightly different.
- If you don’t have erythritol on hand, feel free to use another sugar substitute like stevia or monk fruit sweetener. Just adjust the quantity according to the sweetness level of your chosen sweetener.
- Want to add a little crunch? Toss in some chopped nuts or even some sugar-free peanut butter chips instead of chocolate chips for a fun twist!
- If you’re not a fan of cream cheese, you can try using Greek yogurt for a lighter filling, though it will change the flavor slightly.
And don’t worry about jotting down these measurements! I’ve got you covered with printable measurements at the end of the article. So, let’s get ready to create some magic in the kitchen with these Chocolate Chip Cheesecake Bars!
How to Make Chocolate Chip Cheesecake Bars
Alright, my fellow busy bees, it’s time to roll up our sleeves and dive into the delicious process of making these Chocolate Chip Cheesecake Bars. Don’t worry; I promise it’s easier than it sounds! With just a few simple steps, you’ll have a scrumptious dessert that will wow your family and friends. Let’s get started!
Step 1 – Prep Ingredients
First things first, we need to get our kitchen ready for some baking magic! Preheat your oven to 350°F (that’s 175°C for my metric friends). While that’s warming up, grab an 8×8-inch baking dish. You can either grease it with a little cooking spray or line it with parchment paper for easy removal later. Trust me, parchment paper is a lifesaver when it comes to cutting those bars neatly!
Step 2 – Begin Cooking
Now that our oven is preheating, let’s get to the fun part—mixing our dry ingredients! In a mixing bowl, combine the almond flour, unsweetened cocoa powder, granulated erythritol, baking powder, and salt. Give it a good stir until everything is well mixed. It should look like a lovely chocolatey sand. Just imagine the aroma wafting through your kitchen—heavenly, right?
Step 3 – Combine Ingredients
Next, it’s time to bring our crust to life! Add the melted butter, one large egg, and that delightful teaspoon of vanilla extract to the dry mixture. Now, mix it all together until a dough forms. It should be slightly sticky but hold together nicely. Once you’ve got that dough, press it evenly into the bottom of your prepared baking dish. Use your fingers or the back of a spoon to make sure it’s nice and compact. This crust is going to be the foundation of our delicious bars!
Step 4 – Finish and Serve
Now, let’s move on to the star of the show—the cheesecake filling! In another bowl, beat the softened cream cheese and the remaining granulated erythritol until it’s smooth and creamy. You can use an electric mixer or a good old-fashioned whisk if you’re feeling strong! Once it’s nice and fluffy, add in the second egg and another teaspoon of vanilla extract. Mix until everything is well combined.
Finally, fold in those sugar-free chocolate chips. This is where the magic happens! You’ll want to spread this luscious cheesecake mixture over the crust in your baking dish. Make sure it’s evenly distributed so every bite is filled with that creamy goodness.
Now, pop the baking dish into your preheated oven and let it bake for 25-30 minutes. You’ll know it’s done when the edges are set, and the center is just slightly jiggly. It’s like a little dance party in there! Once it’s out of the oven, let it cool at room temperature for about 30 minutes. Then, transfer it to the fridge and let it chill for at least 2 hours to set completely. Patience is key here, but I promise it’s worth the wait!
Once the bars are chilled and set, cut them into squares and serve them chilled or at room temperature. You can even sprinkle a little sea salt on top for that extra flavor kick. Trust me, your taste buds will thank you!
And there you have it! Making Chocolate Chip Cheesecake Bars is as easy as pie—well, easier, actually! Now, let’s move on to some tips for perfect results!
Tips for Perfect Results
Now that you’re all set to make your Chocolate Chip Cheesecake Bars, let’s talk about some tips to ensure they turn out absolutely perfect every time. After all, we want to impress our family and friends, right? Here are some actionable tips that will elevate your dessert game!
1. Enhance the Flavor: One of my favorite tricks is to add a sprinkle of sea salt on top of the bars just before serving. It might sound simple, but that little touch of salt really enhances the sweetness and brings out the rich chocolate flavor. It’s like a flavor explosion in your mouth! You can also consider adding a dash of espresso powder to the cheesecake filling for a mocha twist. Trust me, it’s a game changer!
2. Speed Up Prep Time: If you’re short on time (and who isn’t?), here’s a little hack: prepare the crust and filling the night before. Just store them separately in the fridge, and when you’re ready to bake, simply assemble and pop them in the oven. This way, you can enjoy fresh Chocolate Chip Cheesecake Bars without the last-minute rush. Plus, they’ll have even more time to chill and set, making them even more delicious!
3. Easy Storage Methods: These bars are perfect for making ahead of time, and they store beautifully! Once they’re completely cooled and set, cut them into squares and place them in an airtight container. They’ll keep in the fridge for up to a week—if they last that long! You can also freeze them for up to three months. Just make sure to wrap each bar individually in plastic wrap and then place them in a freezer-safe bag. When you’re ready to enjoy, simply thaw them in the fridge overnight. It’s like having a sweet surprise waiting for you!
4. Unique Serving Ideas: When it comes to serving your Chocolate Chip Cheesecake Bars, don’t be afraid to get a little creative! You can serve them with a dollop of whipped cream or a scoop of sugar-free ice cream for an extra indulgent treat. Fresh berries on the side add a pop of color and freshness that pairs beautifully with the rich cheesecake. You could even drizzle a little sugar-free chocolate sauce on top for that extra wow factor. Presentation is key, and a little garnish can go a long way!
5. Make It a Family Affair: Involve your family in the process! Get the kids to help with mixing or decorating the bars. It’s a fun way to spend time together, and they’ll love being part of the baking adventure. Plus, they’ll be more likely to eat something they helped create. Win-win!
With these tips in your back pocket, you’re all set to make the most delicious Chocolate Chip Cheesecake Bars that will wow everyone at your table. Happy baking!
Essential Equipment Needed
Before we dive into the delicious world of Chocolate Chip Cheesecake Bars, let’s make sure you have all the essential equipment ready to go. Trust me, having the right tools can make the baking process smoother and more enjoyable. Here’s what you’ll need:
- Mixing Bowls: You’ll need a couple of mixing bowls—one for the crust and one for the cheesecake filling. If you don’t have mixing bowls, any large bowl will do! Just make sure it’s big enough to hold all your ingredients without spilling over. I often use glass bowls because they’re sturdy and easy to clean.
- Baking Dish (8×8-inch): An 8×8-inch baking dish is perfect for this recipe. If you don’t have one, you can use a 9×9-inch dish, but keep an eye on the baking time, as it may cook a little faster. Alternatively, a round cake pan works too! Just adjust the cutting method later.
- Electric Mixer or Whisk: An electric mixer makes whipping the cream cheese a breeze, but if you don’t have one, a good old-fashioned whisk will work just fine. It might take a little more elbow grease, but hey, it’s a great workout! If you’re feeling adventurous, you can even use a fork to mix the ingredients—just be prepared for a bit of a workout!
- Parchment Paper (Optional): While not strictly necessary, lining your baking dish with parchment paper makes it super easy to lift the bars out once they’re cooled. If you don’t have parchment paper, just grease the dish well with cooking spray or butter. It’ll work just fine, but you might need to use a spatula to help release the bars.
With these essential tools in hand, you’re all set to create some mouthwatering Chocolate Chip Cheesecake Bars. Remember, the right equipment can make all the difference in your baking experience, so gather your tools and let’s get started!
Delicious Variations of Chocolate Chip Cheesecake Bars
Now that you’ve mastered the basic recipe for Chocolate Chip Cheesecake Bars, let’s have some fun with variations! One of the best things about this recipe is its versatility. You can easily tweak it to suit your taste buds or dietary needs. Here are some unique flavor twists and substitutions that will keep your dessert game fresh and exciting!
1. Nutty Delight: If you’re a fan of a little crunch, consider adding chopped nuts to your crust or cheesecake filling. Walnuts, pecans, or even almonds can add a delightful texture and flavor. Just toss in about ½ cup of your favorite nuts when you mix in the chocolate chips. It’s like a party in your mouth with every bite!
2. Peanut Butter Bliss: For those who can’t resist the combination of chocolate and peanut butter, why not swap out the chocolate chips for sugar-free peanut butter chips? You can also swirl in a few tablespoons of natural peanut butter into the cheesecake filling before baking. It adds a creamy richness that pairs beautifully with the chocolatey crust. Just be careful not to overdo it—balance is key!
3. Gluten-Free Goodness: If you’re looking to make these bars gluten-free, you can easily substitute the almond flour with a gluten-free all-purpose flour blend. Just make sure to check the label to ensure it’s truly gluten-free. This way, everyone can enjoy these delicious bars without worry!
4. Low-Carb Options: For those watching their carb intake, you can adjust the sweeteners to fit your dietary needs. Instead of using erythritol, try a low-carb sweetener like monk fruit or stevia. Just remember to adjust the quantity according to the sweetness level of your chosen sweetener. You can also reduce the number of chocolate chips or use a sugar-free chocolate bar chopped into chunks for a lower-carb treat.
5. Flavor Infusions: Want to take your cheesecake bars to the next level? Consider adding flavor extracts to the filling. A teaspoon of almond extract or a splash of orange zest can add a delightful twist. You could even experiment with a hint of coconut extract for a tropical vibe. The possibilities are endless, and it’s a fun way to personalize your bars!
6. Seasonal Variations: Don’t forget about seasonal flavors! In the fall, you can add a teaspoon of pumpkin spice to the cheesecake filling for a cozy autumn treat. In the summer, fresh berries like raspberries or strawberries can be folded into the filling for a fruity burst of flavor. Just imagine the vibrant colors and flavors dancing together!
With these delicious variations, your Chocolate Chip Cheesecake Bars will never get boring. Feel free to mix and match these ideas to create your own signature version. After all, baking is all about having fun and expressing your creativity in the kitchen. So, roll up your sleeves, get adventurous, and enjoy the sweet rewards of your culinary experiments!
Serving Suggestions
Now that you’ve whipped up a batch of those delightful Chocolate Chip Cheesecake Bars, it’s time to think about how to serve them up! Presentation can elevate your dessert from simple to spectacular, and I’ve got some family-friendly pairing ideas that will make your bars shine even brighter.
1. Fresh Fruit: One of my favorite ways to serve these bars is with a side of fresh fruit. Think juicy strawberries, sweet raspberries, or even slices of ripe peaches. The natural sweetness and acidity of the fruit perfectly balance the rich, creamy cheesecake. Plus, it adds a pop of color to your plate, making it look even more inviting. You can even toss the fruit in a little lemon juice and a sprinkle of erythritol for an extra zing!
2. A Dollop of Whipped Cream: Who can resist a dollop of whipped cream on top of their dessert? It’s like the cherry on top, but even better! You can use store-bought whipped cream or whip up your own using heavy cream and a touch of erythritol for sweetness. Just imagine sinking your fork into a creamy bar topped with fluffy whipped cream—it’s pure bliss! For an extra touch, consider adding a sprinkle of cocoa powder or a drizzle of sugar-free chocolate sauce on top.
3. Coffee or Herbal Tea: When it comes to drinks, I highly recommend pairing your Chocolate Chip Cheesecake Bars with a warm cup of coffee or herbal tea. The rich flavors of coffee complement the chocolate beautifully, creating a cozy dessert experience. If you prefer tea, a soothing chamomile or a refreshing mint tea can be a lovely choice. It’s like a warm hug in a cup, perfect for winding down after a busy day.
4. Ice Cream or Yogurt: For those extra special occasions, consider serving your bars with a scoop of sugar-free ice cream or a dollop of Greek yogurt. The creaminess of the ice cream or yogurt adds another layer of indulgence, and you can even sprinkle some crushed nuts or sugar-free chocolate chips on top for added texture. It’s a dessert that feels like a treat from your favorite café!
5. Make It a Dessert Platter: If you’re hosting a gathering or just want to impress your family, consider creating a dessert platter. Arrange your Chocolate Chip Cheesecake Bars alongside an assortment of fresh fruit, whipped cream, and a few other sweet treats. It’s a fun way to offer variety and let everyone choose their favorite combinations. Plus, it makes for a beautiful presentation that’s sure to wow your guests!
With these serving suggestions, your Chocolate Chip Cheesecake Bars will not only taste amazing but also look like a million bucks on the table. So, gather your loved ones, serve up these delicious bars, and enjoy the sweet moments together!
FAQs About Chocolate Chip Cheesecake Bars
As you embark on your journey to create these delightful Chocolate Chip Cheesecake Bars, you might have a few questions swirling in your mind. Don’t worry; I’ve got you covered! Here are some common questions and concise answers to help you along the way:
- Can I make these bars ahead of time?
Absolutely! These bars are perfect for making ahead of time. You can prepare them a day or two in advance and store them in the fridge. Just make sure to let them chill for at least 2 hours after baking to set properly. They’ll be ready to impress when you are! - How should I store leftovers?
If you happen to have any leftovers (which is rare in my house!), simply place the bars in an airtight container and store them in the fridge. They’ll stay fresh for up to a week. Just remember to cut them into squares before storing for easy access! - Can I freeze these bars for later?
Yes, you can! These Chocolate Chip Cheesecake Bars freeze beautifully. Wrap each bar individually in plastic wrap and then place them in a freezer-safe bag. They’ll keep for up to three months. When you’re ready to enjoy, just thaw them in the fridge overnight. It’s like having a sweet surprise waiting for you! - What can I use instead of erythritol?
If you don’t have erythritol on hand, no worries! You can substitute it with other sugar alternatives like stevia or monk fruit sweetener. Just be sure to adjust the quantity according to the sweetness level of your chosen sweetener, as they can vary in sweetness. - Are there any nut-free alternatives for the crust?
Yes! If you need a nut-free option, you can use oat flour instead of almond flour. Just keep in mind that the texture will be slightly different, but it will still yield delicious results. You can also try using a gluten-free all-purpose flour blend for a similar effect!
With these FAQs in mind, you’re all set to tackle your Chocolate Chip Cheesecake Bars with confidence. Happy baking!
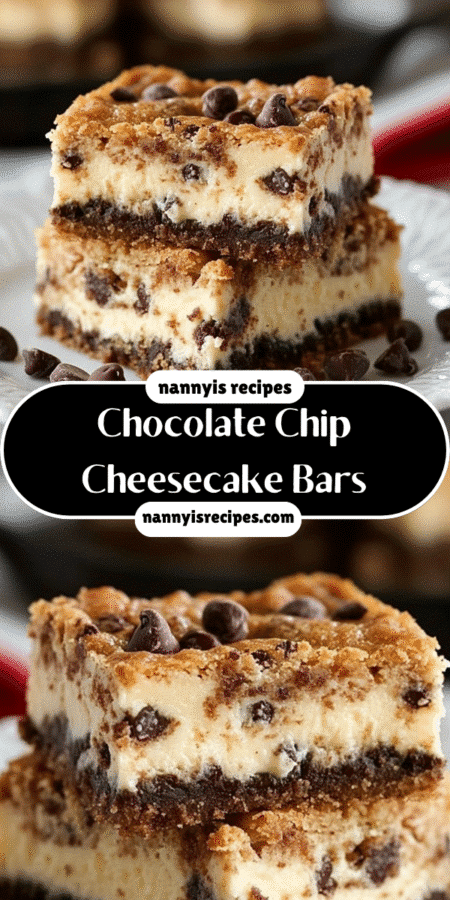
Final Thoughts on Chocolate Chip Cheesecake Bars
As we wrap up our delicious journey through the world of Chocolate Chip Cheesecake Bars, I can’t help but reflect on just how easy and delightful this recipe truly is. Seriously, it’s like a little miracle in the kitchen! With minimal prep time and simple ingredients, you can create a dessert that feels indulgent without the fuss. It’s a win-win for busy women like us who want to enjoy something sweet without spending hours in the kitchen.
These bars are not just a treat; they’re a celebration of flavors and textures that come together beautifully. The creamy cheesecake filling, paired with the rich chocolate chips and a nutty crust, creates a symphony of taste that’s hard to resist. I’ve seen the smiles on my family’s faces when I serve these bars, and it warms my heart to know I’m providing them with something they love that’s also good for them. It’s moments like these that make all the hustle and bustle worth it!
So, if you haven’t tried making these Chocolate Chip Cheesecake Bars yet, I wholeheartedly encourage you to give it a go. Whether you’re looking for a quick dessert after a long day, a sweet treat to share with friends, or a way to impress your family, these bars are the perfect solution. Plus, they’re so versatile that you can customize them to suit your taste or dietary needs. The possibilities are endless!
Imagine having a batch of these bars ready to go in your fridge, waiting to be enjoyed after dinner or as a delightful snack. It’s like having a little piece of happiness at your fingertips! So, roll up your sleeves, gather your ingredients, and let’s create some magic in the kitchen together. I promise you won’t regret it!
Here’s to sweet moments, happy taste buds, and the joy of baking. Enjoy your Chocolate Chip Cheesecake Bars, and may they bring as much joy to your life as they have to mine!
“`
Print
Chocolate Chip Cheesecake Bars that Wow Your Taste Buds!
- Total Time: 2 hours 45 minutes
- Yield: 9 bars 1x
- Diet: Low Calorie
Description
Delicious and easy-to-make Chocolate Chip Cheesecake Bars that are perfect for satisfying your sweet tooth while keeping it healthy.
Ingredients
- 1 ½ cups almond flour
- ½ cup unsweetened cocoa powder
- ¼ cup granulated erythritol
- ½ teaspoon baking powder
- ¼ teaspoon salt
- ½ cup unsalted butter, melted
- 1 large egg
- 1 teaspoon vanilla extract
- 8 ounces cream cheese, softened
- ½ cup granulated erythritol
- 1 large egg
- 1 teaspoon vanilla extract
- ½ cup sugar-free chocolate chips
Instructions
- Preheat the oven to 350°F. Grease an 8×8-inch baking dish or line it with parchment paper.
- In a mixing bowl, combine almond flour, cocoa powder, erythritol, baking powder, and salt. Stir until well mixed.
- Add the melted butter, egg, and vanilla extract. Mix until a dough forms.
- Press the dough evenly into the bottom of the prepared baking dish to form the crust.
- In another bowl, beat the softened cream cheese and erythritol until smooth.
- Add the egg and vanilla extract, mixing until well combined. Fold in the sugar-free chocolate chips.
- Spread the cheesecake mixture over the crust in the baking dish.
- Bake for 25-30 minutes, or until the edges are set and the center is slightly jiggly.
- Remove from the oven and allow to cool at room temperature for about 30 minutes, then refrigerate for at least 2 hours to set completely.
- Cut into bars and serve chilled or at room temperature.
Notes
- For added flavor, consider adding a sprinkle of sea salt on top before serving.
- You can substitute the chocolate chips with chopped nuts or sugar-free peanut butter chips for a different twist.
- Serve with pork rinds or celery sticks for a crunchy side option.
- Prep Time: 15 minutes
- Cook Time: 30 minutes
- Category: Dessert
- Method: Baking
- Cuisine: American
Nutrition
- Serving Size: 1 bar
- Calories: 210
- Sugar: 0g
- Sodium: 0mg
- Fat: 18g
- Saturated Fat: 0g
- Unsaturated Fat: 0g
- Trans Fat: 0g
- Carbohydrates: 4g
- Fiber: 0g
- Protein: 5g
- Cholesterol: 0mg
Keywords: Chocolate Chip Cheesecake Bars, dessert, healthy dessert, low calorie
