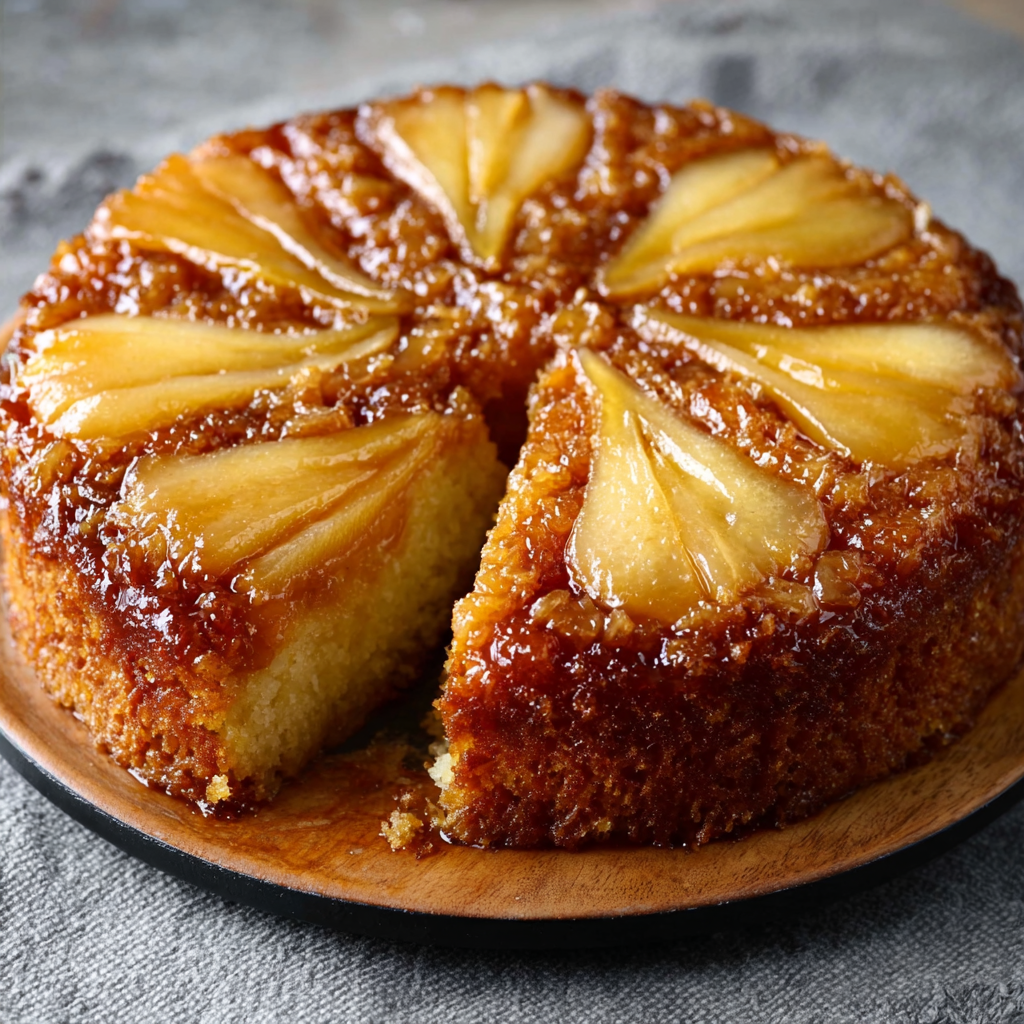
Vanilla Pear Upside-Down Cake is a must-try recipe!
gutenberg
How to Make Vanilla Pear Upside-Down Cake
Now that you’re all set to dive into the delightful world of baking, let’s get into the nitty-gritty of how to make this scrumptious Vanilla Pear Upside-Down Cake. I promise, it’s easier than you might think! With just a few simple steps, you’ll have a cake that not only tastes heavenly but also looks like a million bucks. So, roll up your sleeves, and let’s get started!
Step 1 – Prep Ingredients
First things first, let’s prep those beautiful pears. You’ll need three medium ripe pears for this recipe. I like to use Bartlett or Anjou pears because they’re sweet and juicy, but feel free to use whatever you have on hand. Start by peeling, coring, and slicing them into thin wedges. This is where the magic begins!
Next, grab your 9-inch round cake pan and grease it with about a tablespoon of unsalted butter. This will help the cake slide right out when it’s time to flip it. Trust me, you don’t want to be wrestling with a stuck cake! Once that’s done, set the pan aside and let’s move on to the caramel layer.
Step 2 – Begin Cooking
In a small saucepan, melt 1/4 cup of unsalted butter over medium heat. As the butter melts, it’ll start to bubble and smell divine. This is the moment to add in 1/2 cup of packed brown sugar and 1 teaspoon of ground cinnamon. Stir it all together until it’s well blended and bubbly. The aroma will fill your kitchen, and you might find yourself doing a little happy dance!
Once the mixture is smooth and caramel-like, pour it into the bottom of your prepared cake pan. Make sure to spread it evenly so every slice gets that delicious caramel goodness. Now, it’s time to arrange those pear slices on top of the caramel. Lay them out in a pretty pattern—this is your chance to show off a bit!
Step 3 – Combine Ingredients
Now that the base is ready, let’s whip up the cake batter. In a large mixing bowl, combine 1 1/2 cups of all-purpose flour, 1 teaspoon of baking powder, 1/2 teaspoon of baking soda, and 1/4 teaspoon of salt. Give it a good whisk to combine everything. This is your dry mixture, and it’s essential for a fluffy cake!
In another bowl, beat the remaining 1/4 cup of unsalted butter with 1 cup of granulated sugar until it’s light and fluffy. This step is crucial because it incorporates air into the batter, making your cake rise beautifully. Add in 2 large eggs, one at a time, mixing well after each addition. Then, stir in 2 teaspoons of vanilla extract. Ah, the sweet scent of vanilla—can you smell it?
Now, it’s time to bring the dry and wet ingredients together. Gradually mix the dry ingredients into the wet mixture, alternating with 1/2 cup of buttermilk. Start and finish with the flour mixture. This helps to keep the batter smooth and prevents overmixing, which can lead to a dense cake. Once everything is combined, you should have a lovely, thick batter.
Step 4 – Finish and Serve
Pour the batter over the arranged pears in the pan, smoothing it out evenly with a spatula. It’s like giving your cake a cozy blanket! Now, pop it into your preheated oven at 350°F (175°C) and bake for about 35-40 minutes. You’ll know it’s done when a toothpick inserted into the center comes out clean. The anticipation will be real, but trust me, it’s worth the wait!
Once baked, let the cake cool in the pan for about 10 minutes. This is a crucial step—don’t skip it! If you flip it too soon, you might end up with a pear disaster. After the cooling time, place a serving plate over the cake pan and carefully flip it over. Give it a gentle tap to release the cake, and voilà! You’ve got a stunning Vanilla Pear Upside-Down Cake ready to impress.
Let it cool slightly before slicing and serving. I recommend pairing it with a scoop of vanilla ice cream or a dollop of whipped cream for that extra touch of indulgence. Trust me, your family will be begging for seconds!
Introduction to Vanilla Pear Upside-Down Cake
Let me tell you, if you’re looking for a dessert that’s as delightful as it is easy to whip up, the Vanilla Pear Upside-Down Cake is your new best friend! This cake is like a warm hug on a plate, perfect for busy women like us who juggle a million things but still want to treat our families (and ourselves) to something special. With its luscious caramelized pears sitting atop a moist vanilla cake, it’s a showstopper that requires minimal effort but delivers maximum flavor.
Picture this: you’ve just wrapped up a long day, and the last thing you want to do is spend hours in the kitchen. But you also want to create a sweet moment for your family after dinner. That’s where this cake shines! It’s not just a dessert; it’s a centerpiece for family gatherings, a sweet treat to celebrate life’s little moments, or even a cozy indulgence just for you. The best part? It’s so simple to make that you’ll wonder why you didn’t try it sooner!
Whether you’re hosting a casual get-together or simply want to brighten up a weeknight dinner, this Vanilla Pear Upside-Down Cake is sure to impress. The combination of tender pears and fluffy cake, all drizzled with a rich caramel sauce, creates a dessert that feels fancy without the fuss. So, grab your apron, and let’s dive into this delicious adventure together!
Why You’ll Love This Vanilla Pear Upside-Down Cake
Let’s be real for a moment: life can get hectic, especially when you’re balancing work, family, and everything in between. That’s why I’m so excited to share why the Vanilla Pear Upside-Down Cake is a game-changer for busy women like us. First off, the prep time is a breeze! You can whip this beauty up in just 20 minutes. Yes, you heard that right! In less time than it takes to scroll through social media, you can have a delicious dessert in the oven.
And cleanup? Oh, it’s a dream! With just a few bowls and a saucepan to wash, you won’t be left with a mountain of dishes staring you down after dinner. I don’t know about you, but the thought of spending more time cleaning than enjoying my dessert is a total buzzkill. This cake allows you to savor the sweet moments without the stress of a messy kitchen.
Now, let’s talk about flavor. This cake is a crowd-pleaser, appealing to both kids and adults alike. The combination of sweet, caramelized pears and moist vanilla cake is like a symphony of flavors that dances on your taste buds. Kids love the sweetness of the pears, while adults appreciate the warm, comforting notes of vanilla and cinnamon. It’s a dessert that brings everyone together, making it perfect for family gatherings or a cozy night in.
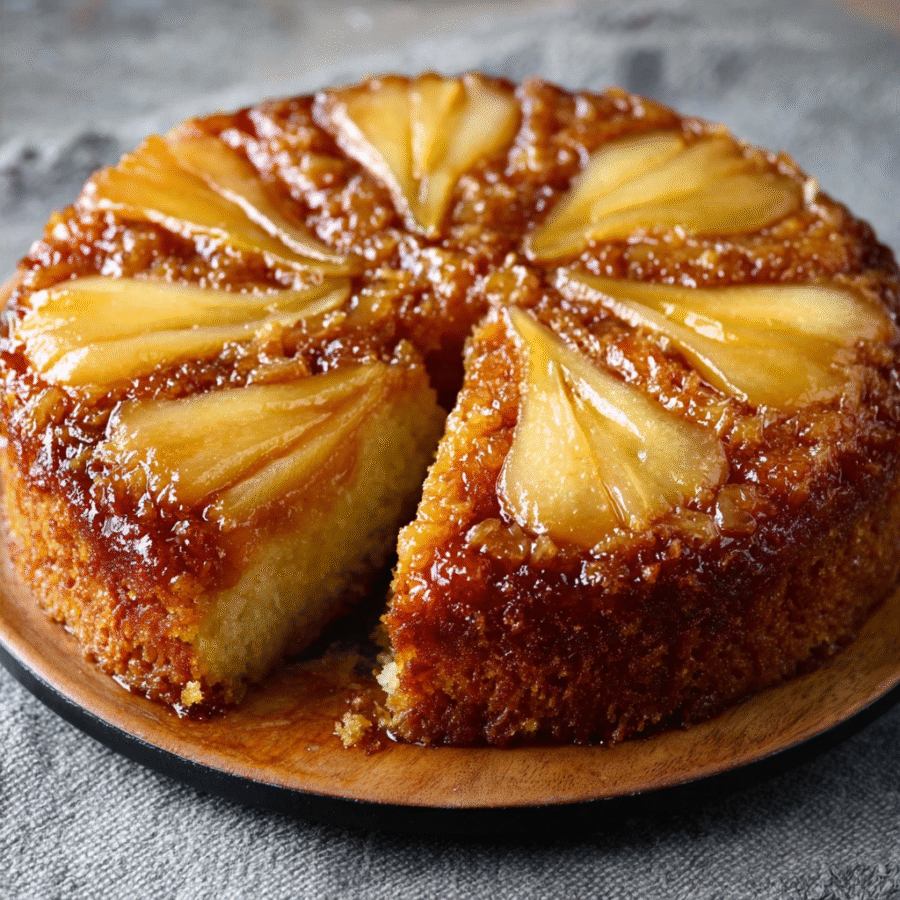
And can we take a moment to appreciate the presentation? When you flip this cake over, the sight of those beautifully arranged pears glistening in caramel is nothing short of stunning. It’s like a work of art that you can eat! Your family and friends will be oohing and aahing before they even take a bite. It’s the kind of dessert that makes you feel like a culinary rock star, even if you’re just a home cook trying to get through the week.
So, whether you’re celebrating a special occasion or just want to treat yourself after a long day, the Vanilla Pear Upside-Down Cake is your go-to recipe. It’s quick, easy, and oh-so-delicious—what’s not to love? Let’s get baking!
Ingredients You’ll Need
Before we dive into the baking process, let’s gather our ingredients for this delightful Vanilla Pear Upside-Down Cake. Having everything ready to go makes the whole experience smoother and more enjoyable. Here’s what you’ll need:
- 3 medium ripe pears, peeled, cored, and sliced: The star of our show! Ripe pears add natural sweetness and moisture to the cake. I love using Bartlett or Anjou pears for their juicy texture, but feel free to use whatever you have on hand.
- 1/2 cup unsalted butter, divided: Butter is essential for that rich flavor and moist texture. We’ll use some for the caramel layer and some for the cake batter. If you’re looking for a lighter option, you can substitute half of it with applesauce.
- 1/2 cup packed brown sugar: This is what gives our cake that lovely caramel flavor. If you’re out of brown sugar, you can use coconut sugar for a healthier twist, or even granulated sugar in a pinch, though it won’t have the same depth of flavor.
- 1 teaspoon ground cinnamon: Cinnamon adds warmth and a hint of spice that complements the pears beautifully. If you’re feeling adventurous, a pinch of nutmeg can elevate the flavor even more!
- 1 1/2 cups all-purpose flour: This is the backbone of our cake. If you need a gluten-free option, a gluten-free flour blend works well here.
- 1 teaspoon baking powder: This helps our cake rise and become fluffy. Make sure it’s fresh for the best results!
- 1/2 teaspoon baking soda: Another leavening agent that works in tandem with the baking powder to give our cake that perfect lift.
- 1/4 teaspoon salt: A little salt enhances all the flavors in the cake. Don’t skip it!
- 1 cup granulated sugar: This sweetens the cake and helps create that lovely golden crust. You can reduce the amount if you prefer a less sweet cake.
- 2 large eggs: Eggs provide structure and moisture. If you’re looking for an egg-free option, you can use flax eggs or applesauce as a substitute.
- 2 teaspoons vanilla extract: Vanilla is the secret ingredient that ties everything together. It adds a lovely aroma and flavor that makes the cake irresistible.
- 1/2 cup buttermilk: This adds moisture and a slight tang that balances the sweetness. If you don’t have buttermilk, you can make your own by mixing milk with a splash of vinegar or lemon juice.
And there you have it! All the ingredients you need to create this stunning Vanilla Pear Upside-Down Cake. Remember, if you’re ever in a pinch, there are plenty of substitutions you can make without sacrificing flavor. For printable measurements, just scroll to the end of the article. Now, let’s get ready to bake this beauty!
How to Make Vanilla Pear Upside-Down Cake
Now that you’re all set to dive into the delightful world of baking, let’s get into the nitty-gritty of how to make this scrumptious Vanilla Pear Upside-Down Cake. I promise, it’s easier than you might think! With just a few simple steps, you’ll have a cake that not only tastes heavenly but also looks like a million bucks. So, roll up your sleeves, and let’s get started!
Step 1 – Prep Ingredients
First things first, let’s prep those beautiful pears. You’ll need three medium ripe pears for this recipe. I like to use Bartlett or Anjou pears because they’re sweet and juicy, but feel free to use whatever you have on hand. Start by peeling, coring, and slicing them into thin wedges. This is where the magic begins!
Next, grab your 9-inch round cake pan and grease it with about a tablespoon of unsalted butter. This will help the cake slide right out when it’s time to flip it. Trust me, you don’t want to be wrestling with a stuck cake! Once that’s done, set the pan aside and let’s move on to the caramel layer.
Step 2 – Begin Cooking
In a small saucepan, melt 1/4 cup of unsalted butter over medium heat. As the butter melts, it’ll start to bubble and smell divine. This is the moment to add in 1/2 cup of packed brown sugar and 1 teaspoon of ground cinnamon. Stir it all together until it’s well blended and bubbly. The aroma will fill your kitchen, and you might find yourself doing a little happy dance!
Once the mixture is smooth and caramel-like, pour it into the bottom of your prepared cake pan. Make sure to spread it evenly so every slice gets that delicious caramel goodness. Now, it’s time to arrange those pear slices on top of the caramel. Lay them out in a pretty pattern—this is your chance to show off a bit!
Step 3 – Combine Ingredients
Now that the base is ready, let’s whip up the cake batter. In a large mixing bowl, combine 1 1/2 cups of all-purpose flour, 1 teaspoon of baking powder, 1/2 teaspoon of baking soda, and 1/4 teaspoon of salt. Give it a good whisk to combine everything. This is your dry mixture, and it’s essential for a fluffy cake!
In another bowl, beat the remaining 1/4 cup of unsalted butter with 1 cup of granulated sugar until it’s light and fluffy. This step is crucial because it incorporates air into the batter, making your cake rise beautifully. Add in 2 large eggs, one at a time, mixing well after each addition. Then, stir in 2 teaspoons of vanilla extract. Ah, the sweet scent of vanilla—can you smell it?
Now, it’s time to bring the dry and wet ingredients together. Gradually mix the dry ingredients into the wet mixture, alternating with 1/2 cup of buttermilk. Start and finish with the flour mixture. This helps to keep the batter smooth and prevents overmixing, which can lead to a dense cake. Once everything is combined, you should have a lovely, thick batter.
Step 4 – Finish and Serve
Pour the batter over the arranged pears in the pan, smoothing it out evenly with a spatula. It’s like giving your cake a cozy blanket! Now, pop it into your preheated oven at 350°F (175°C) and bake for about 35-40 minutes. You’ll know it’s done when a toothpick inserted into the center comes out clean. The anticipation will be real, but trust me, it’s worth the wait!
Once baked, let the cake cool in the pan for about 10 minutes. This is a crucial step—don’t skip it! If you flip it too soon, you might end up with a pear disaster. After the cooling time, place a serving plate over the cake pan and carefully flip it over. Give it a gentle tap to release the cake, and voilà! You’ve got a stunning Vanilla Pear Upside-Down Cake ready to impress.
Let it cool slightly before slicing and serving. I recommend pairing it with a scoop of vanilla ice cream or a dollop of whipped cream for that extra touch of indulgence. Trust me, your family will be begging for seconds!
Tips for Perfect Results
Now that you’re ready to bake your Vanilla Pear Upside-Down Cake, let’s talk about a few tips that will help you achieve perfect results every time. Trust me, these little nuggets of wisdom can make a world of difference!
First and foremost, always use fresh, ripe pears. The quality of your fruit can make or break this cake. Ripe pears not only add natural sweetness but also provide that juicy texture we all love. I recommend checking for firmness; they should yield slightly when you press them. If they’re too hard, they won’t caramelize properly, and if they’re too soft, they might turn mushy. Aim for that sweet spot!
Next up, patience is key when it comes to flipping the cake. After baking, allow the cake to cool in the pan for about 10 minutes. This step is crucial! If you flip it too soon, you might end up with a pear disaster on your hands. Trust me, I’ve been there! Letting it cool slightly allows the caramel to set, making it easier to release the cake without losing any of that delicious topping.
And here’s a little secret: consider adding a pinch of nutmeg to your batter for an extra layer of warmth and flavor. Nutmeg pairs beautifully with the sweetness of the pears and the richness of the vanilla. Just a hint will elevate your cake from good to absolutely divine! It’s like giving your cake a cozy sweater for those chilly evenings.
So, keep these tips in mind as you embark on your baking adventure. With fresh pears, a little patience, and a dash of nutmeg, your Vanilla Pear Upside-Down Cake will be a showstopper that your family will rave about. Happy baking!
Essential Equipment Needed
Before we dive into the baking process, let’s make sure you have all the essential equipment needed to create your stunning Vanilla Pear Upside-Down Cake. Having the right tools on hand not only makes the process smoother but also ensures that your cake turns out perfectly every time. Here’s what you’ll need:
- 9-inch round cake pan: This is the star of the show! A 9-inch round cake pan is perfect for this recipe, allowing the cake to bake evenly and giving you that beautiful shape. Make sure it’s non-stick or well-greased to prevent any sticky situations when it’s time to flip the cake.
- Small saucepan: You’ll need a small saucepan to melt the butter and mix in the brown sugar and cinnamon for that luscious caramel layer. A heavy-bottomed saucepan works best to ensure even heating and prevent burning.
- Mixing bowls (large and medium): Having a couple of mixing bowls in different sizes is essential for combining your dry and wet ingredients. A large bowl is perfect for the cake batter, while a medium bowl works well for mixing the dry ingredients and preparing the caramel.
- Whisk and spatula: A whisk is your best friend for mixing the batter and ensuring everything is well combined. A spatula is great for scraping down the sides of the bowl and smoothing out the batter in the cake pan. Plus, it’s perfect for serving up those delicious slices!
- Measuring cups and spoons: Accurate measurements are key to baking success! Make sure you have a set of measuring cups for dry ingredients and a set of measuring spoons for those smaller quantities. Precision is important, especially when it comes to baking!
With these essential tools in your kitchen arsenal, you’ll be well-equipped to tackle the Vanilla Pear Upside-Down Cake. So gather your gear, and let’s get ready to bake something truly delicious!
Delicious Variations of Vanilla Pear Upside-Down Cake
Now that you’ve mastered the classic Vanilla Pear Upside-Down Cake, let’s have some fun with variations! After all, one of the joys of baking is experimenting and making a recipe your own. Here are a few delightful twists that will keep your family guessing and coming back for more!
Add a Splash of Bourbon
If you’re looking to elevate the flavor profile of your cake, consider adding a splash of bourbon to the caramel mixture. Just imagine the rich, warm notes of bourbon mingling with the sweetness of the brown sugar and the fragrant cinnamon. It’s like a cozy hug in dessert form! Simply stir in about a tablespoon of bourbon after you’ve melted the butter and mixed in the brown sugar and cinnamon. This little addition will give your Vanilla Pear Upside-Down Cake a sophisticated twist that’s perfect for special occasions or when you want to treat yourself to something extra special.
Seasonal Fruit Substitutions
While pears are the star of this cake, don’t hesitate to switch things up with seasonal fruits! Apples and peaches are fantastic alternatives that can bring a whole new vibe to your dessert. For a fall-inspired cake, use tart apples like Granny Smith for a delightful contrast to the sweetness of the caramel. If you’re in the mood for summer, juicy peaches will add a lovely sweetness and a hint of sunshine to your cake. Just slice them up and arrange them in the same way you would with the pears. Your family will love discovering new flavors in this classic recipe!
Make It Gluten-Free
For those who are gluten-sensitive or simply prefer a gluten-free option, you can easily adapt this recipe! Swap out the all-purpose flour for a gluten-free flour blend. Many brands offer great alternatives that work beautifully in baking. Just make sure to check the packaging for any specific instructions, as some blends may require additional ingredients like xanthan gum to help with texture. With this simple swap, everyone can enjoy a slice of your Vanilla Pear Upside-Down Cake without missing out on the deliciousness!
These variations not only keep things interesting but also allow you to tailor the cake to your family’s preferences and the seasons. So, whether you’re adding a splash of bourbon, experimenting with different fruits, or making it gluten-free, your Vanilla Pear Upside-Down Cake will always be a hit. Happy baking, and enjoy the delicious journey!
Serving Suggestions
Now that you’ve baked your stunning Vanilla Pear Upside-Down Cake, it’s time to think about how to serve it up for maximum enjoyment! After all, presentation and pairing can elevate your dessert experience from delightful to downright unforgettable. Here are a couple of serving suggestions that will have your family and friends raving!
First up, let’s talk about the classic pairing: a scoop of vanilla ice cream or a dollop of whipped cream. There’s something magical about the combination of warm cake and cold ice cream that creates a delightful contrast. As you slice into the cake, the caramelized pears glisten, and when you add that creamy scoop of vanilla ice cream on top, it’s like a match made in dessert heaven! The ice cream melts slightly into the warm cake, creating a luscious, gooey delight that’s simply irresistible. Trust me, your family will be begging for seconds!
If you’re in the mood for something a bit more cozy, consider serving your Vanilla Pear Upside-Down Cake alongside a warm cup of tea or coffee. The comforting aroma of freshly brewed coffee or a soothing cup of herbal tea complements the sweet, caramel flavors of the cake beautifully. It’s the perfect way to wind down after a long day or to enjoy a leisurely afternoon treat. Imagine curling up with a slice of cake and a steaming cup of your favorite brew—pure bliss!
For an extra touch, you can sprinkle a little cinnamon or nutmeg on top of the whipped cream or ice cream for added flavor. It’s those little details that make a big difference! You could even garnish the plate with a few fresh mint leaves or a dusting of powdered sugar for a pop of color and elegance.
So, whether you choose to indulge with ice cream or savor a slice with a warm beverage, your Vanilla Pear Upside-Down Cake is sure to be a hit. It’s all about creating those sweet moments with loved ones, and this cake is the perfect centerpiece for any gathering. Enjoy every bite, and don’t forget to share the love!
FAQs About Vanilla Pear Upside-Down Cake
As you embark on your baking journey with the Vanilla Pear Upside-Down Cake, you might have a few questions swirling around in your mind. Don’t worry; I’ve got you covered! Here are some frequently asked questions that can help you navigate this delicious recipe with ease.
Can I use canned pears instead of fresh?
Absolutely! Canned pears can be a convenient alternative, especially if fresh ones aren’t available. Just make sure to drain them well to avoid excess moisture in your cake. You don’t want a soggy bottom, right? A little tip: if you can find canned pears in juice rather than syrup, that’s even better for keeping the flavors light and fresh!
How do I store leftovers?
Storing leftovers is a breeze! Simply place any uneaten slices in an airtight container and keep them at room temperature for up to 3 days. If you’re like me and can’t resist a good dessert, I doubt there will be much left! But if there is, this method will keep your cake fresh and delicious for those late-night cravings or afternoon snacks.
Can I freeze this cake?
Yes, you can! If you find yourself with extra cake (or just want to save some for later), wrap it tightly in plastic wrap and freeze it for up to 2 months. When you’re ready to enjoy it again, simply let it thaw in the refrigerator overnight. You can even warm it up in the oven for a few minutes to bring back that fresh-baked taste. It’s like having a little slice of happiness waiting for you in the freezer!
With these FAQs in mind, you’re all set to tackle the Vanilla Pear Upside-Down Cake with confidence. Happy baking, and enjoy every delicious bite!

Final Thoughts on Vanilla Pear Upside-Down Cake
As I sit here reflecting on the delightful journey of creating the Vanilla Pear Upside-Down Cake, I can’t help but smile. This cake is not just a dessert; it’s a celebration of simplicity and flavor that fits perfectly into our busy lives. With its luscious caramelized pears and moist vanilla cake, it’s a sweet reminder that we can create something truly special without spending hours in the kitchen.
What I love most about this cake is how effortlessly it brings people together. Whether it’s a family gathering, a cozy dinner with friends, or just a little treat for yourself after a long day, this cake is the perfect companion. It’s like a warm hug on a plate, inviting everyone to gather around and share in the joy of good food. Plus, the impressive presentation will have your loved ones oohing and aahing before they even take a bite!
So, if you’re looking for a dessert that’s easy to make yet feels indulgent, I wholeheartedly encourage you to give the Vanilla Pear Upside-Down Cake a try. It’s a recipe that’s as forgiving as it is delicious, making it perfect for both novice bakers and seasoned pros. And let’s be honest, who doesn’t love a dessert that looks as good as it tastes?
Next time you’re planning a family gathering or just want to treat yourself to something sweet, remember this cake. It’s a wonderful way to showcase the beauty of seasonal fruits and the magic of baking. So, roll up your sleeves, gather your ingredients, and let the aroma of caramelized pears fill your kitchen. You won’t regret it, and neither will your family!
Happy baking, and may your Vanilla Pear Upside-Down Cake bring as much joy to your home as it has to mine!
“`
Print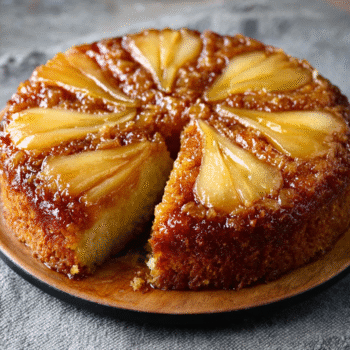
Vanilla Pear Upside-Down Cake is a must-try recipe!
- Total Time: 1 hour
- Yield: 8 servings 1x
- Diet: Vegetarian
Description
Vanilla Pear Upside-Down Cake is a must-try recipe that features caramelized pears atop a moist vanilla cake.
Ingredients
- 3 medium ripe pears, peeled, cored, and sliced
- 1/2 cup unsalted butter, divided
- 1/2 cup packed brown sugar
- 1 teaspoon ground cinnamon
- 1 1/2 cups all-purpose flour
- 1 teaspoon baking powder
- 1/2 teaspoon baking soda
- 1/4 teaspoon salt
- 1 cup granulated sugar
- 2 large eggs
- 2 teaspoons vanilla extract
- 1/2 cup buttermilk
Instructions
- Preheat your oven to 350°F (175°C).
- Grease a 9-inch round cake pan with 1 tablespoon of butter and set aside.
- In a small saucepan, melt 1/4 cup of butter over medium heat, then mix in the brown sugar and cinnamon until fully blended.
- Pour the caramel mixture into the bottom of the prepared pan.
- Arrange the sliced pears on top of the caramel mixture in an even layer.
- In a separate bowl, combine the flour, baking powder, baking soda, and salt; whisk them together and set aside.
- In a large mixing bowl, beat the remaining 1/4 cup of butter with the granulated sugar until light and fluffy.
- Add the eggs one at a time, ensuring each is well incorporated before adding the next.
- Stir in the vanilla extract.
- Gradually mix the dry ingredients into the wet ingredients, alternating with the buttermilk, starting and finishing with the flour mixture.
- Pour the batter over the pear arrangement in the pan, smoothing it out evenly.
- Bake the cake for about 35-40 minutes, or until a toothpick inserted into the center comes out clean.
- Allow the cake to cool in the pan for 10 minutes before flipping it onto a serving plate.
- Let it cool slightly before slicing and serving.
Notes
- Serves 8.
- Prep Time: 20 minutes
- Cook Time: 35-40 minutes
- Category: Dessert
- Method: Baking
- Cuisine: American
Nutrition
- Serving Size: 1 slice
- Calories: 350
- Sugar: 25g
- Sodium: 150mg
- Fat: 15g
- Saturated Fat: 9g
- Unsaturated Fat: 4g
- Trans Fat: 0g
- Carbohydrates: 50g
- Fiber: 2g
- Protein: 4g
- Cholesterol: 70mg
Keywords: Vanilla Pear Upside-Down Cake, Caramelized Pear Delight Cake
