Salted Caramel Chocolate Tart: A Delicious Treat Awaits!
gutenberg
Why You’ll Love This Salted Caramel Chocolate Tart
Let me tell you, this Salted Caramel Chocolate Tart is a game changer in my kitchen! As a busy woman juggling family, work, and everything in between, I often find myself in a cooking rut. But this tart? It’s like a breath of fresh air! With a prep time of just 30 minutes and minimal cleanup, it’s perfect for those hectic days when you want to whip up something special without spending hours in the kitchen.
One of the best parts? The flavors! This tart strikes a beautiful balance between rich chocolate and the delightful sweetness of salted caramel. It’s a crowd-pleaser, appealing to both adults and kids alike. I can’t tell you how many times I’ve served this at family gatherings, only to see everyone’s eyes light up with joy. It’s like a little slice of happiness on a plate!
And let’s be real—who doesn’t love a dessert that feels indulgent yet is surprisingly easy to make? You can impress your guests or treat your family to something special without breaking a sweat. Plus, the combination of chocolate and salted caramel is like a warm hug for your taste buds. It’s rich, it’s sweet, and that hint of salt just elevates it to a whole new level!
So, if you’re looking for a dessert that’s not only delicious but also quick and easy to prepare, this Salted Caramel Chocolate Tart is your answer. Trust me, once you try it, you’ll be adding it to your regular rotation. It’s the perfect way to satisfy your sweet tooth while still keeping your sanity intact!
Introduction to Salted Caramel Chocolate Tart
Welcome to the world of indulgence with the Salted Caramel Chocolate Tart! If you’re like me, a busy woman navigating the whirlwind of life, you know how precious time can be. Between work, family, and everything else on your plate, finding time to whip up a delightful dessert can feel like a daunting task. But fear not! This tart is here to save the day.
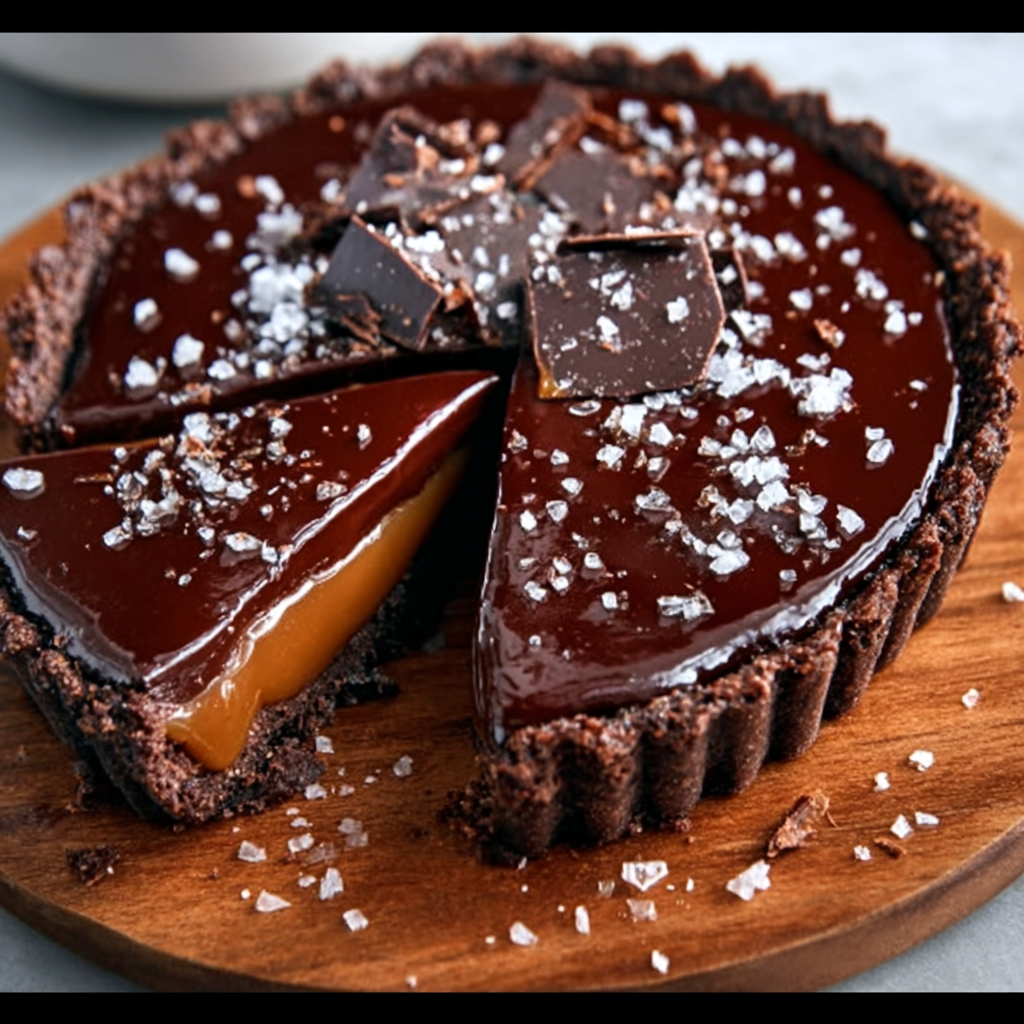
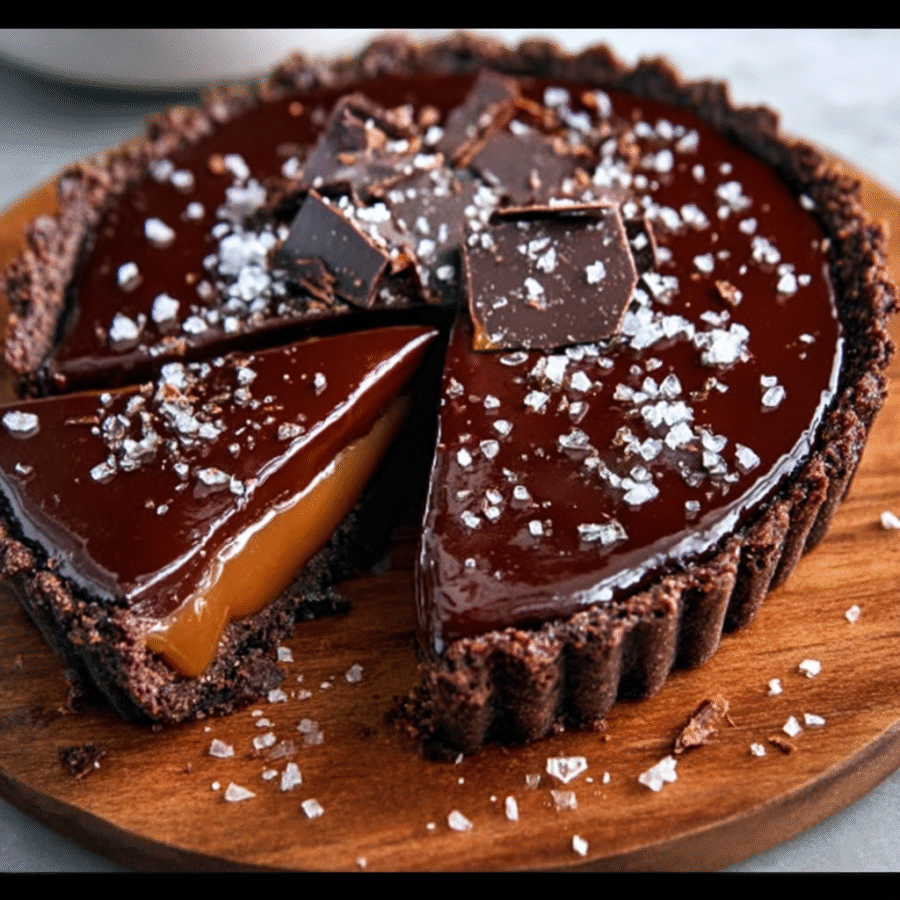
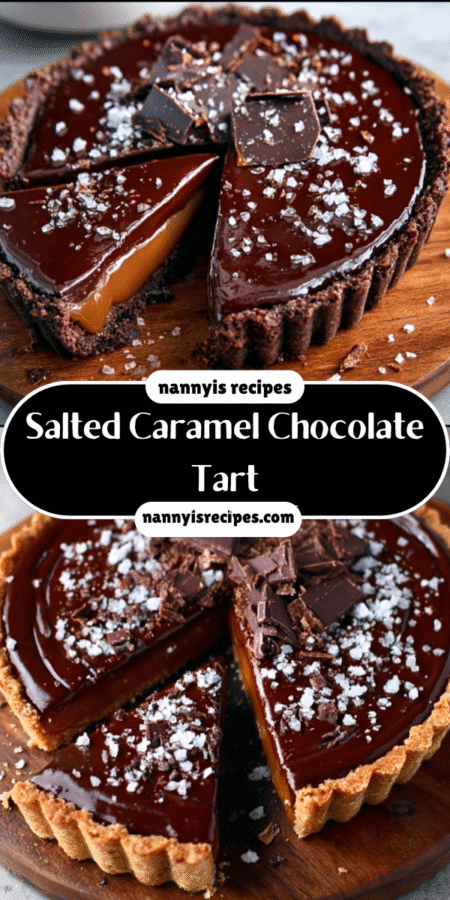
Imagine a rich, velvety chocolate crust cradling a luscious salted caramel filling that dances on your taste buds. It’s like a sweet serenade that brings joy to any occasion! Whether you’re hosting a family gathering, celebrating a special milestone, or simply treating yourself after a long week, this tart is the perfect companion. It’s not just a dessert; it’s an experience that brings people together.
What I love most about this Salted Caramel Chocolate Tart is how effortlessly it comes together. With just a handful of ingredients and a little bit of love, you can create a show-stopping dessert that looks and tastes like it came from a fancy bakery. And let’s be honest, who doesn’t want to impress their family and friends without spending hours in the kitchen? This tart is your secret weapon!
So, roll up your sleeves and get ready to dive into a recipe that’s as easy as pie (or should I say tart?). With its rich flavors and simple preparation, you’ll find yourself making this dessert time and time again. Trust me, once you take that first bite, you’ll understand why this tart is a must-have in your dessert repertoire!
Why You’ll Love This Salted Caramel Chocolate Tart
Let me tell you, this Salted Caramel Chocolate Tart is a game changer in my kitchen! As a busy woman juggling family, work, and everything in between, I often find myself in a cooking rut. But this tart? It’s like a breath of fresh air! With a prep time of just 30 minutes and minimal cleanup, it’s perfect for those hectic days when you want to whip up something special without spending hours in the kitchen.
One of the best parts? The flavors! This tart strikes a beautiful balance between rich chocolate and the delightful sweetness of salted caramel. It’s a crowd-pleaser, appealing to both adults and kids alike. I can’t tell you how many times I’ve served this at family gatherings, only to see everyone’s eyes light up with joy. It’s like a little slice of happiness on a plate!
And let’s be real—who doesn’t love a dessert that feels indulgent yet is surprisingly easy to make? You can impress your guests or treat your family to something special without breaking a sweat. Plus, the combination of chocolate and salted caramel is like a warm hug for your taste buds. It’s rich, it’s sweet, and that hint of salt just elevates it to a whole new level!
So, if you’re looking for a dessert that’s not only delicious but also quick and easy to prepare, this Salted Caramel Chocolate Tart is your answer. Trust me, once you try it, you’ll be adding it to your regular rotation. It’s the perfect way to satisfy your sweet tooth while still keeping your sanity intact!
Ingredients You’ll Need
Alright, let’s dive into the heart of our Salted Caramel Chocolate Tart—the ingredients! Each one plays a vital role in creating that rich, indulgent flavor we all crave. Here’s what you’ll need:
- 1 1/2 cups all-purpose flour: This is the base of our tart crust. It gives structure and a lovely texture. If you’re looking for a gluten-free option, you can easily swap this out for a gluten-free flour blend. Just make sure it’s a 1:1 substitute!
- 1/2 cup unsweetened cocoa powder: This adds that deep chocolate flavor we all adore. It’s what makes the crust so rich and decadent. You could also use Dutch-processed cocoa for a slightly different taste.
- 1/2 cup powdered sugar: This sweetens the crust and gives it a nice, tender crumb. If you’re watching your sugar intake, feel free to use coconut sugar instead. It’s a great natural alternative!
- 1/4 teaspoon salt: A pinch of salt enhances all the flavors in the tart. It’s like a secret ingredient that brings everything together. Don’t skip it!
- 1/2 cup unsalted butter, chilled and cubed: Butter is the magic that makes the crust flaky and delicious. Make sure it’s cold for the best texture. If you want a dairy-free option, you can use coconut oil, but the flavor will be a bit different.
- 1 large egg yolk: This helps bind the crust together and adds richness. If you’re looking for an egg-free version, you can use a flax egg (1 tablespoon ground flaxseed mixed with 2.5 tablespoons water) as a substitute.
- 2 tablespoons cold water: This is just enough to bring the dough together. If you find your dough is too dry, add a little more water, one teaspoon at a time.
- 1 cup granulated sugar: This is the star of our salted caramel filling. It’s what gives that beautiful sweetness and caramel flavor. If you want to cut down on refined sugar, you can use a natural sweetener like maple syrup, but the texture will change a bit.
- 1/4 cup water: This helps dissolve the sugar when making the caramel. It’s essential for achieving that perfect amber color.
- 1/2 cup heavy cream: This adds creaminess to the caramel filling. If you’re looking for a lighter option, you can use half-and-half, but the flavor won’t be quite as rich.
- 1/4 teaspoon sea salt: This is the magic touch that transforms our caramel into something extraordinary. It balances the sweetness and enhances the chocolate flavor. Feel free to adjust to your taste!
- 8 ounces semi-sweet chocolate, chopped: This is what makes the filling so luscious and chocolatey. You can use dark chocolate if you prefer a richer taste, or even milk chocolate for a sweeter option.
- 1 teaspoon vanilla extract: A splash of vanilla adds depth to the flavor. You can also use almond extract for a unique twist!
Now that you know what goes into this delightful Salted Caramel Chocolate Tart, you can see how each ingredient contributes to the overall experience. It’s all about balance and flavor, and I promise, once you gather these ingredients, you’ll be on your way to creating a dessert that will wow your family and friends!
How to Make Salted Caramel Chocolate Tart
Step 1 – Prep Ingredients
Alright, let’s roll up our sleeves and get started on this Salted Caramel Chocolate Tart! First things first, gather all your ingredients and tools. You’ll need a mixing bowl, a whisk, a rubber spatula, and of course, your trusty 9-inch tart pan. Oh, and don’t forget to preheat your oven to 350°F (175°C). This is crucial because we want that oven nice and toasty for our tart crust!
Step 2 – Begin Cooking
Now that we’re all set, let’s dive into the fun part! In your mixing bowl, combine the all-purpose flour, unsweetened cocoa powder, powdered sugar, and salt. Give it a good whisk to mix everything together. It’s like a little dance party for your dry ingredients!
Next, add the chilled, cubed butter to the bowl. Using your fingers or a pastry cutter, mix it in until the mixture resembles coarse crumbs. You want it to look a bit like sand—this is what will give our crust that flaky texture. If you’re feeling fancy, you can even use a food processor for this step. Just pulse until you reach that crumbly goodness!
Step 3 – Combine Ingredients
Once you’ve got those lovely crumbs, it’s time to bring it all together. Stir in the egg yolk and cold water until the dough starts to come together. Don’t be afraid to get your hands in there! It’s a bit messy, but that’s part of the fun. If the dough feels too dry, add a little more cold water, one teaspoon at a time.
Now, press the dough evenly into your 9-inch tart pan, making sure to cover the bottom and sides. It’s like giving your tart a cozy little blanket! Once that’s done, prick the bottom with a fork to prevent it from puffing up while baking. Pop it in the oven and bake for 15-20 minutes, or until it’s set. Let it cool completely before we move on to the next step.
Step 4 – Finish and Serve
Now for the pièce de résistance—the salted caramel filling! In a saucepan, combine the granulated sugar and water over medium heat. Stir gently until the sugar dissolves, then increase the heat and let it cook without stirring. Keep an eye on it as it turns a beautiful deep amber color. This is where the magic happens!
Once it reaches that gorgeous color, remove it from the heat and carefully whisk in the heavy cream and sea salt. Be cautious, as it will bubble up like a volcano! After that, add the chopped chocolate and vanilla extract, stirring until it’s all smooth and silky. Your kitchen will smell divine at this point!
Pour that luscious chocolate caramel filling into your cooled tart shell, spreading it evenly. Now, here’s the hard part—resist the urge to dive in right away! Refrigerate the tart for at least 2 hours to let it set. Trust me, the wait will be worth it!
And there you have it! Your very own Salted Caramel Chocolate Tart is ready to impress. Once it’s set, slice it up, serve it with a drizzle of extra salted caramel if you’re feeling extra indulgent, and watch as your family and friends fall in love with every bite!
Tips for Perfect Results
Now that you’re all set to create your Salted Caramel Chocolate Tart, let me share some of my favorite tips to ensure you achieve perfect results every time. Trust me, these little nuggets of wisdom can make a world of difference!
- 1. Use chilled ingredients for a flakier crust: This is a game changer! When making the crust, make sure your butter is nice and cold. Chilled ingredients help create that flaky texture we all love. If you have time, you can even chill your mixing bowl and utensils. It’s like giving your dough a spa day!
- 2. Allow the tart to cool completely before adding the filling: I know it’s tempting to pour that luscious salted caramel filling into the crust right away, but patience is key here. Letting the crust cool completely ensures that the filling doesn’t melt into the crust, which can lead to a soggy bottom. Nobody wants that! So, take a breather, maybe enjoy a cup of tea, and let the tart cool down.
- 3. Drizzle extra salted caramel on top for an elegant presentation: If you want to take your tart to the next level, consider drizzling some extra salted caramel on top before serving. It adds a beautiful touch and makes it look like you spent hours in the kitchen (even though we know you didn’t!). Plus, who doesn’t love a little extra sweetness? It’s like the cherry on top of an already fabulous dessert!
With these tips in your back pocket, you’re well on your way to creating a stunning Salted Caramel Chocolate Tart that will have everyone raving. So, roll up your sleeves, have fun in the kitchen, and enjoy the delicious results!
Essential Equipment Needed
Before we dive into making our Salted Caramel Chocolate Tart, let’s talk about the essential equipment you’ll need. Having the right tools on hand can make the process smoother and more enjoyable. Trust me, I’ve learned this the hard way! Here’s what you’ll need:
- 9-inch tart pan: This is the star of the show! A tart pan with a removable bottom is ideal because it makes it super easy to take the tart out once it’s set. If you don’t have one, a regular pie dish will work too, but the presentation won’t be quite as fancy.
- Mixing bowls: You’ll need a couple of mixing bowls—one for the crust and another for the filling. I like to use glass bowls because they’re sturdy and you can see what’s going on inside. Plus, they’re easy to clean!
- Whisk: A good whisk is essential for mixing your ingredients together, especially when you’re making that luscious caramel filling. It helps incorporate air and ensures everything is well combined. If you don’t have a whisk, a fork will do in a pinch!
- Saucepan: You’ll need a medium-sized saucepan for cooking the sugar and water to make the caramel. A heavy-bottomed pan is best because it distributes heat evenly, preventing the sugar from burning. We want that beautiful amber color, not a burnt mess!
- Rubber spatula: This handy tool is perfect for scraping down the sides of your mixing bowls and ensuring you get every last bit of that delicious filling into your tart. Plus, it’s great for folding ingredients together without overmixing.
- Rolling pin (optional): If you prefer to roll out your tart dough instead of pressing it into the pan, a rolling pin will come in handy. It’s not necessary for this recipe, but if you’re feeling fancy, go for it! Just make sure to flour your surface to prevent sticking.
With these essential tools in your kitchen arsenal, you’ll be well-equipped to tackle the Salted Caramel Chocolate Tart. Remember, having the right equipment can make all the difference in your cooking experience. So gather your tools, and let’s get ready to create something delicious!
Delicious Variations of Salted Caramel Chocolate Tart
Now that you’ve mastered the classic Salted Caramel Chocolate Tart, let’s have some fun with variations! One of the best things about this recipe is its versatility. You can easily tweak it to suit your taste or dietary preferences. Here are a few delicious ideas to get your creative juices flowing:
1. Add finely ground nuts to the crust for a nutty flavor: If you’re a fan of nuts, consider adding 1/2 cup of finely ground nuts—like almonds or hazelnuts—to your crust mixture. This not only adds a delightful crunch but also enhances the flavor profile of the tart. Just imagine that nutty aroma mingling with the rich chocolate and salted caramel! It’s like a party for your taste buds. Plus, it gives the crust a lovely texture that pairs beautifully with the smooth filling.
2. Substitute dark chocolate for a richer taste: For those who crave a deeper chocolate experience, swapping out the semi-sweet chocolate for dark chocolate is a fantastic option. Dark chocolate has a more intense flavor and a slight bitterness that balances perfectly with the sweetness of the caramel. It’s like a match made in dessert heaven! Just be sure to choose a high-quality dark chocolate with at least 70% cocoa for the best results. Your friends and family will be raving about this decadent twist!
3. Create a gluten-free version using almond flour: If you or someone in your family is gluten-sensitive, fear not! You can easily make a gluten-free version of this Salted Caramel Chocolate Tart by substituting the all-purpose flour with almond flour. This not only makes the tart gluten-free but also adds a lovely nutty flavor that complements the chocolate and caramel beautifully. Just keep in mind that almond flour tends to be a bit denser, so you may need to adjust the amount slightly. But trust me, the end result will be just as delicious!
These variations are just the tip of the iceberg! Feel free to experiment and make this Salted Caramel Chocolate Tart your own. Whether you’re adding nuts, switching up the chocolate, or going gluten-free, the possibilities are endless. So, roll up your sleeves, get creative, and enjoy the process of making this delightful dessert even more special!
Serving Suggestions
Now that you’ve created your stunning Salted Caramel Chocolate Tart, let’s talk about how to serve it up for maximum enjoyment! Presentation is key, and the right accompaniments can elevate your dessert experience to a whole new level. Here are some delightful serving suggestions that I absolutely love:
1. Pair with fresh berries or a scoop of vanilla ice cream: There’s something magical about the combination of rich chocolate and the bright, tart flavor of fresh berries. Think strawberries, raspberries, or even blueberries! Their natural sweetness and slight acidity cut through the richness of the tart, creating a perfect balance. Just imagine taking a bite of that luscious tart, followed by a burst of juicy berries—it’s like a flavor explosion in your mouth!
If you’re feeling extra indulgent, why not add a scoop of creamy vanilla ice cream on the side? The cold, velvety ice cream melts into the warm chocolate filling, creating a delightful contrast in temperature and texture. It’s a classic pairing that never goes out of style. Plus, who can resist a little ice cream on top of a decadent dessert? It’s like the cherry on top of an already fabulous sundae!
2. Serve with a cup of coffee or herbal tea for a delightful afternoon treat: There’s nothing quite like enjoying a slice of Salted Caramel Chocolate Tart with a warm cup of coffee or a soothing herbal tea. The rich flavors of the tart pair beautifully with a robust cup of coffee, enhancing the chocolate notes and making for a truly satisfying experience. It’s the perfect pick-me-up for those busy afternoons when you need a little something sweet to recharge!
If you prefer something lighter, a cup of herbal tea—like chamomile or peppermint—can be a lovely complement. The gentle flavors of the tea won’t overpower the tart, allowing the chocolate and caramel to shine. Plus, it adds a touch of elegance to your dessert presentation. Imagine serving this delightful combination at a cozy afternoon gathering with friends or family. It’s sure to impress!
So, whether you choose to pair your Salted Caramel Chocolate Tart with fresh berries, a scoop of ice cream, or a comforting cup of coffee or tea, you can’t go wrong. These serving suggestions will not only enhance the flavors but also create a memorable experience for you and your loved ones. Enjoy every delicious bite!
FAQs About Salted Caramel Chocolate Tart
As you embark on your journey to create this delightful Salted Caramel Chocolate Tart, you might have a few questions swirling in your mind. Don’t worry; I’ve got you covered! Here are some frequently asked questions that can help you navigate the process and enjoy this indulgent dessert to the fullest.
Can I make this tart ahead of time?
Absolutely! One of the best things about this Salted Caramel Chocolate Tart is that it can be made a day in advance. Just prepare it, let it set in the refrigerator, and you’ll have a stunning dessert ready to impress your family or guests. It’s a real time-saver for those busy days when you want to get a head start on your meal prep!
How do I store leftovers?
If you happen to have any leftovers (which is rare, but it can happen!), simply keep the tart covered in the refrigerator. It will stay fresh for up to 3 days. Just make sure to cover it well to prevent it from absorbing any odors from the fridge. You want that rich chocolate and salted caramel flavor to shine through!
Can I freeze the tart?
Yes, you can! If you want to make this Salted Caramel Chocolate Tart ahead of time and store it for later, wrap it tightly in plastic wrap or aluminum foil and freeze it for up to a month. When you’re ready to enjoy it, just thaw it in the refrigerator overnight before serving. It’s like having a little slice of heaven waiting for you whenever you need a sweet treat!
With these FAQs in mind, you’re all set to tackle your Salted Caramel Chocolate Tart with confidence. Whether you’re making it ahead of time, storing leftovers, or freezing it for a later date, you can enjoy this delicious dessert without any worries. Happy baking!
Final Thoughts on Salted Caramel Chocolate Tart
As I sit here, savoring the last bite of my Salted Caramel Chocolate Tart, I can’t help but reflect on how easy and indulgent this dessert truly is. It’s like a little piece of heaven that you can whip up without spending hours in the kitchen. For busy women like us, that’s a win-win! The combination of rich chocolate and luscious salted caramel is not just a treat for the taste buds; it’s a moment of pure joy amidst our hectic lives.
What I love most about this tart is how it brings people together. Whether it’s a family gathering, a cozy dinner with friends, or just a quiet evening at home, this dessert has a way of making any occasion feel special. It’s the kind of treat that elicits smiles and happy sighs, and let’s be honest, who doesn’t want to be the one who brings that kind of joy to the table?
So, if you’re looking for a delicious dessert that will impress your family and friends without requiring extensive time in the kitchen, I wholeheartedly encourage you to try this Salted Caramel Chocolate Tart. It’s simple, elegant, and oh-so-satisfying. Plus, the best part? You can make it ahead of time, leaving you free to enjoy the company of your loved ones without the stress of last-minute baking.
Trust me, once you take that first bite, you’ll understand why this tart has become a staple in my dessert repertoire. It’s a delightful way to treat yourself and those you care about, and I can’t wait for you to experience the magic of this recipe. So, roll up your sleeves, gather your ingredients, and let’s create something truly special together!
“`
Print
Salted Caramel Chocolate Tart: A Delicious Treat Awaits!
- Total Time: 2 hours 50 minutes
- Yield: Serves 8
- Diet: Vegetarian
Description
A rich and indulgent Salted Caramel Chocolate Tart that combines a chocolate crust with a luscious salted caramel filling.
Ingredients
- 1 1/2 cups all-purpose flour
- 1/2 cup unsweetened cocoa powder
- 1/2 cup powdered sugar
- 1/4 teaspoon salt
- 1/2 cup unsalted butter, chilled and cubed
- 1 large egg yolk
- 2 tablespoons cold water
- 1 cup granulated sugar
- 1/4 cup water
- 1/2 cup heavy cream
- 1/4 teaspoon sea salt
- 8 ounces semi-sweet chocolate, chopped
- 1 teaspoon vanilla extract
Instructions
- Preheat the oven to 350°F (175°C).
- In a mixing bowl, combine the flour, cocoa powder, powdered sugar, and salt.
- Add the chilled butter and mix until the mixture resembles coarse crumbs.
- Stir in the egg yolk and cold water until the dough comes together.
- Press the dough into a 9-inch tart pan evenly across the bottom and up the sides.
- Prick the bottom with a fork and bake for 15-20 minutes or until set. Let cool.
- In a saucepan, combine the granulated sugar and water over medium heat. Stir until the sugar dissolves.
- Increase the heat and cook without stirring until the mixture turns a deep amber color.
- Remove from heat and carefully whisk in the heavy cream and sea salt (it will bubble up).
- Add the chopped chocolate and vanilla extract, stirring until smooth.
- Pour the chocolate caramel filling into the cooled tart shell.
- Refrigerate for at least 2 hours to set before serving.
Notes
- For a nutty flavor, add 1/2 cup of finely ground nuts to the crust mixture.
- Drizzle extra salted caramel on top before serving for an added touch of sweetness.
- Prep Time: 30 minutes
- Cook Time: 20 minutes
- Category: Dessert
- Method: Baking
- Cuisine: American
Nutrition
- Serving Size: 1 slice
- Calories: 320
- Sugar: 28g
- Sodium: 200mg
- Fat: 20g
- Saturated Fat: 12g
- Unsaturated Fat: 8g
- Trans Fat: 0g
- Carbohydrates: 28g
- Fiber: 2g
- Protein: 4g
- Cholesterol: 50mg
Keywords: Salted Caramel Chocolate Tart, dessert, chocolate tart, salted caramel


