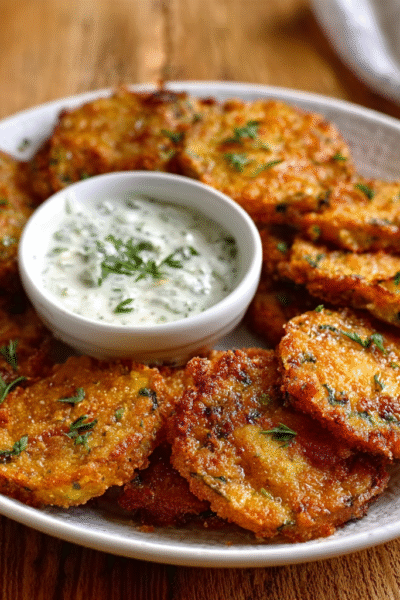
Pumpkin Crisp: Discover the Ultimate Fall Dessert Recipe!

gutenberg
Why You’ll Love This Pumpkin Crisp
Let me tell you, if you’re a busy woman juggling work, family, and everything in between, this Pumpkin Crisp is about to become your new best friend in the kitchen. Seriously, it’s like a warm hug on a chilly fall evening, and it’s so easy to whip up that you’ll wonder why you didn’t try it sooner!
First off, let’s talk about the prep time. With just 15 minutes of hands-on work, you can have this delightful dessert in the oven, filling your home with the cozy aroma of pumpkin and spices. I mean, who doesn’t love the smell of cinnamon wafting through the air? It’s like a warm invitation to gather around the table with your loved ones.
And cleanup? A breeze! You’ll only need a couple of mixing bowls and a baking dish. No complicated gadgets or endless pots and pans to wash. Just a quick rinse, and you’re done! This is a lifesaver for those evenings when you’re already exhausted from a long day.
Now, let’s not forget about the flavors. This Pumpkin Crisp is a crowd-pleaser, appealing to both adults and kids alike. The creamy pumpkin filling is perfectly spiced, and the crispy oat topping adds that delightful crunch. It’s like a party in your mouth! I’ve served this to my family countless times, and it never fails to bring smiles and satisfied sighs. Even my picky eater, who usually turns his nose up at anything resembling a vegetable, can’t resist a second helping!
Plus, it’s versatile! You can serve it warm with a dollop of whipped cream or a scoop of vanilla ice cream for that extra indulgence. Or, if you’re feeling a bit more health-conscious, enjoy it plain or with a sprinkle of nuts on top. Either way, it’s a win-win!
So, if you’re looking for a dessert that’s not only delicious but also quick and easy to make, this Pumpkin Crisp is your answer. It’s the perfect way to embrace the flavors of fall without adding stress to your already busy life. Trust me, once you try it, you’ll be adding it to your regular rotation!
Introduction to Pumpkin Crisp
Ah, fall! The season of cozy sweaters, colorful leaves, and, of course, pumpkin everything! If you’re like me, you can’t resist the allure of pumpkin-flavored treats as soon as the first chill hits the air. That’s where Pumpkin Crisp comes in—a delightful dessert that captures all the warm, comforting flavors of autumn in one easy-to-make dish.
Picture this: a creamy pumpkin filling, perfectly spiced with cinnamon and nutmeg, topped with a crunchy oat mixture that’s just begging to be paired with a scoop of ice cream. It’s like a hug in dessert form! And the best part? You can have it ready to serve in just over an hour, making it the perfect solution for busy women like us who are always on the go.
Whether you’re a mom trying to whip up something special for the family after a long day or a professional looking to impress friends at a gathering, this Pumpkin Crisp is your secret weapon. It’s quick, satisfying, and sure to please even the pickiest of eaters. I can’t tell you how many times I’ve had friends and family ask for the recipe after just one bite. It’s that good!
So, if you’re ready to embrace the flavors of fall without spending hours in the kitchen, let’s dive into this delightful dessert. Trust me, your taste buds will thank you, and your loved ones will be begging for seconds!
Why You’ll Love This Pumpkin Crisp
Let me tell you, if you’re a busy woman juggling work, family, and everything in between, this Pumpkin Crisp is about to become your new best friend in the kitchen. Seriously, it’s like a warm hug on a chilly fall evening, and it’s so easy to whip up that you’ll wonder why you didn’t try it sooner!
First off, let’s talk about the prep time. With just 15 minutes of hands-on work, you can have this delightful dessert in the oven, filling your home with the cozy aroma of pumpkin and spices. I mean, who doesn’t love the smell of cinnamon wafting through the air? It’s like a warm invitation to gather around the table with your loved ones.
And cleanup? A breeze! You’ll only need a couple of mixing bowls and a baking dish. No complicated gadgets or endless pots and pans to wash. Just a quick rinse, and you’re done! This is a lifesaver for those evenings when you’re already exhausted from a long day.
Now, let’s not forget about the flavors. This Pumpkin Crisp is a crowd-pleaser, appealing to both adults and kids alike. The creamy pumpkin filling is perfectly spiced, and the crispy oat topping adds that delightful crunch. It’s like a party in your mouth! I’ve served this to my family countless times, and it never fails to bring smiles and satisfied sighs. Even my picky eater, who usually turns his nose up at anything resembling a vegetable, can’t resist a second helping!
Plus, it’s versatile! You can serve it warm with a dollop of whipped cream or a scoop of vanilla ice cream for that extra indulgence. Or, if you’re feeling a bit more health-conscious, enjoy it plain or with a sprinkle of nuts on top. Either way, it’s a win-win!
So, if you’re looking for a dessert that’s not only delicious but also quick and easy to make, this Pumpkin Crisp is your answer. It’s the perfect way to embrace the flavors of fall without adding stress to your already busy life. Trust me, once you try it, you’ll be adding it to your regular rotation!
Ingredients You’ll Need
Alright, let’s get down to the nitty-gritty—the ingredients that will transform your kitchen into a cozy fall haven with this Pumpkin Crisp. Here’s what you’ll need:
- 1 can (15 oz) pumpkin puree: This is the star of the show! It gives the crisp its rich, creamy texture and that classic pumpkin flavor we all adore. You can also use homemade pumpkin puree if you’re feeling adventurous!
- 1 cup brown sugar: This adds sweetness and a hint of molasses flavor, which complements the pumpkin beautifully. If you’re looking for a healthier option, try using coconut sugar instead—it’s a great swap that still gives you that caramel-like taste.
- 1/2 cup granulated sugar: Just a little extra sweetness to balance everything out. If you want to cut down on sugar, you can reduce this amount or use a sugar substitute like Stevia.
- 1/2 cup milk: This helps to create a smooth filling. You can easily swap this for almond milk, oat milk, or any other non-dairy milk if you prefer a dairy-free version.
- 3 large eggs: These are essential for binding everything together and giving the filling a lovely custard-like consistency. If you’re looking for an egg substitute, try using flax eggs (1 tablespoon of ground flaxseed mixed with 2.5 tablespoons of water per egg) for a vegan option.
- 1 teaspoon vanilla extract: A splash of vanilla adds depth and warmth to the flavor profile. You can use vanilla bean paste for an even richer taste!
- 1 teaspoon ground cinnamon: This spice is a must for that warm, cozy fall flavor. Freshly ground cinnamon can elevate the taste even more, so if you have it, go for it!
- 1/2 teaspoon ground nutmeg: Nutmeg adds a lovely aromatic quality that pairs perfectly with pumpkin. Just a pinch goes a long way, so don’t overdo it!
- 1/4 teaspoon ground ginger: This gives a little zing to the mix. If you have fresh ginger on hand, you can grate a small amount instead for a fresher flavor.
- 1/4 teaspoon salt: A little salt enhances all the flavors and balances the sweetness. Don’t skip this step!
- 1 cup rolled oats: These create the crispy topping that contrasts beautifully with the creamy pumpkin filling. If you’re gluten-free, make sure to use certified gluten-free oats.
- 1/2 cup all-purpose flour: This helps to bind the oat topping together. You can substitute with almond flour or a gluten-free flour blend if you need a gluten-free option.
- 1/2 cup unsalted butter, melted: This adds richness and helps the topping crisp up nicely. If you’re looking for a healthier fat, you can use coconut oil instead.
With these ingredients, you’re well on your way to creating a delicious Pumpkin Crisp that will have everyone asking for seconds. And remember, cooking is all about experimenting! Feel free to mix and match based on what you have in your pantry or your dietary preferences. Let’s get cooking!
How to Make Pumpkin Crisp
Now that you’ve gathered all your ingredients, it’s time to roll up your sleeves and dive into the delightful process of making this Pumpkin Crisp. Trust me, it’s as easy as pie—well, easier, actually! Let’s get started!
Step 1 – Prep Ingredients
First things first, let’s get everything ready. Gather all your ingredients and set them out on the counter. This makes the process smoother and helps you avoid that last-minute scramble for the brown sugar you forgot to take out!
Next, preheat your oven to 350°F (175°C). This is crucial because you want your Pumpkin Crisp to bake evenly and come out perfectly golden brown. While the oven is heating up, take a moment to enjoy the anticipation of that warm, spicy aroma that will soon fill your kitchen!
Step 2 – Begin Cooking
In a large mixing bowl, combine the pumpkin puree, brown sugar, granulated sugar, milk, eggs, vanilla extract, cinnamon, nutmeg, ginger, and salt. I like to use a whisk for this part—it really helps to blend everything together smoothly. Just imagine the colors swirling together, creating a beautiful, creamy mixture that’s bursting with fall flavors!
Mix until everything is well combined. You want a smooth consistency, so take your time here. Once it’s all mixed, you’ll be left with a luscious pumpkin filling that’s just begging to be poured into a baking dish.
Step 3 – Combine Ingredients
Now, grab a greased baking dish (I usually use a 9×13 inch dish) and pour that glorious pumpkin mixture right in. Spread it out evenly with a spatula, making sure every corner is covered. This is where the magic begins!
In another bowl, combine the rolled oats, flour, and melted butter. Mix it all together until it resembles a crumbly topping. It should feel a bit like wet sand—moist but still crumbly. This topping is what gives your Pumpkin Crisp that delightful crunch, so don’t skip this step!
Step 4 – Finish and Serve
Now comes the fun part! Sprinkle the oat mixture evenly over the pumpkin layer. Don’t worry about making it perfect; a little unevenness adds to the charm of homemade desserts!
Pop the baking dish into your preheated oven and let it bake for 45-50 minutes. You’ll know it’s done when the top is golden brown and the pumpkin layer is set. The smell wafting through your home will be absolutely irresistible—trust me, your family will come running!
Once it’s out of the oven, let it cool for a few minutes before serving. This is the hardest part, I know! But just imagine the first bite of that warm, spiced pumpkin filling paired with the crispy topping. It’s worth the wait!
And there you have it! A simple, delicious Pumpkin Crisp that’s sure to become a favorite in your home. Now, go ahead and dig in—you’ve earned it!
Tips for Perfect Results
Now that you’re all set to make your Pumpkin Crisp, let me share some tried-and-true tips that will help you achieve perfect results every time. After all, we want this dessert to be as delightful as the season itself!
1. Use Fresh Spices for Enhanced Flavor: You might not think about it, but the freshness of your spices can make a world of difference in your Pumpkin Crisp. If you have whole spices, consider grinding them just before use. Freshly ground cinnamon, nutmeg, and ginger will elevate the flavor profile to a whole new level. It’s like giving your dessert a little extra love!
2. Consider Prepping Ingredients the Night Before: Life can get hectic, and sometimes the last thing you want to do is spend time measuring and mixing. To save time, prep your ingredients the night before. Measure out your sugars, spices, and oats, and store them in separate containers. You can even mix the pumpkin filling and keep it in the fridge overnight. This way, when you’re ready to bake, all you have to do is combine everything and pop it in the oven. It’s a game-changer!
3. Store Leftovers in an Airtight Container for Easy Access: If you happen to have any leftovers (which is rare in my house!), make sure to store them properly. Let the Pumpkin Crisp cool completely, then transfer it to an airtight container. It will keep in the refrigerator for up to three days. This makes for a quick and easy dessert option later in the week. Just reheat a slice in the microwave, and you’ll have a cozy treat ready in no time!
With these tips in your back pocket, you’re well on your way to creating a Pumpkin Crisp that’s not only delicious but also perfectly executed. Happy baking!
Essential Equipment Needed
Before we dive into the deliciousness of making Pumpkin Crisp, let’s talk about the essential equipment you’ll need. Don’t worry; it’s nothing fancy! Just a few basic tools that you probably already have in your kitchen. Here’s what you’ll need:
- Mixing Bowls: You’ll need a couple of mixing bowls—one for the pumpkin filling and another for the oat topping. I recommend using a large bowl for the filling so you have plenty of room to mix everything together without making a mess. Trust me, I’ve had my fair share of flour explosions!
- Baking Dish: A 9×13 inch baking dish is perfect for this recipe. It allows the Pumpkin Crisp to bake evenly and gives you those lovely, golden edges. If you don’t have one, any similar-sized dish will do. Just make sure it’s oven-safe!
- Whisk: A good whisk is essential for blending the pumpkin filling smoothly. It helps to incorporate air into the mixture, making it light and fluffy. If you don’t have a whisk, a fork will work in a pinch, but I promise you’ll love the ease of using a whisk!
- Measuring Cups and Spoons: Accurate measurements are key to a successful Pumpkin Crisp. Make sure you have a set of measuring cups for dry ingredients and a set for liquids. It’s a small investment that pays off big time in the kitchen!
- Spatula: A spatula is your best friend when it comes to spreading the pumpkin filling evenly in the baking dish and for serving up those delicious portions once it’s baked. I recommend a silicone spatula for easy scraping and mixing.
With these essential tools in hand, you’re all set to create a Pumpkin Crisp that will warm your heart and delight your taste buds. So, gather your equipment, and let’s get baking!
Delicious Variations of Pumpkin Crisp
Now that you’ve mastered the classic Pumpkin Crisp, let’s have some fun with variations! After all, who says you can’t mix things up a bit? Here are a few delightful twists that will keep your taste buds dancing and your family coming back for more.
1. Add Chocolate Chips for a Sweet Twist: If you’re a chocolate lover like me, this variation is a must-try! Simply fold in a cup of semi-sweet or dark chocolate chips into the pumpkin mixture before pouring it into the baking dish. The rich chocolate pairs beautifully with the spiced pumpkin, creating a dessert that’s both comforting and indulgent. It’s like a cozy fall hug with a sweet surprise! Just imagine that first bite—creamy pumpkin, crunchy topping, and a burst of chocolate. Heaven!
2. Substitute Oats with Gluten-Free Oats: For those of you who are gluten-sensitive or simply prefer a gluten-free option, fear not! You can easily swap out regular rolled oats for certified gluten-free oats. This small change allows everyone to enjoy the deliciousness of Pumpkin Crisp without any worries. Plus, the texture remains just as delightful, with that satisfying crunch on top. It’s a win-win for all your gluten-free friends and family!
3. Use Maple Syrup Instead of Brown Sugar: If you’re looking to add a unique flavor twist, consider using pure maple syrup in place of brown sugar. Not only does it lend a lovely sweetness, but it also infuses the Pumpkin Crisp with a warm, earthy flavor that’s simply irresistible. Just remember to reduce the amount of milk slightly, as maple syrup adds extra liquid to the mix. This variation is perfect for those who love that classic maple taste, reminiscent of cozy breakfasts on a crisp fall morning.
These variations are just the tip of the iceberg! Feel free to get creative and experiment with your own ideas. Maybe you want to add some chopped nuts for extra crunch or a sprinkle of coconut for a tropical twist. The possibilities are endless! The beauty of this Pumpkin Crisp is its versatility, allowing you to tailor it to your family’s preferences and dietary needs. So, roll up your sleeves and let your culinary creativity shine!
Serving Suggestions
Now that you’ve whipped up a delicious Pumpkin Crisp, let’s talk about how to serve it up for maximum enjoyment! After all, presentation can make a world of difference, and who doesn’t love a little extra indulgence?
1. Serve Warm with a Dollop of Whipped Cream or a Scoop of Vanilla Ice Cream: There’s something magical about warm desserts, especially when they’re topped with a fluffy dollop of whipped cream or a generous scoop of vanilla ice cream. The cold creaminess of the ice cream contrasts beautifully with the warm, spiced pumpkin filling, creating a delightful experience for your taste buds. Just imagine that first bite—creamy pumpkin, crunchy topping, and the coolness of ice cream melting into every delicious layer. It’s pure bliss!
If you’re feeling a bit fancy, you can even make your own whipped cream by whipping heavy cream with a touch of sugar and vanilla extract. It’s super easy and adds a special touch that your family and friends will appreciate. Plus, it’s a great way to impress your guests at a fall gathering!
2. Pair with a Warm Spiced Apple Cider for a Cozy Fall Experience: To elevate your Pumpkin Crisp experience even further, consider pairing it with a warm spiced apple cider. The sweet and tangy flavors of the cider complement the pumpkin perfectly, creating a cozy, autumnal vibe that’s hard to resist. You can easily make your own spiced apple cider by simmering apple juice with cinnamon sticks, cloves, and a few slices of fresh ginger. The aroma alone will have everyone gathering around the kitchen, eager to dig into that Pumpkin Crisp!
Imagine curling up on the couch with a slice of warm Pumpkin Crisp in one hand and a steaming mug of spiced apple cider in the other. It’s the perfect way to embrace the fall season and create lasting memories with your loved ones. So, go ahead and serve it up with style—your family will thank you for it!
Whether you choose to indulge with ice cream or keep it cozy with cider, one thing is for sure: this Pumpkin Crisp is bound to be a hit at your table. Enjoy every bite, and don’t forget to share the love with those around you!
FAQs About Pumpkin Crisp
As you embark on your journey to create this delightful Pumpkin Crisp, you might have a few questions swirling around in your mind. Don’t worry; I’ve got you covered! Here are some frequently asked questions that will help you navigate this delicious dessert with ease.
Can I make Pumpkin Crisp ahead of time?
Absolutely! One of the best things about this Pumpkin Crisp is that it can be made ahead of time. You can prepare it a day or two in advance and simply reheat it before serving. Just let it cool completely after baking, then cover it tightly and store it in the refrigerator. When you’re ready to enjoy it, pop it in the oven at 350°F (175°C) for about 15-20 minutes, or until warmed through. This makes it a fantastic option for busy weeknights or holiday gatherings!
Is Pumpkin Crisp suitable for vegetarians?
Absolutely! This recipe is vegetarian-friendly, making it a great choice for anyone looking to enjoy a delicious dessert without any meat or animal products. The ingredients are all plant-based, so you can feel good about serving it to your vegetarian friends and family. Plus, it’s so tasty that even the meat-lovers will be coming back for seconds!
How should I store leftovers?
If you happen to have any leftovers (which is rare in my house!), storing them properly is key to keeping that deliciousness intact. Allow the Pumpkin Crisp to cool completely, then transfer it to an airtight container. It will keep in the refrigerator for up to 3 days. When you’re ready to enjoy a slice, simply reheat it in the microwave for a quick treat or pop it back in the oven for that freshly baked taste. Trust me, it’s just as good the next day!
With these FAQs in mind, you’re all set to tackle your Pumpkin Crisp adventure with confidence. Enjoy the process, and don’t hesitate to reach out if you have any other questions along the way. Happy baking!

Final Thoughts on Pumpkin Crisp
As we wrap up our journey through the delightful world of Pumpkin Crisp, I can’t help but reflect on just how easy and satisfying this recipe truly is. It’s like a little slice of fall that you can whip up in no time, bringing warmth and joy to your kitchen and your family. Seriously, if you’re looking for a dessert that’s not only delicious but also simple to make, this is it!
Every time I pull a warm Pumpkin Crisp out of the oven, I’m reminded of the cozy gatherings with family and friends, the laughter shared over a slice, and the smiles that follow each bite. It’s a dessert that invites everyone to the table, creating moments that linger long after the last crumb is gone. And let’s be honest, who doesn’t need a little more comfort in their life, especially during the bustling fall season?
I encourage you to give this recipe a try. Whether you’re hosting a gathering, celebrating a special occasion, or just looking for a sweet treat to enjoy after dinner, this Pumpkin Crisp is sure to impress. Plus, it’s versatile enough to adapt to your family’s tastes—add chocolate chips, swap in gluten-free oats, or even experiment with different spices. The possibilities are endless!
So, roll up your sleeves, gather your ingredients, and let the aroma of pumpkin and spices fill your home. I promise you won’t regret it. Embrace the flavors of fall, create lasting memories with your loved ones, and enjoy every delicious bite of this Pumpkin Crisp. Happy baking, and may your kitchen be filled with warmth and love!
“`
Print
Pumpkin Crisp: Discover the Ultimate Fall Dessert Recipe!
- Total Time: 1 hour 5 minutes
- Yield: 8 servings 1x
- Diet: Vegetarian
Description
A delicious and easy-to-make dessert that combines the flavors of pumpkin and spices, topped with a crispy oat topping.
Ingredients
- 1 can (15 oz) pumpkin puree
- 1 cup brown sugar
- 1/2 cup granulated sugar
- 1/2 cup milk
- 3 large eggs
- 1 teaspoon vanilla extract
- 1 teaspoon ground cinnamon
- 1/2 teaspoon ground nutmeg
- 1/4 teaspoon ground ginger
- 1/4 teaspoon salt
- 1 cup rolled oats
- 1/2 cup all-purpose flour
- 1/2 cup unsalted butter, melted
Instructions
- Preheat the oven to 350°F (175°C).
- In a large bowl, mix together the pumpkin puree, brown sugar, granulated sugar, milk, eggs, vanilla extract, cinnamon, nutmeg, ginger, and salt until well combined.
- Pour the pumpkin mixture into a greased baking dish.
- In another bowl, combine the rolled oats, flour, and melted butter. Mix until crumbly.
- Sprinkle the oat mixture evenly over the pumpkin layer.
- Bake for 45-50 minutes, or until the top is golden brown and the pumpkin layer is set.
- Let cool for a few minutes before serving.
Notes
- Serve warm with whipped cream or ice cream for added indulgence.
- Can be made ahead of time and reheated before serving.
- Store leftovers in the refrigerator for up to 3 days.
- Prep Time: 15 minutes
- Cook Time: 50 minutes
- Category: Dessert
- Method: Baking
- Cuisine: American
Nutrition
- Serving Size: 1 serving
- Calories: 250
- Sugar: 20g
- Sodium: 150mg
- Fat: 10g
- Saturated Fat: 5g
- Unsaturated Fat: 3g
- Trans Fat: 0g
- Carbohydrates: 35g
- Fiber: 3g
- Protein: 4g
- Cholesterol: 50mg
Keywords: Pumpkin Crisp, Fall Dessert, Pumpkin Dessert, Easy Dessert Recipe
