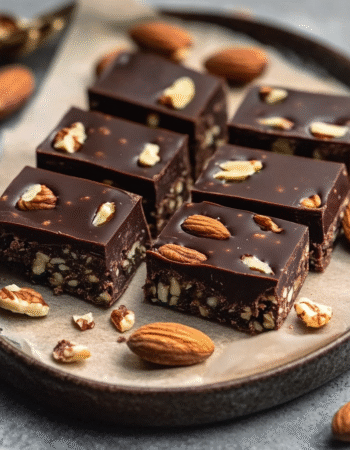
Piña Colada Magic Bars: A Slice of Paradise Awaits!

How to Make Piña Colada Magic Bars
Now that you’re all set to dive into the tropical goodness of Piña Colada Magic Bars, let’s roll up our sleeves and get cooking! I promise, this is one of those recipes that feels like a mini-vacation in your kitchen. With just a few simple steps, you’ll have a delightful dessert that’s sure to impress your family and friends. So, grab your apron, and let’s get started!
Step 1 – Prep Ingredients
First things first, preheat your oven to 350°F (175°C). This is crucial because we want our bars to bake evenly and come out perfectly golden. While that’s heating up, grab an 8×8-inch baking dish and line it with parchment paper. I like to leave a little overhang on the sides. It makes lifting the bars out later a breeze—trust me, you’ll thank me for this tip!
Step 2 – Begin Cooking
In a mixing bowl, combine the almond flour, unsweetened shredded coconut, erythritol (or your favorite keto sweetener), melted butter, vanilla extract, and salt. Mix it all together until it resembles a crumbly dough. It should feel like a sandy beach—moist but not too wet. Once you’ve got that texture, press the mixture evenly into the bottom of your prepared baking dish. Use the back of a measuring cup or your hands to really pack it down. This crust is the foundation of your Piña Colada Magic Bars, so make it sturdy!
Step 3 – Combine Ingredients
Now, let’s whip up the filling! In a separate bowl, mix together the sugar-free white chocolate chips, unsweetened coconut cream, drained crushed pineapple, and chopped macadamia nuts. This is where the magic happens! The combination of flavors will transport you straight to a tropical paradise. Make sure everything is well combined; you want every bite to be bursting with that sweet, creamy goodness.
Step 4 – Finish and Serve
Pour the luscious filling over the cooled crust, spreading it evenly with a spatula. Don’t be shy—get every last drop in there! Then, sprinkle the additional shredded coconut on top for that extra touch of tropical flair. Pop the dish into the oven and bake for 20-25 minutes. You’ll know they’re ready when the top is golden and set, and your kitchen smells like a beachside resort.
Once they’re done baking, let the bars cool completely in the pan. This is the hardest part—waiting! But trust me, it’s worth it. Once cooled, lift them out using the parchment paper and cut them into squares. You’ll have a beautiful tray of Piña Colada Magic Bars that are just begging to be devoured!
And there you have it! A simple, delicious recipe that brings a slice of paradise right to your dessert table. Whether you’re serving them at a family gathering or just treating yourself after a long day, these bars are sure to be a hit. Enjoy every bite!
Introduction to Piña Colada Magic Bars
Welcome to the world of Piña Colada Magic Bars, where every bite is like a mini-vacation! If you’re anything like me, you know that life can get a bit hectic, especially when juggling family, work, and everything in between. That’s why I’m thrilled to share this delightful dessert option that’s not only easy to whip up but also transports you straight to a tropical paradise with its luscious flavors.
These bars are the perfect solution for busy women looking for quick, tropical-inspired treats. With just a handful of ingredients and minimal prep time, you can create a dessert that feels indulgent without the fuss. Imagine serving these at your next family gathering or enjoying them as a sweet treat after a long day. They’re a hit with both kids and adults, making them a versatile addition to your dessert repertoire.
What I love most about Piña Colada Magic Bars is their ability to bring a little sunshine into your kitchen, even on the busiest of days. They’re not just a dessert; they’re a slice of paradise that you can enjoy anytime. So, let’s dive into this recipe and discover how easy it is to create a tropical escape right at home!
Why You’ll Love This Piña Colada Magic Bars
Let me tell you, these Piña Colada Magic Bars are a game changer in the dessert department! If you’re a busy woman like me, you know that time is often a luxury we can’t afford. That’s why I adore this recipe—it’s quick to prepare and requires minimal cleanup. Seriously, who has time to spend hours in the kitchen when there are so many other things on our plates? With just 15 minutes of prep and a little baking time, you’ll have a delicious treat ready to go!
And let’s talk about the flavors! These bars are a delightful blend of sweet and tropical, making them a hit with everyone in the family. Kids love the creamy coconut and pineapple combination, while adults appreciate the subtle sweetness from the sugar-free white chocolate. It’s like a party in your mouth! Plus, they’re perfect for any occasion—whether it’s a family gathering, a potluck, or just a cozy night in. You can serve them up with pride, knowing that everyone will be reaching for seconds.
Now, if you’re watching your carbs or following a keto diet, you’re in luck! These Piña Colada Magic Bars are not only delicious but also keto-friendly. With almond flour and erythritol as the base, you can indulge without the guilt. It’s a win-win situation! You can enjoy a sweet treat that fits your dietary preferences while still feeling like you’re on a tropical getaway. So, whether you’re entertaining guests or just treating yourself, these bars are the perfect solution for satisfying your sweet tooth without compromising your health goals.
In short, these bars are quick, family-friendly, and keto-approved—what’s not to love? They’re a delightful way to bring a taste of the tropics into your home, and I can’t wait for you to try them!
Ingredients You’ll Need
Before we dive into the magic of baking, let’s gather our ingredients for these delightful Piña Colada Magic Bars. Each component plays a crucial role in creating that tropical paradise flavor we all crave. Here’s what you’ll need:
- 1 cup almond flour: This is the base of our crust, giving it a nutty flavor and a lovely texture. It’s a fantastic low-carb alternative to traditional flour.
- 1/2 cup unsweetened shredded coconut: This adds a chewy texture and enhances the coconut flavor. It’s like a little piece of the tropics in every bite!
- 1/4 cup erythritol or your preferred keto sweetener: This sweetener keeps our bars low in sugar while still satisfying that sweet tooth. Feel free to use your favorite sweetener here!
- 1/4 cup unsalted butter, melted: Butter brings richness and helps bind the crust together. It’s the secret ingredient that makes everything taste better!
- 1/2 teaspoon vanilla extract: A splash of vanilla adds depth and warmth to the flavor profile. It’s like a hug for your taste buds!
- 1/4 teaspoon salt: Just a pinch of salt enhances all the flavors and balances the sweetness. It’s amazing how a little salt can elevate a dish!
- 1/2 cup sugar-free white chocolate chips: These little gems add creaminess and a touch of sweetness without the sugar. They’re perfect for achieving that decadent dessert feel.
- 1/2 cup unsweetened coconut cream: This is where the magic happens! Coconut cream gives our filling a rich, creamy texture that’s simply irresistible.
- 1/2 cup crushed pineapple (drained well): Pineapple brings that juicy, tropical flavor we all love. Just make sure to drain it well so our bars don’t get soggy!
- 1/4 cup chopped macadamia nuts: These nuts add a delightful crunch and a buttery flavor. If you’re not a fan, feel free to swap them out for chopped pecans or walnuts for a different twist!
- 1/4 cup unsweetened shredded coconut (for topping): This is the finishing touch that adds a beautiful texture and makes our bars look extra inviting.
And there you have it! A simple list of ingredients that come together to create a slice of paradise. If you’re looking for printable measurements, don’t worry! You’ll find them at the end of the article, making it super easy to whip up these Piña Colada Magic Bars in no time. Now, let’s get ready to bake and enjoy the tropical goodness!
How to Make Piña Colada Magic Bars
Now that you’re all set to dive into the tropical goodness of Piña Colada Magic Bars, let’s roll up our sleeves and get cooking! I promise, this is one of those recipes that feels like a mini-vacation in your kitchen. With just a few simple steps, you’ll have a delightful dessert that’s sure to impress your family and friends. So, grab your apron, and let’s get started!
Step 1 – Prep Ingredients
First things first, preheat your oven to 350°F (175°C). This is crucial because we want our bars to bake evenly and come out perfectly golden. While that’s heating up, grab an 8×8-inch baking dish and line it with parchment paper. I like to leave a little overhang on the sides. It makes lifting the bars out later a breeze—trust me, you’ll thank me for this tip!
Step 2 – Begin Cooking
In a mixing bowl, combine the almond flour, unsweetened shredded coconut, erythritol (or your favorite keto sweetener), melted butter, vanilla extract, and salt. Mix it all together until it resembles a crumbly dough. It should feel like a sandy beach—moist but not too wet. Once you’ve got that texture, press the mixture evenly into the bottom of your prepared baking dish. Use the back of a measuring cup or your hands to really pack it down. This crust is the foundation of your Piña Colada Magic Bars, so make it sturdy!
Step 3 – Combine Ingredients
Now, let’s whip up the filling! In a separate bowl, mix together the sugar-free white chocolate chips, unsweetened coconut cream, drained crushed pineapple, and chopped macadamia nuts. This is where the magic happens! The combination of flavors will transport you straight to a tropical paradise. Make sure everything is well combined; you want every bite to be bursting with that sweet, creamy goodness.
Step 4 – Finish and Serve
Pour the luscious filling over the cooled crust, spreading it evenly with a spatula. Don’t be shy—get every last drop in there! Then, sprinkle the additional shredded coconut on top for that extra touch of tropical flair. Pop the dish into the oven and bake for 20-25 minutes. You’ll know they’re ready when the top is golden and set, and your kitchen smells like a beachside resort.
Once they’re done baking, let the bars cool completely in the pan. This is the hardest part—waiting! But trust me, it’s worth it. Once cooled, lift them out using the parchment paper and cut them into squares. You’ll have a beautiful tray of Piña Colada Magic Bars that are just begging to be devoured!
And there you have it! A simple, delicious recipe that brings a slice of paradise right to your dessert table. Whether you’re serving them at a family gathering or just treating yourself after a long day, these bars are sure to be a hit. Enjoy every bite!
Tips for Perfect Results
Now that you’re ready to create your own batch of Piña Colada Magic Bars, let me share some tried-and-true tips to ensure your tropical treat turns out absolutely perfect every time. After all, we want these bars to be a slice of paradise, not a culinary misadventure!
First and foremost, use fresh, well-drained pineapple for the best flavor. I can’t stress this enough! Fresh pineapple brings that juicy, vibrant taste that canned varieties just can’t match. If you do opt for canned, make sure to drain it thoroughly. Nobody wants soggy bars, right? A little extra effort here goes a long way in elevating the overall flavor of your Piña Colada Magic Bars.
Next up, if you’re looking to take your bars to the next level, consider adding coconut extract to the filling. Just a few drops can enhance that tropical flavor and make your bars taste even more indulgent. It’s like adding a secret ingredient that transforms your dessert from delicious to downright heavenly! Trust me, your taste buds will thank you.
Lastly, store your bars in an airtight container to maintain freshness. I know how tempting it is to leave them out on the counter, but keeping them sealed will help preserve their delightful texture and flavor. If you have any leftovers (which is rare, but it happens!), they’ll stay delicious for days. Just make sure to keep them in a cool, dry place, and you’ll be able to enjoy that tropical goodness long after baking day.
With these tips in your back pocket, you’re all set to create the most scrumptious Piña Colada Magic Bars. Happy baking, and may your kitchen be filled with the sweet aroma of paradise!
Essential Equipment Needed
Before we embark on our tropical baking adventure, let’s make sure we have all the essential equipment ready to go. Having the right tools on hand not only makes the process smoother but also ensures that your Piña Colada Magic Bars turn out perfectly every time. Here’s what you’ll need:
- 8×8-inch baking dish: This is the star of the show! A square baking dish is perfect for our bars, allowing them to bake evenly and be cut into those delightful squares we all love. If you don’t have an 8×8-inch dish, a similar size will work, but keep an eye on the baking time as it may vary.
- Mixing bowls: You’ll need a couple of mixing bowls—one for the crust and another for the filling. I recommend using glass or stainless steel bowls, as they’re easy to clean and won’t retain any odors. Plus, they look great when you’re mixing up your tropical concoctions!
- Parchment paper: This is a must-have for easy removal of your bars from the baking dish. Lining the dish with parchment paper not only prevents sticking but also makes cleanup a breeze. You’ll be thanking yourself later when you can lift those bars out without a fuss!
- Spatula or spoon for mixing: A sturdy spatula or a good mixing spoon will be your best friend in this recipe. You’ll use it to combine the crust ingredients and spread the filling evenly. I prefer a silicone spatula because it’s flexible and gets every last bit of that delicious mixture out of the bowl!
- Oven mitts: Safety first! When it’s time to take your Piña Colada Magic Bars out of the oven, you’ll want a good pair of oven mitts to protect your hands. Trust me, you don’t want to risk a burn when you’re just trying to enjoy a slice of paradise!
With these essential tools at your fingertips, you’re all set to create your own batch of Piña Colada Magic Bars. So, gather your equipment, and let’s get ready to bake up some tropical goodness!
Delicious Variations of Piña Colada Magic Bars
Now that you’ve mastered the classic Piña Colada Magic Bars, let’s have some fun with variations! One of the best things about this recipe is its versatility. You can easily tweak it to suit your taste or dietary preferences. Here are a few delicious variations that will keep your tropical treat game strong!
First up, if you want to amp up that tropical flavor, add a few drops of coconut extract to the filling. This little addition can take your bars from delightful to downright dreamy! Just a splash will enhance the coconut flavor, making every bite feel like a vacation in your mouth. It’s like adding a secret ingredient that transforms your dessert into a tropical paradise!
Next, let’s talk about nuts. If macadamia nuts aren’t your thing, or if you simply want to switch it up, substitute them with chopped pecans or walnuts. Both options bring their own unique flavor and texture to the bars. Pecans add a buttery richness, while walnuts offer a delightful crunch. Feel free to experiment and find your favorite nut combination. After all, variety is the spice of life!
And for those of you who are gluten-sensitive or just prefer to keep things gluten-free, you can easily create a gluten-free version of these bars. Just make sure all your ingredients are certified gluten-free. Almond flour is naturally gluten-free, and as long as you choose gluten-free sweeteners and chocolate chips, you’re good to go! This way, everyone can enjoy a slice of paradise without any worries.
With these delicious variations, you can keep your Piña Colada Magic Bars fresh and exciting. Whether you’re hosting a gathering or just treating yourself, these tweaks will ensure that every batch is a delightful adventure. So, get creative and let your taste buds lead the way to your own tropical paradise!
Serving Suggestions
Now that you’ve whipped up a batch of those delightful Piña Colada Magic Bars, let’s talk about how to serve them up for maximum enjoyment! Presentation can elevate any dessert, and these bars are no exception. Here are some fun and delicious serving suggestions that will make your tropical treat even more irresistible.
First up, why not pair your bars with a scoop of sugar-free vanilla ice cream? The creamy, cool texture of the ice cream complements the chewy, tropical flavors of the bars perfectly. It’s like a match made in dessert heaven! Just imagine taking a bite of that warm, gooey bar topped with a melting scoop of ice cream—pure bliss! Plus, it keeps things keto-friendly, so you can indulge without the guilt.
Next, let’s add a splash of color to your plate by serving alongside fresh fruit like mango or kiwi. The vibrant hues of these fruits not only make your dessert look stunning but also add a refreshing contrast to the rich flavors of the bars. Slices of juicy mango bring a sweet, tropical flair, while kiwi adds a tangy kick. It’s like a mini fruit salad that brightens up your dessert table and makes it feel like a festive occasion!
And if you’re looking for a refreshing drink to wash it all down, enjoy your Piña Colada Magic Bars with a glass of iced tea or coconut water. A chilled glass of iced tea, whether sweetened or unsweetened, pairs beautifully with the tropical flavors of the bars. Or, if you want to stay in the coconut theme, coconut water is a fantastic choice! It’s hydrating and adds to that beachy vibe. Sip on your drink while savoring your bars, and you’ll feel like you’re lounging on a sunny beach, even if you’re just at home!
With these serving suggestions, you can take your Piña Colada Magic Bars to the next level. Whether you’re hosting a gathering or enjoying a quiet night in, these ideas will make your dessert experience even more delightful. So, gather your family or friends, serve up those bars, and let the tropical vibes flow!
FAQs About Piña Colada Magic Bars
As you embark on your journey to create these delightful Piña Colada Magic Bars, you might have a few questions swirling around in your mind. Don’t worry; I’ve got you covered! Here are some frequently asked questions that will help you navigate your baking adventure with ease.
Can I make these bars ahead of time?
Absolutely! One of the best things about Piña Colada Magic Bars is that they can be made a day in advance. This is perfect for busy women like us who want to get a head start on dessert prep. Just whip them up, let them cool, and store them in the fridge. They’ll be ready to serve when you are, and the flavors will have time to meld together beautifully. It’s a win-win!
Are these bars suitable for a keto diet?
You bet! These Piña Colada Magic Bars are not only delicious but also keto-friendly. With almond flour and erythritol as the base, they’re low in carbs and sugar-free, making them a guilt-free treat for anyone following a keto lifestyle. You can indulge in a slice of paradise without worrying about your carb count. It’s like having your cake and eating it too!
Can I freeze Piña Colada Magic Bars?
Yes, you can! These bars freeze beautifully, which is fantastic if you want to make a big batch or save some for later. Just wrap them tightly in plastic wrap or aluminum foil before placing them in an airtight container. When you’re ready to enjoy them, simply thaw them in the fridge overnight. You’ll have a delicious tropical treat waiting for you whenever the craving strikes!
With these FAQs in mind, you’re all set to tackle your Piña Colada Magic Bars with confidence. Whether you’re making them ahead of time, sticking to your keto diet, or planning to freeze some for later, you’re in for a delightful treat that’s sure to bring a slice of paradise to your dessert table!

Final Thoughts on Piña Colada Magic Bars
As we wrap up our tropical journey with these delightful Piña Colada Magic Bars, I can’t help but reflect on just how easy and delicious this recipe truly is. Seriously, it’s like a little slice of paradise that you can whip up in no time! With minimal ingredients and straightforward steps, you’ll find yourself creating a dessert that not only satisfies your sweet tooth but also transports you to a sun-soaked beach with every bite.
What I love most about these bars is their versatility. Whether you’re hosting a family gathering, celebrating a special occasion, or simply treating yourself after a long day, they fit the bill perfectly. Plus, the fact that they’re keto-friendly means you can indulge without the guilt. It’s a win-win situation that makes dessert time feel like a mini-vacation!
So, if you haven’t already, I wholeheartedly encourage you to try this recipe for yourself. Gather your ingredients, roll up your sleeves, and let the tropical magic unfold in your kitchen. I promise, once you take that first bite of the creamy coconut, juicy pineapple, and crunchy macadamia nuts, you’ll be hooked! Your family and friends will be begging for the recipe, and you’ll be the star of the dessert table.
In the hustle and bustle of our busy lives, it’s important to carve out moments of joy and indulgence. These Piña Colada Magic Bars are the perfect way to do just that. So go ahead, treat yourself to a taste of tropical paradise right in your own home. You deserve it!
“`
Print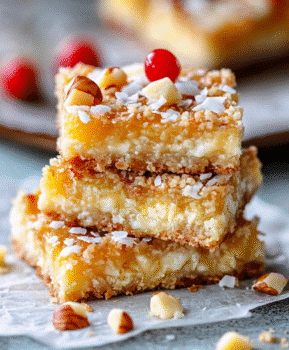
Piña Colada Magic Bars: A Slice of Paradise Awaits!
- Total Time: 45 minutes
- Yield: Serves 9
- Diet: Keto
Description
Delicious Piña Colada Magic Bars that bring a slice of paradise to your dessert table.
Ingredients
- 1 cup almond flour
- 1/2 cup unsweetened shredded coconut
- 1/4 cup erythritol or your preferred keto sweetener
- 1/4 cup unsalted butter, melted
- 1/2 teaspoon vanilla extract
- 1/4 teaspoon salt
- 1/2 cup sugar-free white chocolate chips
- 1/2 cup unsweetened coconut cream
- 1/2 cup crushed pineapple (drained well)
- 1/4 cup chopped macadamia nuts
- 1/4 cup unsweetened shredded coconut (for topping)
Instructions
- Preheat your oven to 350°F (175°C) and line an 8×8-inch baking dish with parchment paper, leaving some overhang for easy removal.
- In a mixing bowl, combine almond flour, shredded coconut, erythritol, melted butter, vanilla extract, and salt. Mix until well combined and crumbly.
- Press the mixture evenly into the bottom of the prepared baking dish to form the crust.
- Bake the crust for 10 minutes, then remove from the oven and let it cool slightly.
- In a separate bowl, mix together the sugar-free white chocolate chips, coconut cream, drained crushed pineapple, and chopped macadamia nuts until well combined.
- Pour the mixture over the cooled crust and spread it evenly.
- Sprinkle the additional shredded coconut on top.
- Bake for an additional 20-25 minutes, or until the top is golden and set.
- Allow the bars to cool completely in the pan before lifting them out using the parchment paper. Cut into squares and serve.
Notes
- For a tropical twist, add a few drops of coconut extract to the filling mixture.
- Substitute macadamia nuts with chopped pecans or walnuts for a different flavor and texture.
- Prep Time: 15 minutes
- Cook Time: 30 minutes
- Category: Dessert
- Method: Baking
- Cuisine: Tropical
Nutrition
- Serving Size: 1 bar
- Calories: 200
- Sugar: 0g
- Sodium: 200mg
- Fat: 18g
- Saturated Fat: 10g
- Unsaturated Fat: 8g
- Trans Fat: 0g
- Carbohydrates: 4g
- Fiber: 1g
- Protein: 3g
- Cholesterol: 30mg
Keywords: Piña Colada Magic Bars, keto dessert, tropical bars
