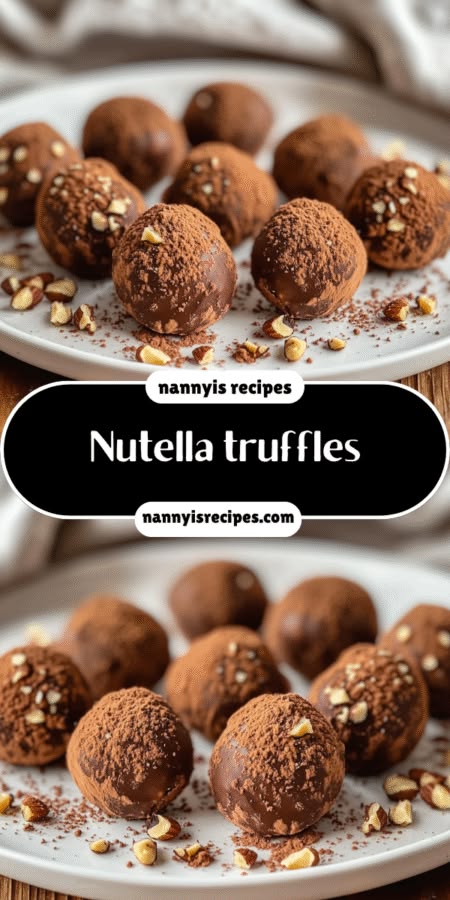
Nutella truffles are the ultimate decadent treat!

gutenberg
Why You’ll Love This Nutella Truffles
Let me tell you, if you’re a busy woman juggling work, family, and a million other responsibilities, Nutella truffles are about to become your new best friend. Seriously, these little bites of heaven are not just delicious; they’re a lifesaver when you need a quick dessert that doesn’t require hours in the kitchen.
First off, the preparation time is a mere 10 minutes. Yes, you heard that right! In less time than it takes to scroll through social media, you can whip up a batch of these decadent treats. And the best part? They’re no-bake! That means no oven to preheat, no pots and pans to scrub, and no complicated techniques to master. Just mix, chill, and roll. It’s as easy as pie—well, easier, actually!
Now, let’s talk about cleanup. I don’t know about you, but after a long day, the last thing I want to do is spend an hour cleaning up the kitchen. With Nutella truffles, you’ll only need a mixing bowl and a cookie scoop (or your hands, if you’re feeling adventurous). A quick rinse and you’re done! It’s like a dream come true for anyone who’s ever faced the dreaded post-cooking mess.


And let’s not forget about the flavors. Nutella truffles are a hit with everyone, from picky kids to discerning adults. The rich, creamy chocolate hazelnut flavor is universally loved, making these truffles a fantastic option for family gatherings, birthday parties, or just a cozy night in. You can even get the kids involved in rolling the truffles—trust me, they’ll love it! It’s a fun way to spend time together, and you’ll have a delicious reward at the end.
So, if you’re looking for a treat that’s quick, easy, and sure to please, Nutella truffles are the answer. They’re the perfect blend of indulgence and simplicity, making them a must-try for any busy woman who deserves a little sweetness in her life.
Introduction to Nutella Truffles
Ah, Nutella truffles! Just saying the name makes my mouth water. These little gems are the epitome of a quick and indulgent dessert option that can turn any ordinary day into a special occasion. Imagine biting into a rich, creamy truffle that melts in your mouth, leaving you with a delightful taste of chocolate hazelnut bliss. Sounds heavenly, right?
For busy women like us, who often find ourselves racing against the clock, Nutella truffles are a game changer. They require minimal effort and time, making them the perfect treat for those moments when you want to impress without the stress. Whether you’re hosting a last-minute gathering, celebrating a birthday, or simply craving something sweet after a long day, these truffles have got your back.
What I love most about Nutella truffles is their versatility. You can whip them up in just 10 minutes, and they don’t even require baking! That means no worrying about oven temperatures or timing. Just mix, chill, and roll—easy peasy! Plus, they’re a hit with everyone, from your picky eaters to your gourmet-loving friends. It’s like having a secret weapon in your dessert arsenal!
So, if you’re looking for a simple yet delicious treat that fits seamlessly into your busy lifestyle, look no further than Nutella truffles. They’re not just a dessert; they’re a little moment of joy you can create in your kitchen, and trust me, you deserve it!
Ingredients You’ll Need
Alright, let’s dive into the delicious world of Nutella truffles! To create these little bites of joy, you’ll need just a handful of ingredients that are likely already hanging out in your pantry. Here’s what you’ll need:
- 1 cup Nutella: This is the star of the show! Nutella brings that rich, creamy chocolate hazelnut flavor that makes these truffles so irresistible. It’s like a hug in dessert form!
- 1 cup crushed graham crackers: These little crunchy bits add texture and a hint of sweetness. They help bind everything together, giving your truffles that perfect consistency. If you’re looking for a healthier option, try using almond flour instead. It’ll give you a nutty flavor and a bit of protein!
- 1 cup powdered sugar: This sweet powder is what gives your truffles that melt-in-your-mouth quality. It sweetens the mix without making it too heavy. If you want to cut down on sugar, you can use a sugar substitute like erythritol or monk fruit sweetener. Just keep in mind that it might change the texture a bit.
- 1 teaspoon vanilla extract: A splash of vanilla adds depth to the flavor, making your truffles taste even more decadent. If you’re feeling adventurous, try using hazelnut extract for an extra nutty kick!
- 1/2 cup chocolate chips (for coating): This is where the magic happens! Melting chocolate chips creates a luscious coating that takes your truffles to the next level. You can use dark, milk, or even white chocolate, depending on your preference. For a healthier twist, look for sugar-free chocolate chips.
- 1 tablespoon coconut oil (for coating): Adding coconut oil to your melted chocolate helps it to glide smoothly over the truffles, giving them a beautiful sheen. Plus, it adds a subtle coconut flavor that pairs wonderfully with chocolate. If you’re not a fan of coconut, you can use vegetable oil instead.
And there you have it! These ingredients come together to create a dessert that’s not only easy to make but also incredibly satisfying. Whether you’re whipping them up for a family gathering or just treating yourself after a long day, Nutella truffles are sure to impress. So gather your ingredients, and let’s get ready to make some magic in the kitchen!
How to Make Nutella Truffles
Now that we’ve gathered our ingredients, it’s time to roll up our sleeves and dive into the fun part—making those delightful Nutella truffles! Trust me, this process is as easy as pie (or should I say truffles?), and I promise you’ll be amazed at how quickly you can whip these up. Let’s get started!
Step 1 – Prep Ingredients
First things first, let’s get organized! Gather all your ingredients and tools. You’ll need:
- A mixing bowl
- A cookie scoop or your hands (I prefer the hands-on approach!)
- Parchment paper for lining your baking sheet
- A microwave-safe bowl for melting chocolate
Having everything ready to go makes the process smoother and more enjoyable. Plus, it’s a great way to avoid that last-minute scramble when you realize you forgot to grab something!
Step 2 – Begin Cooking
Now, let’s get mixing! In your mixing bowl, combine the star of the show—Nutella—with the crushed graham crackers, powdered sugar, and vanilla extract. It’s like a party in a bowl, and everyone’s invited!
Using a spatula or a sturdy spoon, mix everything together until it’s well combined. You want to make sure there are no dry bits left behind. The mixture should start to come together into a dough-like consistency. If it feels a bit too sticky, don’t worry; that’s perfectly normal!
Step 3 – Combine Ingredients
Once your mixture is well combined, it’s time to chill! Cover the bowl with plastic wrap or a clean kitchen towel and pop it in the refrigerator for about 30 minutes. This step is crucial because it helps the dough firm up, making it easier to shape into those adorable little truffles.
While you wait, you can take a moment to relax, maybe pour yourself a cup of tea or coffee. You deserve a little break, right? Plus, it gives you a chance to think about how you’re going to impress your family and friends with these delicious treats!
Step 4 – Finish and Serve
Alright, the waiting is over! Once the mixture has chilled and firmed up, it’s time to get rolling. Use a small cookie scoop or your hands to form the mixture into balls, about 1 inch in diameter. If you’re feeling fancy, you can even roll them in your palms to make them nice and smooth.
Place the truffles on a parchment-lined baking sheet, giving them a little space to breathe. Now, let’s move on to the chocolate coating! In a microwave-safe bowl, combine the chocolate chips and coconut oil. Microwave in 30-second intervals, stirring in between, until the chocolate is melted and smooth. It should look glossy and inviting—like a warm hug for your truffles!
Now, dip each truffle into the melted chocolate, allowing any excess to drip off. Return them to the baking sheet and repeat until all your truffles are coated in that luscious chocolate goodness. Once you’re done, pop the baking sheet back in the refrigerator for at least 30 minutes to let the chocolate set.
And there you have it! Your Nutella truffles are ready to be enjoyed. You can serve them chilled or at room temperature, and trust me, they’ll be a hit no matter how you present them. So go ahead, take a moment to admire your handiwork before diving in. You’ve earned it!
Tips for Perfect Results
Now that you’re all set to make your Nutella truffles, let me share some tried-and-true tips to ensure your truffles turn out perfectly every time. After all, we want these little bites of joy to be as delightful as possible, right?
1. Use a cookie scoop for uniform truffles. This handy tool is a game changer! Not only does it help you create perfectly round truffles, but it also ensures that each one is the same size. This means even cooking and a beautiful presentation. Plus, it saves you from the guesswork of rolling them by hand. If you don’t have a cookie scoop, don’t fret! Just use your hands, but try to keep them consistent in size. Your family will appreciate the uniformity, and you’ll feel like a pro!
2. Chill the mixture longer if it’s too soft to handle. Sometimes, depending on the temperature of your kitchen or the ingredients you used, the mixture might be a bit too soft to shape into truffles. If that’s the case, don’t panic! Just pop it back in the fridge for an extra 10-15 minutes. This will help firm it up, making it much easier to roll into those delightful little balls. Trust me, a little patience goes a long way in achieving that perfect truffle texture!
3. Add a pinch of sea salt to the chocolate for enhanced flavor. If you want to take your Nutella truffles to the next level, consider adding a pinch of sea salt to the melted chocolate before dipping your truffles. The contrast of sweet and salty is simply divine! It elevates the flavor profile and adds a gourmet touch that will impress your family and friends. Just a tiny sprinkle can make a world of difference, so don’t skip this step!
With these tips in your back pocket, you’re well on your way to creating Nutella truffles that are not only delicious but also visually stunning. So roll up your sleeves, have fun, and enjoy the process. You’ve got this!
Essential Equipment Needed
Before we dive into the delightful world of Nutella truffles, let’s make sure you have all the essential equipment on hand. Trust me, having the right tools can make the process smoother and more enjoyable. Here’s what you’ll need:
- Mixing bowl: A good-sized mixing bowl is crucial for combining all those delicious ingredients. I recommend using a medium to large bowl so you have plenty of room to mix without making a mess. Plus, it’s always nice to have a sturdy bowl that can handle a little elbow grease!
- Cookie scoop or hands for shaping: A cookie scoop is a fantastic tool for creating uniform truffles. It helps you portion out the mixture evenly, ensuring that each truffle is the same size. If you don’t have one, don’t worry! Your hands work just as well. Just remember to keep the size consistent for that picture-perfect presentation.
- Parchment paper: This is your best friend when it comes to lining your baking sheet. Parchment paper prevents the truffles from sticking and makes cleanup a breeze. Plus, it gives your truffles a nice, professional look. If you’re out of parchment paper, you can also use wax paper, but I find parchment works best for this recipe.
- Microwave-safe bowl for melting chocolate: You’ll need a microwave-safe bowl to melt your chocolate chips and coconut oil. Make sure it’s large enough to hold all the chocolate you’ll be using. Glass or ceramic bowls work great, but avoid plastic, as it can warp in the heat. If you prefer, you can also use a double boiler on the stovetop, but the microwave is quick and convenient!
With these essential tools at your disposal, you’re all set to create some mouthwatering Nutella truffles. It’s amazing how having the right equipment can make the process feel effortless. So gather your gear, and let’s get ready to indulge in some sweet, chocolatey goodness!
Delicious Variations of Nutella Truffles
Now that you’ve mastered the classic Nutella truffles, let’s have some fun with variations! One of the best things about this recipe is its versatility. You can easily switch things up to suit your taste or the occasion. Here are a few delightful ideas to get your creative juices flowing:
1. Roll in crushed nuts for added texture. If you’re a fan of a little crunch, consider rolling your truffles in crushed nuts. Chopped hazelnuts, almonds, or walnuts add a delightful texture and a nutty flavor that complements the creamy Nutella perfectly. Just place the crushed nuts on a plate and roll each truffle until it’s well-coated. Not only does this add a lovely crunch, but it also gives your truffles a beautiful, rustic look. Plus, it’s a great way to sneak in some healthy fats!
2. Use sprinkles for a festive look. Want to make your Nutella truffles party-ready? Sprinkles are the way to go! Whether it’s colorful jimmies for a birthday bash or festive red and green for the holidays, sprinkles can instantly elevate the appearance of your truffles. Just dip the truffles in melted chocolate, then roll them in sprinkles before the chocolate sets. It’s a fun and playful way to add a pop of color and excitement to your treats. Trust me, the kids (and the kids at heart) will love them!
3. Experiment with flavored extracts for a twist. If you’re feeling adventurous, why not play around with flavored extracts? Instead of vanilla, try adding a splash of almond or hazelnut extract to the mixture. This little change can give your truffles a whole new flavor profile. Imagine the delightful surprise of biting into a truffle that has a hint of almond or a deeper hazelnut flavor! You can even mix and match extracts for a unique combination that’s all your own. Just remember, a little goes a long way, so start with a small amount and adjust to your taste.
These variations are just the tip of the iceberg! The beauty of Nutella truffles is that you can customize them to fit any occasion or personal preference. So don’t be afraid to get creative and make these treats your own. Whether you’re rolling them in nuts, dressing them up with sprinkles, or infusing them with new flavors, you’re sure to impress your family and friends with your delicious creations. Happy truffling!
Serving Suggestions
Now that you’ve whipped up a batch of those delightful Nutella truffles, let’s talk about how to serve them for maximum enjoyment! After all, presentation can elevate a simple treat into something truly special. Here are a couple of my favorite serving suggestions that will have your family and friends raving about your dessert skills!
1. Pair with fresh fruit like strawberries or bananas. There’s something magical about the combination of rich chocolate and fresh fruit. The sweetness of strawberries or the creaminess of bananas perfectly complements the decadent flavor of Nutella truffles. You can serve the truffles on a platter alongside a bowl of fresh fruit for a beautiful and colorful display. It’s like a mini dessert buffet right at your table! Plus, the fruit adds a refreshing contrast that balances out the richness of the truffles. Trust me, your guests will appreciate the thoughtful pairing!
2. Serve alongside a cup of coffee or hot chocolate for a cozy treat. If you’re looking to create a warm and inviting atmosphere, consider serving your Nutella truffles with a steaming cup of coffee or hot chocolate. The rich flavors of the truffles pair beautifully with the boldness of coffee or the sweetness of hot chocolate. It’s the perfect way to wind down after a long day or to enjoy a cozy afternoon treat. You can even set up a little hot chocolate bar with toppings like whipped cream, marshmallows, and chocolate shavings for an extra touch of fun. Your family will feel like they’re at a fancy café right in the comfort of your home!
These serving suggestions not only enhance the experience of enjoying Nutella truffles but also make for a lovely presentation that’s sure to impress. So go ahead, get creative with your serving ideas, and enjoy every delicious bite of your homemade truffles. You deserve it!
FAQs About Nutella Truffles
As you embark on your delightful journey of making Nutella truffles, you might have a few questions swirling around in your mind. Don’t worry; I’ve got you covered! Here are some frequently asked questions that will help you navigate the truffle-making process with ease:
Can I make these truffles ahead of time?
Absolutely! One of the best things about Nutella truffles is their make-ahead convenience. You can whip up a batch a few days in advance and store them in the refrigerator. Just keep them in an airtight container to maintain their freshness. This is perfect for busy weeks when you want a sweet treat on hand without the last-minute rush. Trust me, having these little gems ready to go will make you feel like a dessert superhero!
What can I use instead of Nutella?
If you’re not a fan of Nutella or simply want to try something different, you’re in luck! You can substitute Nutella with any chocolate hazelnut spread available at your local grocery store. There are plenty of delicious options out there! Alternatively, if you’re looking for a nut-free option, peanut butter works wonderfully too. Just keep in mind that it will give your truffles a different flavor profile, but they’ll still be just as delightful. The world of truffles is your oyster!
How should I store leftover truffles?
To keep your Nutella truffles fresh and tasty, store them in an airtight container in the fridge. They’ll stay good for up to a week, but I doubt they’ll last that long once your family gets a whiff of them! If you want to keep them for an extended period, you can also freeze them. Just make sure to separate layers with parchment paper to prevent sticking. When you’re ready to enjoy them, simply let them thaw in the fridge for a few hours. Easy peasy!
With these FAQs in mind, you’re all set to tackle your Nutella truffle adventure with confidence. Remember, the joy of making and sharing these treats is just as sweet as the truffles themselves. So go ahead, get in the kitchen, and let the truffle magic begin!
Final Thoughts on Nutella Truffles
As I sit here savoring the last bite of a Nutella truffle, I can’t help but reflect on just how easy and indulgent this little treat is. Seriously, who knew that a handful of simple ingredients could come together to create such a delightful explosion of flavor? It’s like a little piece of heaven wrapped in chocolate, and the best part is that you can whip them up in no time at all!
Making Nutella truffles is not just about the end result; it’s about the joy of creating something special with minimal effort. Whether you’re treating yourself after a long day or impressing guests at a gathering, these truffles are sure to steal the show. Plus, the no-bake aspect means you can skip the stress of oven timers and complicated techniques. Just mix, chill, and roll—how easy is that?
I encourage you to give this delightful recipe a try. Trust me, once you take that first bite, you’ll understand why Nutella truffles are a favorite in my kitchen. And don’t forget to share them with family and friends! There’s something so rewarding about watching their faces light up with joy as they indulge in these sweet treats. It’s a simple way to spread happiness and create lasting memories.
So, gather your ingredients, roll up your sleeves, and let the truffle-making magic begin! You deserve a little sweetness in your life, and these Nutella truffles are just the ticket. Happy truffling, my friends!
“`
Print Nutella truffles : are the ultimate decadent treat!
- Total Time: 40 minutes
- Yield: 12 servings 1x
- Diet: Vegetarian
Description
Nutella truffles are the ultimate decadent treat!
Ingredients
- 1 cup Nutella
- 1 cup crushed graham crackers
- 1 cup powdered sugar
- 1 teaspoon vanilla extract
- 1/2 cup chocolate chips (for coating)
- 1 tablespoon coconut oil (for coating)
Instructions
- In a mixing bowl, combine Nutella, crushed graham crackers, powdered sugar, and vanilla extract. Mix until well combined and a dough forms.
- Chill the mixture in the refrigerator for about 30 minutes to firm up.
- Once chilled, use a small cookie scoop or your hands to form the mixture into small balls, about 1 inch in diameter.
- Place the truffles on a parchment-lined baking sheet.
- In a microwave-safe bowl, combine chocolate chips and coconut oil. Microwave in 30-second intervals, stirring in between, until melted and smooth.
- Dip each truffle into the melted chocolate, allowing excess to drip off, and return to the baking sheet.
- Refrigerate the truffles for at least 30 minutes to set the chocolate coating.
- Serve chilled or at room temperature.
Notes
- For a flavor twist, add a pinch of sea salt to the chocolate coating for a salted chocolate truffle experience.
- Roll the truffles in crushed nuts, sprinkles, or cocoa powder instead of chocolate for a different coating option.
- Prep Time: 10 minutes
- Cook Time: 0 minutes
- Category: Dessert
- Method: No-bake
- Cuisine: American
Nutrition
- Serving Size: 1 truffle
- Calories: 130
- Sugar: 15g
- Sodium: 0mg
- Fat: 7g
- Saturated Fat: 0g
- Unsaturated Fat: 0g
- Trans Fat: 0g
- Carbohydrates: 15g
- Fiber: 0g
- Protein: 1g
- Cholesterol: 0mg
Keywords: nutella truffles


