Mini Mochi Donuts: Delight in This Easy Recipe!
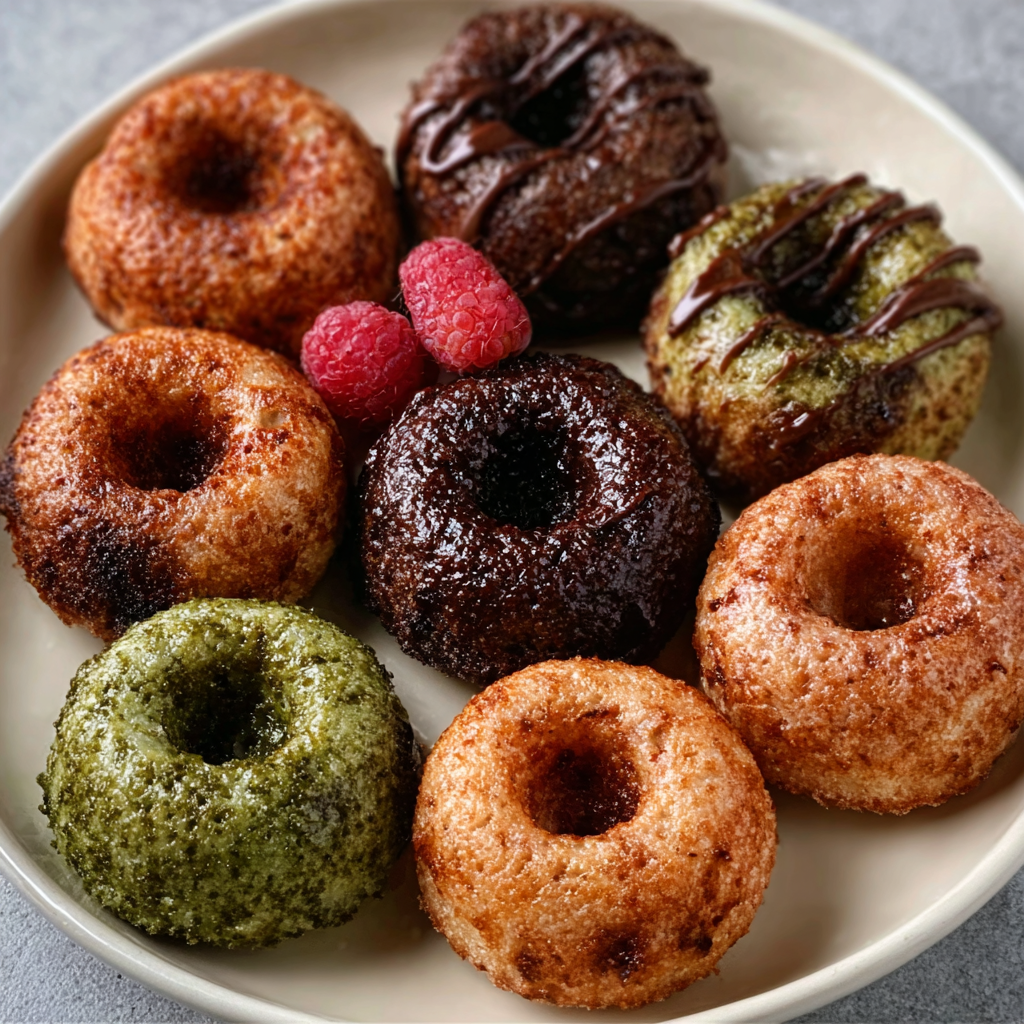
gutenberg
Why You’ll Love This Mini Mochi Donuts
Let me tell you, these Mini Mochi Donuts are not just another sweet treat; they’re a game changer for busy women like us! If you’re juggling work, family, and a million other responsibilities, you’ll appreciate how quick and easy these donuts are to whip up. Seriously, you can have them ready in just about 22 minutes! That’s less time than it takes to scroll through social media, right?
One of the best parts? Minimal cleanup! I don’t know about you, but after a long day, the last thing I want to do is spend an hour scrubbing pots and pans. With this recipe, you’ll only need a few mixing bowls and a mini donut pan. Easy peasy!
Now, let’s talk about flavor. These donuts are soft, chewy, and oh-so-delicious. They have a unique texture that sets them apart from traditional donuts. Imagine biting into a warm, fluffy donut that has just the right amount of sweetness. It’s like a hug for your taste buds! Plus, they’re family-friendly, so whether you have picky eaters or adventurous foodies at home, everyone will find something to love.
And if you’re looking to get a little creative, the flavor possibilities are endless! You can easily customize these donuts to suit your family’s preferences. Want chocolate? Just add cocoa powder! Feeling fruity? Toss in some mashed bananas or pureed strawberries. The kids will love helping you mix in their favorite flavors, making it a fun family activity.
So, if you’re ready to treat yourself and your loved ones to something special, these Mini Mochi Donuts are calling your name. They’re quick, easy, and oh-so-delicious—what’s not to love?
Introduction to Mini Mochi Donuts
Have you ever craved something sweet but felt too busy to whip up a fancy dessert? Enter the Mini Mochi Donuts! These delightful little treats are not only adorable but also incredibly easy to make. If you’re like me, juggling work, family, and a million other tasks, you’ll appreciate how these donuts can fit seamlessly into your busy life.
So, what exactly are Mini Mochi Donuts? They’re a delightful twist on traditional donuts, made with sweet rice flour, which gives them a unique chewy texture that’s simply irresistible. Imagine biting into a warm, soft donut that feels like a little cloud of happiness in your mouth. It’s a treat that’s both comforting and satisfying, perfect for any time of day!
Now, let’s talk about why these donuts are a perfect fit for busy American women aged 40–70. Whether you’re a mom trying to please picky eaters or a professional looking for a quick pick-me-up, these donuts are your answer. They come together in just 22 minutes, which is less time than it takes to watch a couple of cat videos online (and we all know how easy it is to get lost in those!).
Plus, the preparation is a breeze! With just a few simple ingredients and minimal cleanup, you can have a batch of these delightful donuts ready to enjoy. No complicated techniques or fancy equipment required—just a mixing bowl, a whisk, and a mini donut pan. It’s so easy that even your kids can help out, making it a fun family activity!
And let’s not forget about the taste! These Mini Mochi Donuts are sweet, chewy, and oh-so-delicious. They’re perfect for breakfast, an afternoon snack, or even a late-night treat when you need a little something to satisfy your sweet tooth. Trust me, once you try them, you’ll be hooked!
So, if you’re ready to indulge in a sweet treat that’s quick, easy, and downright delightful, let’s dive into the world of Mini Mochi Donuts. Your taste buds will thank you!
Why You’ll Love This Mini Mochi Donuts
Let me tell you, these Mini Mochi Donuts are not just another sweet treat; they’re a game changer for busy women like us! If you’re juggling work, family, and a million other responsibilities, you’ll appreciate how quick and easy these donuts are to whip up. Seriously, you can have them ready in just about 22 minutes! That’s less time than it takes to scroll through social media, right?
One of the best parts? Minimal cleanup! I don’t know about you, but after a long day, the last thing I want to do is spend an hour scrubbing pots and pans. With this recipe, you’ll only need a few mixing bowls and a mini donut pan. Easy peasy!
Now, let’s talk about flavor. These donuts are soft, chewy, and oh-so-delicious. They have a unique texture that sets them apart from traditional donuts. Imagine biting into a warm, fluffy donut that has just the right amount of sweetness. It’s like a hug for your taste buds! Plus, they’re family-friendly, so whether you have picky eaters or adventurous foodies at home, everyone will find something to love.
And if you’re looking to get a little creative, the flavor possibilities are endless! You can easily customize these donuts to suit your family’s preferences. Want chocolate? Just add cocoa powder! Feeling fruity? Toss in some mashed bananas or pureed strawberries. The kids will love helping you mix in their favorite flavors, making it a fun family activity.
So, if you’re ready to treat yourself and your loved ones to something special, these Mini Mochi Donuts are calling your name. They’re quick, easy, and oh-so-delicious—what’s not to love?
Ingredients You’ll Need
Before we dive into the fun of making Mini Mochi Donuts, let’s gather our ingredients! Here’s what you’ll need:
- Sweet rice flour (mochi flour)
- Granulated sugar
- Baking powder
- Salt
- Milk (dairy or non-dairy)
- Large egg
- Vanilla extract
- Melted butter or coconut oil
- Cooking spray or oil for greasing the pan
- For the glaze:
- Powdered sugar
- Milk (dairy or non-dairy)
- Vanilla extract
- Sprinkles (optional)
Now, let’s break down the role of each ingredient:
- Sweet rice flour (mochi flour): This is the star of the show! It gives our donuts that delightful chewy texture. If you can’t find sweet rice flour, you can use regular rice flour, but the texture will be a bit different.
- Granulated sugar: This adds sweetness to our donuts. If you’re looking to cut back on sugar, feel free to use a sugar substitute like stevia or monk fruit sweetener.
- Baking powder: This little helper makes our donuts rise and become fluffy. Make sure it’s fresh for the best results!
- Salt: Just a pinch enhances the flavors and balances the sweetness.
- Milk (dairy or non-dairy): This adds moisture to the batter. Almond milk, oat milk, or soy milk work beautifully if you prefer a non-dairy option.
- Large egg: This binds everything together and adds richness. If you’re vegan or allergic to eggs, you can substitute it with a flax egg (1 tablespoon of ground flaxseed mixed with 2.5 tablespoons of water).
- Vanilla extract: A splash of vanilla adds a lovely aroma and flavor. You can also experiment with almond extract for a different twist!
- Melted butter or coconut oil: This adds richness and moisture. If you want a lighter option, you can use applesauce instead.
- Cooking spray or oil for greasing the pan: This ensures our donuts come out easily. You can use coconut oil or any neutral oil.
- For the glaze:
- Powdered sugar: This is the base for our sweet glaze. If you want to make it healthier, you can use powdered coconut sugar.
- Milk (dairy or non-dairy): This thins out the glaze to the perfect consistency.
- Vanilla extract: Just like in the batter, it adds a lovely flavor to the glaze.
- Sprinkles (optional): Because who doesn’t love a little color and fun on their donuts? You can skip these if you’re looking for a healthier treat.
Don’t worry about memorizing all this; printable measurements are provided at the end of the article. So, let’s get ready to make some delicious Mini Mochi Donuts that will have your family begging for seconds!
How to Make Mini Mochi Donuts
Now that we have our ingredients ready, it’s time to roll up our sleeves and get cooking! Making Mini Mochi Donuts is a breeze, and I promise you’ll be amazed at how simple it is. Let’s dive into the step-by-step process!
Step 1 – Prep Ingredients
First things first, let’s get our oven preheated. Set it to 350°F (175°C). While that’s warming up, grab your mini donut pan and give it a light greasing with cooking spray or a bit of oil. This will ensure our donuts pop out easily once they’re baked. Trust me, there’s nothing worse than a donut that sticks to the pan!
Once your pan is ready, gather your mixing bowls. You’ll need one for the dry ingredients and another for the wet ones. It’s like setting up a little assembly line in your kitchen—so efficient!
Step 2 – Begin Cooking
Now, let’s get mixing! In your first bowl, combine the sweet rice flour, granulated sugar, baking powder, and salt. Give it a good whisk to make sure everything is evenly distributed. This is where the magic begins!
In your second bowl, whisk together the milk, egg, vanilla extract, and melted butter (or coconut oil). Make sure everything is well combined. You want a smooth mixture that’s ready to join forces with the dry ingredients. It’s like a little party in your kitchen!
Step 3 – Combine Ingredients
Now comes the fun part—mixing it all together! Pour the wet ingredients into the bowl with the dry ingredients. Using a spatula or a whisk, gently mix until everything is smooth and fully incorporated. You want to avoid overmixing, as that can make the donuts tough. Just mix until you don’t see any dry flour—easy peasy!
At this point, you can also get creative! If you want to add any extras like mashed bananas or cocoa powder, now’s the time to do it. Just fold them in gently, and you’re ready to move on!
Step 4 – Finish and Serve
Time to fill that donut pan! Using a spoon or a piping bag, carefully spoon the batter into each cavity, filling them about 3/4 full. This allows room for the donuts to rise without overflowing. Once you’ve filled the pan, pop it into the preheated oven and bake for 10-12 minutes. You’ll know they’re done when they’re lightly golden and a toothpick inserted comes out clean.
After baking, let the donuts cool in the pan for about 5 minutes. Then, transfer them to a wire rack to cool completely. While they’re cooling, you can whip up the glaze by whisking together the powdered sugar, milk, and vanilla extract until smooth. It should be thick but pourable—just the right consistency for dipping!
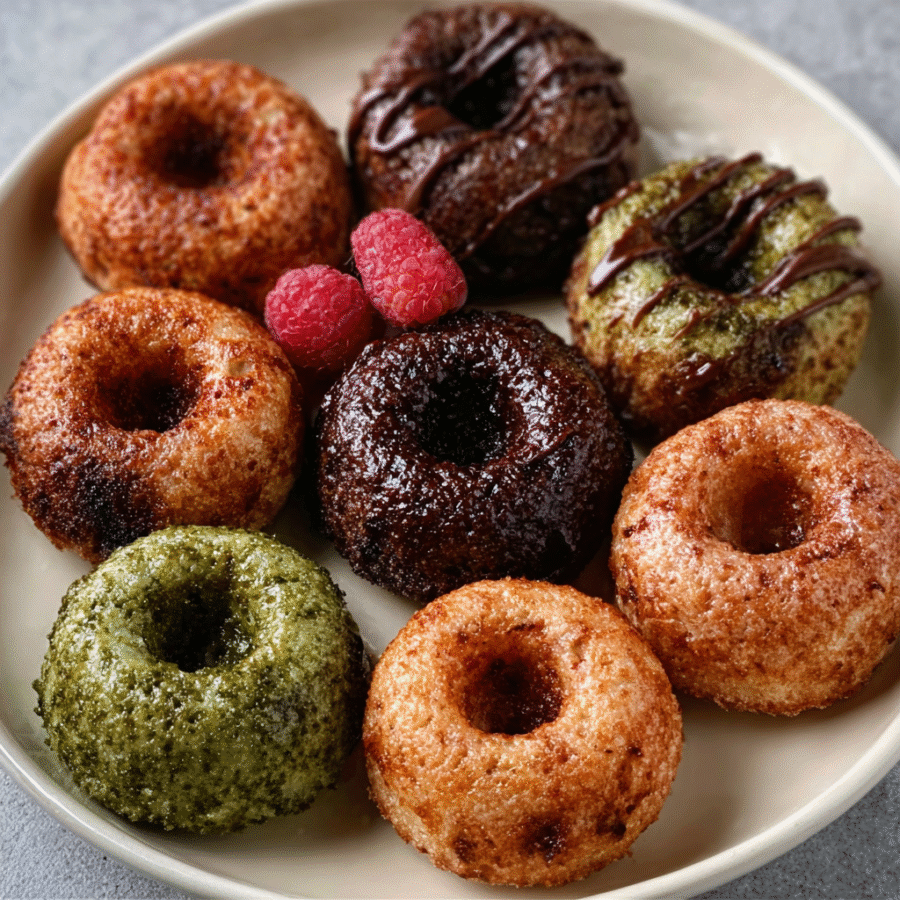
Once the donuts are cool, dip them into the glaze, allowing any excess to drip off. If you’re feeling festive, sprinkle some colorful sprinkles on top! Let the glaze set for a few minutes before serving. And there you have it—delicious, homemade Mini Mochi Donuts that are sure to impress!
Tips for Perfect Results
Now that you’re all set to make your Mini Mochi Donuts, let me share some tried-and-true tips to ensure your donuts turn out perfectly every time. These little nuggets of wisdom will help you avoid common pitfalls and elevate your baking game!
- Use room temperature ingredients: This is a game changer! When your ingredients are at room temperature, they mix together more easily, resulting in a smoother batter. So, take that egg and milk out of the fridge about 30 minutes before you start. Your donuts will thank you!
- Experiment with different glazes: While the classic glaze is delicious, don’t be afraid to get creative! Try adding a splash of lemon juice for a zesty twist, or mix in some cocoa powder for a chocolate glaze. You can even use flavored extracts like almond or coconut to switch things up. The possibilities are endless!
- Store leftovers in an airtight container: If you happen to have any donuts left (which is rare in my house!), make sure to store them in an airtight container. This keeps them fresh and chewy for a few days. You can also pop them in the fridge if you want to extend their shelf life a bit longer. Just remember to let them come to room temperature before enjoying!
With these tips in your back pocket, you’ll be well on your way to making the best Mini Mochi Donuts ever. Happy baking!
Essential Equipment Needed
Before we dive into the delicious world of Mini Mochi Donuts, let’s make sure you have all the right tools at your fingertips. Don’t worry; you won’t need any fancy gadgets or high-tech equipment. Here’s a simple list of what you’ll need:
- Mini donut pan: This is the star of the show! If you don’t have one, you can use a muffin pan instead. Just keep in mind that the baking time may vary, and your donuts will be a bit larger.
- Mixing bowls: You’ll need a couple of these for mixing your dry and wet ingredients. If you’re in a pinch, any large bowl will do—just make sure it’s big enough to hold all that delicious batter!
- Whisk: A whisk is perfect for combining your ingredients smoothly. If you don’t have one, a fork can work in a pinch, though it might take a bit more elbow grease!
- Measuring cups and spoons: Accurate measurements are key to baking success! If you don’t have a full set, you can use any standard cup or spoon you have at home—just remember to keep the ratios consistent.
- Wire rack for cooling: This is essential for letting your donuts cool properly. If you don’t have a wire rack, you can use a plate or cutting board, but make sure to space the donuts out so they don’t get soggy.
With these simple tools, you’ll be all set to create your own batch of Mini Mochi Donuts. Happy baking, and remember, the most important ingredient is a sprinkle of love!
Delicious Variations of Mini Mochi Donuts
Now that you’ve mastered the basic Mini Mochi Donuts recipe, let’s have some fun with variations! One of the best things about these little treats is how easily they can be customized to suit your taste buds or dietary needs. Whether you’re in the mood for something chocolatey, fruity, or gluten-free, I’ve got you covered. Let’s dive into some delicious twists!
- Chocolate Version: If you’re a chocolate lover like me, you’ll want to try this variation! Simply substitute 2 tablespoons of the sweet rice flour with cocoa powder. This will give your donuts a rich, chocolatey flavor that’s sure to satisfy your sweet tooth. You can even add chocolate chips to the batter for an extra indulgent treat. Just imagine biting into a warm, gooey chocolate donut—heavenly!
- Fruity Twist: Want to add a burst of flavor? Try incorporating some mashed bananas or pureed strawberries into the batter. Just add about 1/4 cup of your chosen fruit before mixing the wet and dry ingredients. This not only adds a delightful fruity flavor but also makes the donuts extra moist. Plus, it’s a sneaky way to get some fruit into your family’s diet! You can even top them with a fruity glaze made from powdered sugar and fruit juice for an extra pop of flavor.
- Gluten-Free Option: If you or someone in your family is gluten-sensitive, don’t worry! You can easily make these donuts gluten-free by using alternative flours. Try substituting the sweet rice flour with a gluten-free all-purpose flour blend. Just make sure it contains xanthan gum, which helps mimic the chewy texture of mochi. You can also experiment with almond flour or coconut flour, but keep in mind that the texture and flavor will vary slightly. With these adjustments, everyone can enjoy the deliciousness of Mini Mochi Donuts!
These variations are just the tip of the iceberg! Feel free to get creative and experiment with your favorite flavors. The beauty of Mini Mochi Donuts is that they’re incredibly versatile, so don’t hesitate to make them your own. Happy baking, and I can’t wait to hear about your delicious creations!
Serving Suggestions
Now that you’ve whipped up a batch of those delightful Mini Mochi Donuts, it’s time to think about how to serve them! These little treats are not only delicious on their own, but they also pair beautifully with a variety of accompaniments. Here are some practical, family-friendly serving suggestions that will elevate your donut experience:
- Serve with a side of fresh fruit: Nothing complements the sweetness of donuts quite like the freshness of fruit! Consider slicing up some strawberries, bananas, or even a handful of blueberries. The juicy, vibrant flavors will balance out the sweetness of the donuts and add a pop of color to your plate. Plus, it’s a great way to sneak in some extra vitamins!
- Pair with coffee or tea for a delightful afternoon treat: If you’re looking for a cozy afternoon pick-me-up, enjoy your Mini Mochi Donuts with a steaming cup of coffee or a soothing cup of tea. The rich flavors of coffee or the calming notes of herbal tea will perfectly complement the chewy sweetness of the donuts. It’s like a little moment of bliss in your busy day!
- Offer with yogurt for a balanced snack: For a more balanced snack option, serve your donuts alongside a dollop of yogurt. Greek yogurt, in particular, adds a creamy, tangy contrast that pairs wonderfully with the sweetness of the donuts. You can even add a drizzle of honey or a sprinkle of granola on top for an extra crunch. It’s a delicious way to satisfy your sweet tooth while still getting some protein!
These serving suggestions are not only practical but also add a fun twist to your Mini Mochi Donuts experience. Whether you’re enjoying them for breakfast, an afternoon snack, or a special treat, these pairings will make your donuts even more delightful. So, gather your family, set the table, and enjoy these sweet little bites together!
FAQs About Mini Mochi Donuts
As you embark on your journey to create these delightful Mini Mochi Donuts, you might have a few questions swirling in your mind. Don’t worry; I’ve got you covered! Here are some common questions and their answers to help you along the way:
- Can I make these donuts ahead of time?
Absolutely! You can prepare the batter ahead of time and store it in the refrigerator for up to 24 hours. Just give it a good stir before pouring it into the donut pan. However, for the best texture, I recommend baking them fresh if you can. If you have leftover baked donuts, they can be stored for later enjoyment! - How do I store leftover donuts?
If you happen to have any donuts left (which is rare in my house!), store them in an airtight container at room temperature for up to 2 days. If you want to keep them fresh for longer, you can refrigerate them, but be aware that they may lose some of their delightful chewiness. Just let them come to room temperature before enjoying! - Can I freeze Mini Mochi Donuts?
Yes, you can! To freeze your Mini Mochi Donuts, let them cool completely, then place them in a single layer on a baking sheet and freeze until solid. Once frozen, transfer them to an airtight container or freezer bag. They can be stored in the freezer for up to 2 months. When you’re ready to enjoy, simply thaw them at room temperature or pop them in the microwave for a few seconds to warm them up!
With these FAQs in mind, you’re all set to tackle your Mini Mochi Donuts adventure with confidence. Happy baking, and enjoy every delicious bite!

Final Thoughts on Mini Mochi Donuts
As I sit here savoring the last bite of my Mini Mochi Donuts, I can’t help but reflect on how easy and delightful this recipe truly is. It’s like a little slice of happiness that you can whip up in no time, even on the busiest of days. The chewy texture, the sweet glaze, and the endless possibilities for customization make these donuts a standout treat in my kitchen.
What I love most about these donuts is how they bring a sense of joy and togetherness. Whether you’re making them for a family breakfast, a cozy afternoon snack, or a fun baking activity with the kids, they create moments of connection and laughter. Plus, they’re so simple to make that you won’t feel overwhelmed in the kitchen. Just a few ingredients, a little mixing, and voilà—deliciousness awaits!
I wholeheartedly encourage you to give these Mini Mochi Donuts a try. Trust me, once you take that first bite, you’ll be hooked! And don’t be afraid to get creative with flavors and toppings. Whether you stick to the classic glaze or experiment with fruity or chocolatey variations, the joy of baking these treats is all yours to explore.
So, gather your ingredients, roll up your sleeves, and dive into the world of Mini Mochi Donuts. I can’t wait to hear about your delicious creations and the smiles they bring to your family’s faces. Happy baking, and may your kitchen be filled with love and laughter!
“`
Print
Mini Mochi Donuts: Delight in This Easy Recipe!
- Total Time: 22 minutes
- Yield: 12 mini donuts 1x
- Diet: Vegetarian
Description
Delight in these easy-to-make Mini Mochi Donuts, perfect for a sweet treat!
Ingredients
- 1 cup sweet rice flour (mochi flour)
- 1/2 cup granulated sugar
- 1/2 teaspoon baking powder
- 1/4 teaspoon salt
- 1/2 cup milk (dairy or non-dairy)
- 1 large egg
- 1 teaspoon vanilla extract
- 1 tablespoon melted butter or coconut oil
- Cooking spray or oil for greasing the pan
- For the glaze:
- 1 cup powdered sugar
- 2 tablespoons milk (dairy or non-dairy)
- 1/2 teaspoon vanilla extract
- Sprinkles (optional)
Instructions
- Preheat the oven to 350°F (175°C) and lightly grease a mini donut pan with cooking spray or oil.
- In a mixing bowl, combine the sweet rice flour, granulated sugar, baking powder, and salt.
- In another bowl, whisk together the milk, egg, vanilla extract, and melted butter until well combined.
- Pour the wet ingredients into the dry ingredients and mix until smooth and fully incorporated.
- Spoon the batter into the prepared mini donut pan, filling each cavity about 3/4 full.
- Bake for 10-12 minutes or until the donuts are lightly golden and a toothpick inserted comes out clean.
- Allow the donuts to cool in the pan for 5 minutes, then transfer them to a wire rack to cool completely.
- While the donuts are cooling, prepare the glaze by whisking together the powdered sugar, milk, and vanilla extract until smooth.
- Dip the cooled donuts into the glaze, allowing any excess to drip off, and sprinkle with optional sprinkles if desired.
- Let the glaze set for a few minutes before serving.
Notes
- Serves 12 mini donuts.
- For a chocolate version, substitute 2 tablespoons of the sweet rice flour with cocoa powder.
- For a fruity twist, add 1/4 cup of mashed banana or pureed strawberries to the batter before mixing.
- Prep Time: 10 minutes
- Cook Time: 12 minutes
- Category: Dessert
- Method: Baking
- Cuisine: Japanese
Nutrition
- Serving Size: 1 donut
- Calories: 80
- Sugar: 6g
- Sodium: 50mg
- Fat: 3g
- Saturated Fat: 1g
- Unsaturated Fat: 2g
- Trans Fat: 0g
- Carbohydrates: 14g
- Fiber: 0g
- Protein: 1g
- Cholesterol: 20mg
Keywords: Mini Mochi Donuts, Easy Recipe, Dessert

