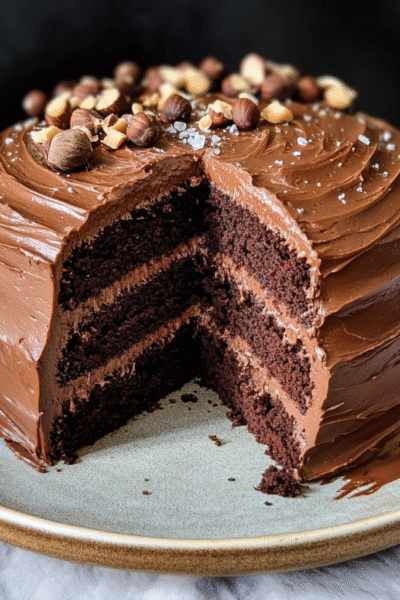
Chocolate Fudge: Discover the Easiest Recipe Today!
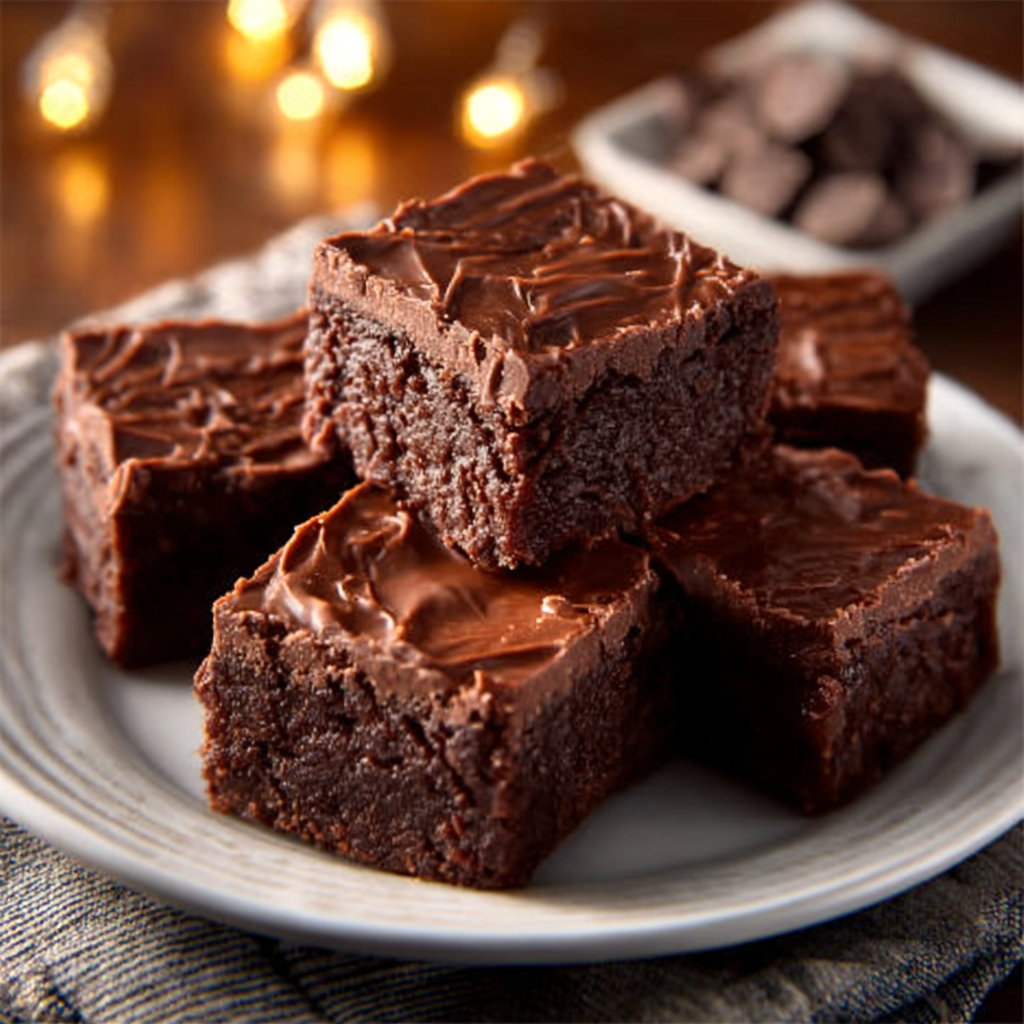
gutenberg
Why You’ll Love This Chocolate Fudge
Let me tell you, this Chocolate Fudge recipe is a game changer for anyone juggling a busy life. Whether you’re a mom racing against the clock or a professional trying to squeeze in a little joy between meetings, this fudge is your new best friend. It’s quick, it’s easy, and it’s downright delicious!
First off, the prep time is a mere 10 minutes. Yes, you heard that right! In just a few short minutes, you can whip up a batch of fudge that will have your family singing your praises. And let’s be honest, who doesn’t love a little extra love from the family? It’s like a warm hug in dessert form!
Now, I know what you might be thinking: “But I don’t have time for complicated recipes!” Trust me, I get it. Between work, family, and everything else life throws at us, the last thing we need is a recipe that requires a culinary degree. This chocolate fudge is as simple as it gets. You’ll only need a few ingredients, and the cleanup is a breeze. Just one saucepan and a baking dish—easy peasy!
And let’s not forget about the flavor. This fudge is rich, creamy, and oh-so-chocolatey. It’s the kind of treat that can brighten even the busiest of days. Whether you’re celebrating a birthday, hosting a family gathering, or just need a little pick-me-up after a long day, this fudge fits the bill perfectly. It’s versatile enough to be a crowd-pleaser at parties or a cozy indulgence for yourself while binge-watching your favorite show.
Plus, if you have picky eaters at home (and who doesn’t?), this chocolate fudge is a surefire hit. Kids and adults alike can’t resist its sweet, melt-in-your-mouth goodness. You can even customize it with nuts or other mix-ins to cater to everyone’s tastes. It’s like a blank canvas for your chocolatey creativity!
So, if you’re looking for a quick, satisfying treat that will make you the star of your kitchen, look no further than this chocolate fudge. It’s not just a dessert; it’s a little moment of joy you can create in your busy life. Trust me, once you try it, you’ll be making it again and again!
Introduction to Chocolate Fudge
Ah, Chocolate Fudge—the very name brings a smile to my face! This delightful dessert has been a beloved staple in kitchens across America for generations. It’s that rich, creamy treat that can turn an ordinary day into something special. Whether you’re indulging after a long day or celebrating a family milestone, chocolate fudge is always a welcome addition.
Now, let’s talk about why this sweet treat is particularly appealing to busy women like us. Life can feel like a whirlwind, right? Between juggling work commitments, family responsibilities, and everything in between, finding time to whip up a dessert can seem impossible. But here’s the good news: chocolate fudge is the answer to your dessert prayers! It’s quick to prepare, requires minimal ingredients, and the best part? It’s a crowd-pleaser!
Imagine this: you’ve just come home from a hectic day, and the last thing you want to do is spend hours in the kitchen. With this chocolate fudge recipe, you can have a delicious dessert ready in no time. In just 10 minutes of prep, you’ll be on your way to creating a sweet masterpiece that your family will adore. It’s like having a secret weapon in your culinary arsenal!
Plus, let’s not forget the joy of sharing something homemade. There’s something incredibly satisfying about serving up a batch of chocolate fudge to your loved ones. It’s a simple way to show you care, and trust me, they’ll appreciate the effort. Whether it’s for a birthday party, a cozy family movie night, or just because you deserve a treat, this fudge is the perfect solution.
So, if you’re ready to dive into the world of chocolate fudge, buckle up! This recipe is not just about making a dessert; it’s about creating moments of joy in our busy lives. Let’s get started on this delicious journey together!
Why You’ll Love This Chocolate Fudge
Let me tell you, this Chocolate Fudge recipe is a game changer for anyone juggling a busy life. Whether you’re a mom racing against the clock or a professional trying to squeeze in a little joy between meetings, this fudge is your new best friend. It’s quick, it’s easy, and it’s downright delicious!
First off, the prep time is a mere 10 minutes. Yes, you heard that right! In just a few short minutes, you can whip up a batch of fudge that will have your family singing your praises. And let’s be honest, who doesn’t love a little extra love from the family? It’s like a warm hug in dessert form!
Now, I know what you might be thinking: “But I don’t have time for complicated recipes!” Trust me, I get it. Between work, family, and everything else life throws at us, the last thing we need is a recipe that requires a culinary degree. This chocolate fudge is as simple as it gets. You’ll only need a few ingredients, and the cleanup is a breeze. Just one saucepan and a baking dish—easy peasy!
And let’s not forget about the flavor. This fudge is rich, creamy, and oh-so-chocolatey. It’s the kind of treat that can brighten even the busiest of days. Whether you’re celebrating a birthday, hosting a family gathering, or just need a little pick-me-up after a long day, this fudge fits the bill perfectly. It’s versatile enough to be a crowd-pleaser at parties or a cozy indulgence for yourself while binge-watching your favorite show.
Plus, if you have picky eaters at home (and who doesn’t?), this chocolate fudge is a surefire hit. Kids and adults alike can’t resist its sweet, melt-in-your-mouth goodness. You can even customize it with nuts or other mix-ins to cater to everyone’s tastes. It’s like a blank canvas for your chocolatey creativity!
So, if you’re looking for a quick, satisfying treat that will make you the star of your kitchen, look no further than this chocolate fudge. It’s not just a dessert; it’s a little moment of joy you can create in your busy life. Trust me, once you try it, you’ll be making it again and again!
Ingredients You’ll Need
Alright, let’s dive into the delicious world of Chocolate Fudge! Before we get our hands chocolatey, we need to gather a few simple ingredients. Trust me, you probably have most of these in your pantry already!
- 2 cups semi-sweet chocolate chips: This is the star of the show! The chocolate chips melt beautifully, creating that rich, creamy texture we all crave. If you’re feeling adventurous, you can swap these for dark chocolate chips for a deeper flavor.
- 1 can (14 ounces) sweetened condensed milk: This magical ingredient adds sweetness and creaminess to our fudge. It’s like the glue that holds everything together! If you’re looking for a lighter option, you can use low-fat sweetened condensed milk, but I promise, the regular stuff is worth it for that indulgent taste.
- 1/4 cup unsalted butter: Butter makes everything better, right? It adds richness and helps the fudge set perfectly. If you’re dairy-free, feel free to use coconut oil instead. It’ll give your fudge a subtle tropical twist!
- 1 teaspoon vanilla extract: This little splash of flavor elevates the fudge to a whole new level. It adds warmth and depth. You can even experiment with almond extract for a nutty flavor if you’re feeling fancy!
- 1/2 cup chopped nuts (optional): Nuts add a delightful crunch and a bit of protein. I love using walnuts or pecans, but you can use whatever you have on hand. If you’re nut-free, just skip this step—your fudge will still be fabulous!
- Pinch of salt: A little salt goes a long way in enhancing the sweetness of the fudge. It’s like a secret ingredient that makes everything pop! Don’t skip it, trust me!
And there you have it! These ingredients come together to create a chocolate fudge that’s not just easy to make but also incredibly satisfying. If you’re wondering about measurements, don’t worry! I’ve got printable measurements at the end of this article, so you can whip up this treat without any hassle.
Now that we’ve got our ingredients lined up, let’s get ready to make some magic happen in the kitchen!
How to Make Chocolate Fudge
Now that we’ve gathered our ingredients, it’s time to roll up our sleeves and get cooking! Making Chocolate Fudge is as easy as pie—well, easier, actually! Follow these simple steps, and you’ll have a delicious treat ready to enjoy in no time.
Step 1 – Prep Ingredients
First things first, let’s get our baking dish ready. Grab an 8-inch square baking dish and line it with parchment paper. This is a crucial step, my friends! The parchment paper will make it super easy to lift the fudge out once it’s set. Just cut a piece of parchment that’s big enough to cover the bottom and sides of the dish, leaving a little overhang. This overhang is your best friend—it’s like a handle for easy removal later. Trust me, you’ll thank yourself when it’s time to cut those perfect squares!
Step 2 – Begin Cooking
Now, let’s get to the fun part—melting our chocolatey goodness! In a medium saucepan, combine the 2 cups of semi-sweet chocolate chips, the can of sweetened condensed milk, and the 1/4 cup of unsalted butter. Place the saucepan over low heat. This is where the magic happens! Stir continuously with a mixing spoon. You want to keep the heat low to avoid burning the chocolate. As you stir, watch the mixture transform into a smooth, glossy delight. It’s like watching a beautiful sunset—so satisfying!
Keep stirring until everything is melted and well combined. This should take about 5 to 7 minutes. Once it’s all smooth and creamy, remove the saucepan from the heat. You’re almost there!
Step 3 – Combine Ingredients
Now that our chocolate mixture is ready, it’s time to add the finishing touches. Carefully stir in the 1 teaspoon of vanilla extract, and if you’re using them, toss in the 1/2 cup of chopped nuts and a pinch of salt. The vanilla adds a lovely warmth, while the nuts give a delightful crunch. If you’re not a nut fan, feel free to skip this step—your fudge will still be fabulous!
Mix everything together until it’s well combined. You’ll want to make sure the vanilla and salt are evenly distributed throughout the fudge. It’s like giving your fudge a little pep talk before it heads to the fridge!
Step 4 – Finish and Serve
Alright, it’s time to pour that luscious fudge mixture into your prepared baking dish. Use a spatula to spread it evenly across the bottom. Don’t worry if it’s not perfect; it’s going to taste amazing no matter what! Once it’s all in the dish, pop it into the refrigerator and let it chill for at least 2 hours. This is the hardest part—waiting! But trust me, it’ll be worth it.
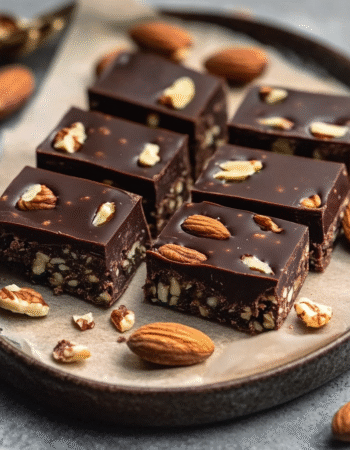
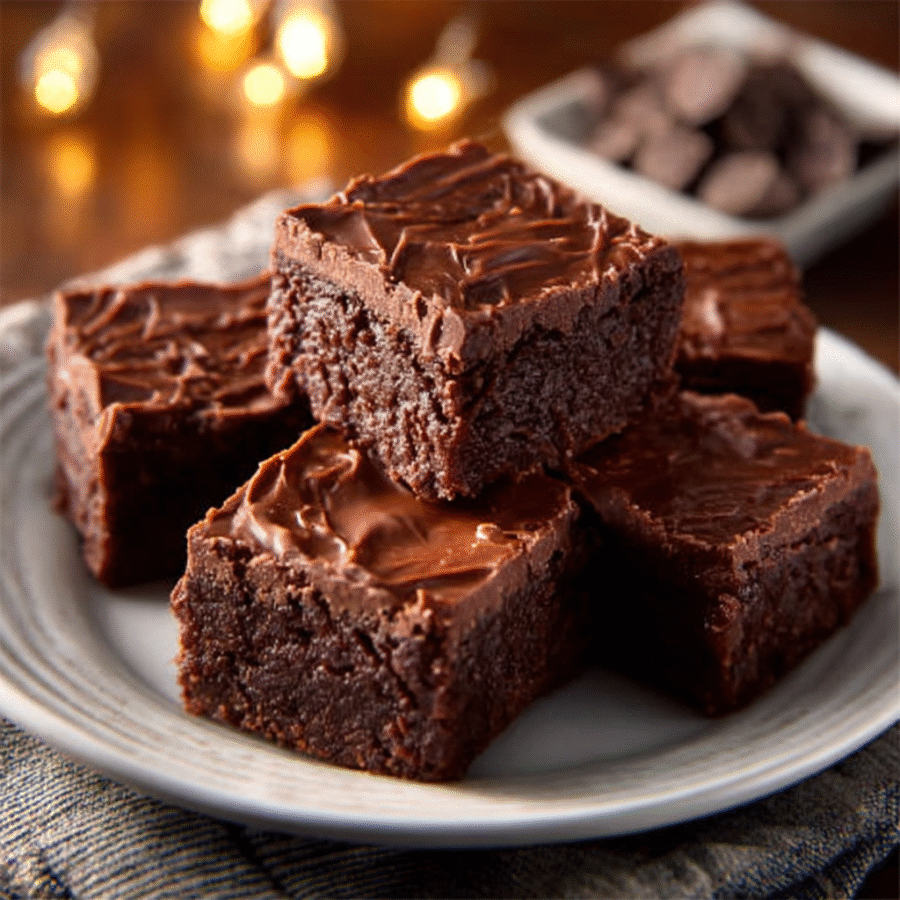
After a couple of hours, check to see if the fudge is firm. Once it’s set, lift it out of the dish using the parchment paper overhang. Place it on a cutting board and cut it into squares. And just like that, you’ve made your very own chocolate fudge! It’s time to enjoy your creation, share it with loved ones, or keep it all to yourself—no judgment here!
Tips for Perfect Results
Now that you’ve mastered the basics of making Chocolate Fudge, let’s talk about how to take your fudge game to the next level! With just a few simple tips, you can enhance the flavor and texture of your fudge, making it even more irresistible. Trust me, these little tweaks can make a big difference!
- Use high-quality chocolate: This is a biggie! The type of chocolate you use can make or break your fudge. Opt for high-quality semi-sweet or dark chocolate chips. They melt beautifully and provide a richer, more decadent flavor. Think of it like using fresh ingredients in a salad—it just tastes better! Your taste buds will thank you!
- Experiment with different nuts or add-ins: Don’t be afraid to get creative! While walnuts and pecans are classic choices, you can mix it up with almonds, hazelnuts, or even dried fruits like cranberries or cherries. Want a little crunch? Try adding crushed pretzels or toffee bits for a delightful surprise. It’s like giving your fudge a personality makeover!
- Store fudge in an airtight container: To keep your fudge fresh and delicious, store it in an airtight container at room temperature. If you live in a particularly warm climate, you might want to keep it in the fridge to prevent it from getting too soft. Just make sure to let it sit at room temperature for a few minutes before serving, so it’s nice and easy to cut. Fresh fudge is the best fudge!
By following these tips, you’ll not only create a delicious batch of chocolate fudge but also impress your family and friends with your culinary skills. So go ahead, get creative, and enjoy every chocolatey bite!
Essential Equipment Needed
Before we dive into the deliciousness of Chocolate Fudge, let’s make sure you have the right tools on hand. Don’t worry; you won’t need any fancy gadgets or high-tech equipment. Just a few basic kitchen essentials will do the trick!
- Medium saucepan: This is where the magic happens! A medium-sized saucepan is perfect for melting your chocolate chips, sweetened condensed milk, and butter together. If you don’t have a medium saucepan, a large one will work too—just keep an eye on the mixture to prevent it from burning.
- Baking dish (8-inch square): You’ll need an 8-inch square baking dish to set your fudge. If you don’t have one, a similar-sized dish will work just fine. Just remember, the size of the dish can affect the thickness of your fudge, so keep that in mind when choosing!
- Parchment paper: This is a must-have for easy removal of your fudge once it’s set. If you don’t have parchment paper, you can use aluminum foil, but be sure to grease it lightly to prevent sticking. Trust me, you’ll want to avoid the struggle of prying fudge out of a dish!
- Mixing spoon: A sturdy mixing spoon is essential for stirring your fudge mixture. Wooden spoons work great, but any heat-resistant spoon will do. Just make sure it’s long enough to reach the bottom of the saucepan for thorough mixing!
Now, if you’re in a pinch and don’t have a medium saucepan, you can also use a microwave-safe bowl for melting your ingredients. Just combine everything in the bowl and microwave in 30-second intervals, stirring in between until smooth. It’s a quick and easy alternative that works like a charm!
With these simple tools at your disposal, you’re all set to create your very own chocolate fudge masterpiece. Let’s get cooking!
Delicious Variations of Chocolate Fudge
Now that you’ve mastered the classic Chocolate Fudge recipe, let’s have some fun with it! One of the best things about fudge is its versatility. You can easily tweak the flavors and ingredients to suit your taste or dietary needs. Here are some delightful variations to consider that will keep your fudge game fresh and exciting!
- Add peppermint extract for a minty twist: If you’re a fan of mint chocolate, this one’s for you! Simply add 1/2 teaspoon of peppermint extract to the chocolate mixture after you’ve removed it from the heat. It’s like a holiday treat any time of year! Imagine biting into a piece of fudge that tastes like a chocolate mint cookie—pure bliss!
- Use almond or cashew butter for a nutty flavor: Want to take your fudge to the next level? Swap out the unsalted butter for almond or cashew butter. This not only adds a delicious nutty flavor but also gives your fudge a creamy texture that’s hard to resist. Plus, it’s a great way to sneak in some healthy fats! Just be sure to use a smooth variety for the best results.
- Create a gluten-free version: If you or someone in your family is gluten-sensitive, you can easily make this fudge gluten-free! Just ensure that all your ingredients, especially the chocolate chips, are certified gluten-free. It’s a simple adjustment that allows everyone to enjoy this sweet treat without worry. You can even add gluten-free graham cracker crumbs for a s’mores-inspired fudge!
These variations are just the tip of the iceberg! Feel free to get creative and experiment with different flavors and mix-ins. You could add a swirl of caramel, sprinkle in some sea salt, or even fold in some dried fruit for a chewy texture. The possibilities are endless, and that’s what makes making fudge so much fun!
So, whether you’re in the mood for something minty, nutty, or gluten-free, these variations will keep your fudge game strong. Get ready to impress your family and friends with your delicious creations, and don’t forget to share your favorite variations with me! Happy fudging!
Serving Suggestions
Now that you’ve whipped up a batch of that irresistible Chocolate Fudge, let’s talk about how to serve it up in style! After all, presentation can make a simple dessert feel like a special occasion. Here are some practical, family-friendly pairings that will elevate your fudge experience and make it even more delightful!
- Serve with vanilla ice cream for a decadent dessert: Picture this: a warm square of chocolate fudge topped with a generous scoop of creamy vanilla ice cream. It’s like a match made in dessert heaven! The rich, gooey fudge pairs perfectly with the cool, smooth ice cream, creating a delightful contrast of temperatures and textures. You can even drizzle some chocolate sauce or caramel on top for an extra indulgent touch. Trust me, your family will be begging for seconds!
- Pair with fresh fruit for a refreshing contrast: If you’re looking for a lighter option, consider serving your fudge alongside some fresh fruit. Slices of strawberries, raspberries, or even banana can add a burst of freshness that balances the richness of the fudge. It’s like a little party on your plate! Plus, the natural sweetness of the fruit complements the chocolate beautifully. You can even create a fun fruit and fudge platter for a family gathering—everyone will love it!
- Enjoy with a cup of coffee or tea for a cozy treat: There’s something so comforting about enjoying a piece of chocolate fudge with a warm cup of coffee or tea. The rich flavors of the fudge pair wonderfully with the boldness of coffee or the soothing notes of herbal tea. It’s the perfect way to unwind after a long day or to treat yourself during a cozy afternoon break. So, brew your favorite cup and savor the moment!
These serving suggestions are not just about making your fudge look good; they’re about enhancing the overall experience. Whether you’re hosting a family gathering, enjoying a quiet night in, or celebrating a special occasion, these pairings will take your chocolate fudge to the next level. So go ahead, get creative, and enjoy every delicious bite!
FAQs About Chocolate Fudge
As you embark on your chocolate fudge-making journey, you might have a few questions swirling around in your mind. Don’t worry; I’ve got you covered! Here are some common questions about Chocolate Fudge along with concise answers to help you out.
How long does chocolate fudge last?
Your homemade chocolate fudge can last up to two weeks when stored properly in an airtight container at room temperature. If you live in a particularly warm climate, it’s best to keep it in the fridge to maintain its firmness. Just remember to let it sit at room temperature for a few minutes before serving, so it’s nice and easy to cut!
Can I freeze chocolate fudge?
Absolutely! Chocolate fudge freezes beautifully. Just wrap it tightly in plastic wrap or aluminum foil, then place it in an airtight container or freezer bag. It can last for up to three months in the freezer. When you’re ready to enjoy it, simply thaw it in the fridge overnight or at room temperature for a few hours. It’s like having a sweet treat waiting for you whenever you need a little indulgence!
What can I use instead of sweetened condensed milk?
If you’re looking for a substitute for sweetened condensed milk, you can make your own by combining 1 cup of milk with 1 cup of sugar and simmering it until it thickens. Alternatively, you can use evaporated milk with added sugar (about 1/2 cup) to achieve a similar sweetness and creaminess. Just keep in mind that the flavor might be slightly different, but it will still be delicious!
Is chocolate fudge suitable for gifting?
Oh, absolutely! Chocolate fudge makes a fantastic gift! It’s perfect for holidays, birthdays, or just because. You can cut it into neat squares, package it in a cute box or tin, and even add a little ribbon for a personal touch. Everyone loves a homemade treat, and your friends and family will appreciate the thoughtfulness behind your delicious gift. Just be sure to include a note about how to store it for maximum freshness!
With these FAQs answered, you’re all set to dive into the wonderful world of chocolate fudge. Enjoy the process, and don’t hesitate to share your fudge-making adventures with me!
Final Thoughts on Chocolate Fudge
As I sit here savoring a piece of that rich, creamy Chocolate Fudge, I can’t help but reflect on how this simple recipe has become a staple in my kitchen. It’s amazing how something so easy to make can bring so much joy to my family and friends. Seriously, it’s like a little piece of happiness wrapped in chocolate!
What I love most about this fudge is its versatility. Whether you’re whipping it up for a birthday party, a cozy family movie night, or just because you deserve a treat, it fits perfectly into any occasion. And let’s be real—who doesn’t need a little chocolate in their life? It’s like a secret weapon against the chaos of everyday life!
So, if you haven’t tried making this chocolate fudge yet, I wholeheartedly encourage you to give it a go. You’ll be amazed at how quickly it comes together and how little effort it takes. Plus, the smiles on your loved ones’ faces when they take that first bite? Priceless! It’s those little moments of joy that make all the hustle and bustle worth it.
And don’t forget to share your experiences with me! I’d love to hear about your fudge-making adventures, any creative twists you’ve added, or even the reactions from your family. After all, cooking is all about connection, and what better way to connect than over a delicious batch of homemade fudge? So roll up your sleeves, grab those ingredients, and let’s create some sweet memories together!
“`
Print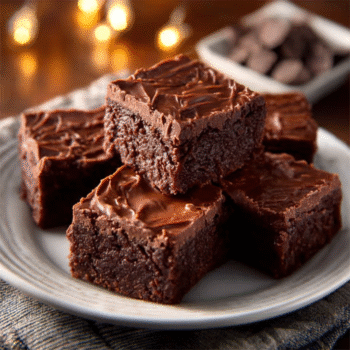
Chocolate Fudge: Discover the Easiest Recipe Today!
- Total Time: 2 hours 20 minutes
- Yield: 16 servings 1x
- Diet: Vegetarian
Description
A simple and delicious recipe for homemade chocolate fudge that is perfect for any occasion.
Ingredients
- 2 cups semi-sweet chocolate chips
- 1 can (14 ounces) sweetened condensed milk
- 1/4 cup unsalted butter
- 1 teaspoon vanilla extract
- 1/2 cup chopped nuts (optional)
- Pinch of salt
Instructions
- Line an 8-inch square baking dish with parchment paper, leaving some overhang for easy removal.
- In a medium saucepan over low heat, combine the chocolate chips, sweetened condensed milk, and butter. Stir continuously until the mixture is smooth and fully melted.
- Remove the saucepan from heat and stir in the vanilla extract, chopped nuts (if using), and a pinch of salt until well combined.
- Pour the fudge mixture into the prepared baking dish and spread it evenly.
- Refrigerate for at least 2 hours, or until the fudge is firm.
- Once set, lift the fudge out of the dish using the parchment paper overhang and cut it into squares.
Notes
- For a richer flavor, try using dark chocolate chips instead of semi-sweet.
- You can also add a sprinkle of sea salt on top before chilling for a sweet and salty contrast.
- Prep Time: 10 minutes
- Cook Time: 10 minutes
- Category: Dessert
- Method: Stovetop
- Cuisine: American
Nutrition
- Serving Size: 1 square
- Calories: 150
- Sugar: 14g
- Sodium: 50mg
- Fat: 8g
- Saturated Fat: 5g
- Unsaturated Fat: 3g
- Trans Fat: 0g
- Carbohydrates: 18g
- Fiber: 1g
- Protein: 2g
- Cholesterol: 10mg
Keywords: Chocolate Fudge, Easy Chocolate Fudge Recipe
