Hello Dolly Bars: Discover This Irresistible Recipe!
gutenberg
Why You’ll Love This Hello Dolly Bars
Let me tell you, if you’re a busy woman juggling work, family, and everything in between, Hello Dolly Bars (or Seven-Layer Bars, as some call them) are about to become your new best friend in the kitchen. Why? Because they’re not just delicious; they’re also incredibly easy to whip up! Seriously, you can have these sweet treats ready in no time, and the cleanup is a breeze. Who doesn’t love that?
First off, let’s talk about the prep time. With just 15 minutes of hands-on work, you can create a dessert that looks and tastes like you spent hours in the kitchen. I mean, who has that kind of time? Not me! And I bet you’re in the same boat. Plus, once you pop them in the oven, you can kick back and relax while they bake. It’s like a mini-vacation in your own home!
Now, let’s get to the good stuff—the flavors! These bars are a delightful medley of chocolate, butterscotch, and coconut, all wrapped up in a buttery graham cracker crust. It’s a flavor explosion that appeals to everyone, from your picky eaters to your chocolate-loving spouse. I’ve served these at family gatherings, and they disappear faster than you can say “Hello Dolly!”
But wait, there’s more! The versatility of this recipe is another reason you’ll love it. You can easily customize it to fit your family’s tastes. Want to swap out the nuts for some dried fruit? Go for it! Prefer dark chocolate over butterscotch? You do you! This recipe is like a blank canvas, just waiting for your personal touch.
And let’s not forget about the occasions. Whether it’s a birthday party, a potluck, or just a cozy night in with your favorite movie, Hello Dolly Bars fit right in. They’re perfect for sharing, but I won’t judge you if you want to keep them all to yourself. I’ve been there, trust me!
So, if you’re looking for a quick, family-friendly dessert that’s as easy to make as it is delicious, look no further than Hello Dolly Bars. They’re sure to become a staple in your dessert rotation, and your family will thank you for it!
Introduction to Hello Dolly Bars
Welcome to the world of Hello Dolly Bars, also affectionately known as Seven-Layer Bars! If you’re a busy woman like me, always on the go and juggling a million things at once, you’re going to love this delightful dessert. These bars are not just a treat; they’re a lifesaver when you need something sweet without the fuss.
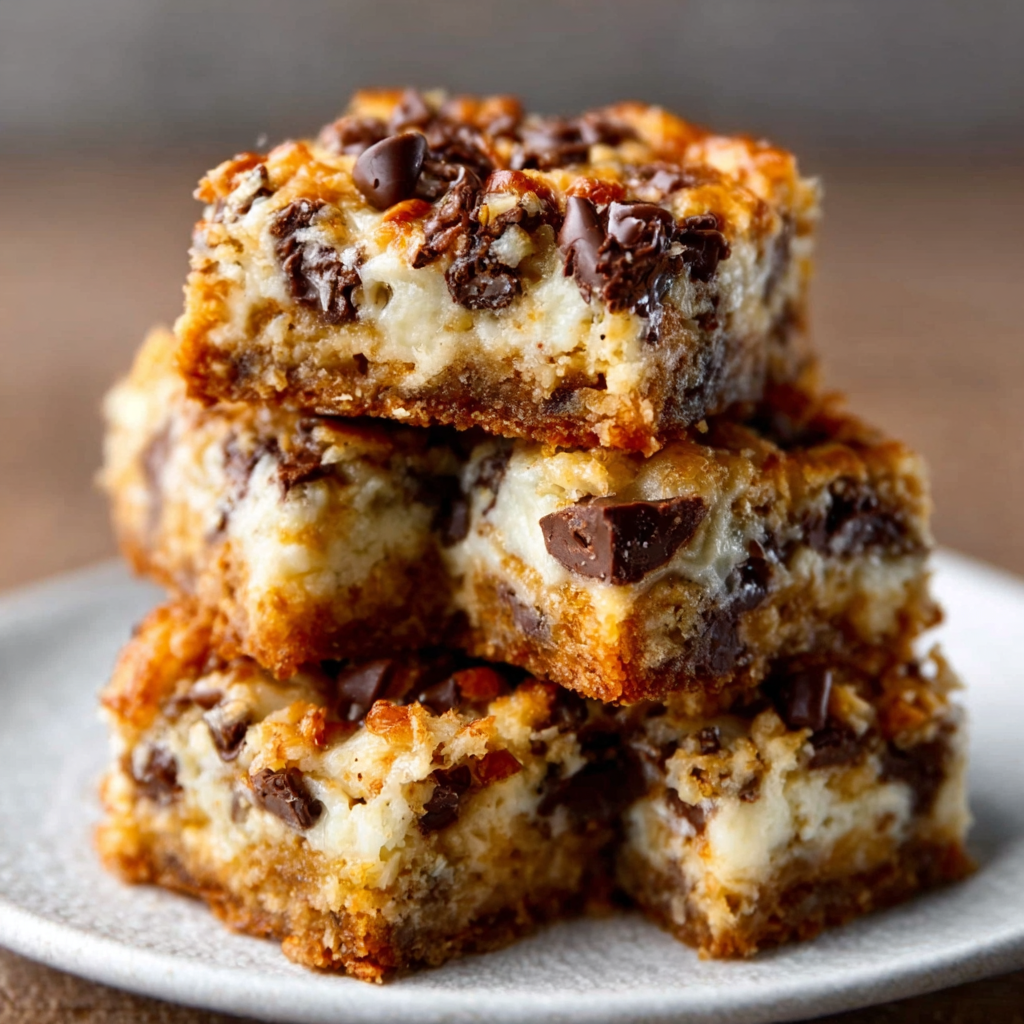
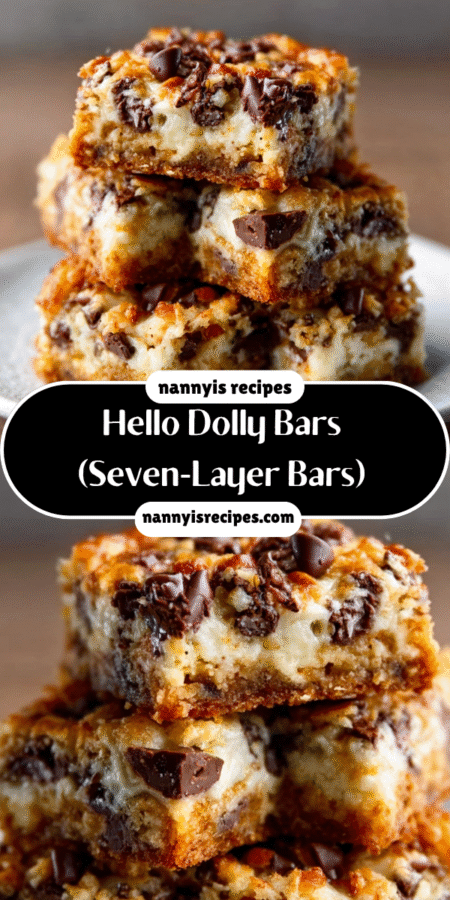
Picture this: a buttery graham cracker crust layered with sweetened shredded coconut, rich chocolate chips, creamy butterscotch chips, and crunchy nuts, all drizzled with luscious sweetened condensed milk. It’s like a party in your mouth! The combination of flavors is simply irresistible, making these bars a family favorite in my house. I can’t tell you how many times I’ve whipped these up for a last-minute gathering or just to satisfy a sweet tooth after a long day.
What I love most about Hello Dolly Bars is how easy they are to prepare. Seriously, you can have them in the oven in just 15 minutes! That’s less time than it takes to scroll through social media, right? And once they’re baking, you can kick back and enjoy a moment of peace (or tackle that ever-growing laundry pile). The minimal cleanup is just the cherry on top—no complicated equipment or endless dishes to wash!
These bars are perfect for any occasion, whether you’re hosting a family gathering, attending a potluck, or simply treating yourself after a long week. They’re a hit with kids and adults alike, and I can guarantee they’ll disappear faster than you can say “Hello Dolly!” So, let’s dive into this easy and delicious recipe that’s sure to become a staple in your dessert repertoire.
Ingredients You’ll Need
Alright, let’s get down to the nitty-gritty—the ingredients for our Hello Dolly Bars! Don’t worry; this list is as simple as pie (or should I say, bars?). Here’s what you’ll need to create this delightful dessert:
- 1 cup graham cracker crumbs: This is the base of our bars, providing that delicious buttery flavor and a bit of crunch. If you’re looking for a gluten-free option, you can easily swap these out for gluten-free graham crackers. Trust me, no one will know the difference!
- 1/2 cup unsalted butter, melted: Butter is the magic ingredient that holds everything together and adds richness. Make sure it’s unsalted so you can control the saltiness of your bars. If you’re feeling adventurous, you could even use coconut oil for a tropical twist!
- 1 cup sweetened shredded coconut: This adds a chewy texture and a hint of sweetness that pairs perfectly with the chocolate and butterscotch. If you’re not a coconut fan, feel free to leave it out or substitute with crushed graham crackers for extra crunch.
- 1 cup chocolate chips: Ah, the star of the show! You can use semi-sweet, milk chocolate, or even dark chocolate chips if you prefer a richer flavor. I won’t judge if you sneak a few while you’re baking!
- 1 cup butterscotch chips: These little gems add a unique sweetness that balances the chocolate. If you’re not a fan of butterscotch, you can replace them with more chocolate chips or even peanut butter chips for a fun twist.
- 1 cup chopped nuts (walnuts or pecans): Nuts add a delightful crunch and nutty flavor. I love using walnuts, but pecans work beautifully too! If you have nut allergies in your family, feel free to skip them altogether or substitute with seeds like sunflower or pumpkin seeds.
- 1 can (14 oz) sweetened condensed milk: This is the glue that holds everything together, creating a gooey, sweet layer that binds all the flavors. If you’re looking for a dairy-free option, there are coconut milk-based sweetened condensed milk alternatives available!
And there you have it! A simple list of ingredients that come together to create something truly magical. Don’t worry about measuring everything out just yet; I’ve got printable measurements at the end of this article for your convenience. Now, let’s get ready to bake some delicious Hello Dolly Bars that your family will adore!
How to Make Hello Dolly Bars
Now that you’ve gathered all your ingredients, it’s time to roll up your sleeves and dive into the fun part—making those scrumptious Hello Dolly Bars! Don’t worry; I’ll guide you through each step, and before you know it, you’ll have a pan full of deliciousness ready to enjoy. Let’s get started!
Step 1 – Prep Ingredients
First things first, let’s get that oven preheating! Set it to 350°F (175°C). This is the perfect temperature for baking our bars to golden perfection.
While the oven warms up, grab your 9×13 inch baking dish and give it a good greasing. You can use a little butter or cooking spray—whatever you have on hand. This will help ensure that your bars come out easily once they’re baked. Trust me, you don’t want to be wrestling with sticky bars later!
Step 2 – Begin Cooking
Now, let’s get mixing! In a large mixing bowl, combine your 1 cup of graham cracker crumbs with the 1/2 cup of melted unsalted butter. This is where the magic begins! Use a spatula or a wooden spoon to mix them together until the crumbs are fully coated in butter. It should look like wet sand—delicious, buttery wet sand!
Step 3 – Combine Ingredients
Once your graham cracker mixture is ready, it’s time to press it into the bottom of your greased baking dish. Use your fingers or the back of a measuring cup to pack it down firmly. You want a nice, even layer that will hold all those tasty toppings.
Now comes the fun part—layering! Start by sprinkling the 1 cup of sweetened shredded coconut evenly over the crust. Next, add the 1 cup of chocolate chips and 1 cup of butterscotch chips. Don’t be shy; let those chips fall where they may! Finally, sprinkle the 1 cup of chopped nuts on top. You can use walnuts or pecans, depending on your preference. If you’re nut-free, just skip this step or swap in some seeds!
Step 4 – Finish and Serve
Now, it’s time for the pièce de résistance—the sweetened condensed milk! Pour the 1 can (14 oz) of sweetened condensed milk evenly over the entire layered mixture. This will soak into all those delicious layers and create that gooey goodness we all love.
Pop your baking dish into the preheated oven and let it bake for 25-30 minutes. Keep an eye on it; you want the edges to turn a lovely golden brown. The aroma wafting through your kitchen will be absolutely heavenly!
Once they’re done baking, remove the dish from the oven and let it cool for a bit. I know it’s tempting to dive right in, but trust me, letting them cool will make cutting them into bars much easier. After about 10-15 minutes, you can slice them into squares and serve. Enjoy your homemade Hello Dolly Bars with a smile, knowing you’ve just created a treat that’s sure to impress!
Tips for Perfect Results
Now that you’re all set to make your Hello Dolly Bars, let me share some tried-and-true tips to ensure your bars turn out perfectly every time. After all, we want these sweet treats to be as delightful as they sound, right?
First up, let’s talk about butter. Using room temperature butter is key for easier mixing. Cold butter can be a bit of a pain to work with, and we want to avoid any unnecessary struggles in the kitchen. So, if you remember, take that butter out of the fridge about 30 minutes before you start baking. It’ll make mixing a breeze, and you’ll be able to combine everything smoothly without any lumps.
Next, if you want to elevate the flavor of your bars, consider toasting the nuts before adding them. Just pop them in a dry skillet over medium heat for a few minutes, stirring frequently until they’re golden and fragrant. This little step adds a depth of flavor that will make your Hello Dolly Bars even more irresistible. Trust me, your family will be asking what your secret ingredient is!
And let’s not forget about storage. If you happen to have any leftovers (which is a big if, because these bars are so good!), make sure to store them in an airtight container. This will help maintain their freshness and keep them from drying out. They’ll stay delicious for up to a week at room temperature, but I doubt they’ll last that long in your house!
So, there you have it! With these simple tips, you’ll be well on your way to creating the most scrumptious Hello Dolly Bars that will have everyone coming back for seconds. Happy baking!
Essential Equipment Needed
Before we dive into the delicious world of Hello Dolly Bars, let’s make sure you have all the essential equipment ready to go. Trust me, having the right tools on hand will make your baking experience smoother and more enjoyable. Here’s what you’ll need:
- 9×13 inch baking dish: This is the star of the show! A good-quality baking dish is crucial for achieving those perfectly baked bars. If you don’t have one, you can use a slightly smaller dish, but keep an eye on the baking time, as they may take a bit longer to cook through.
- Mixing bowls: You’ll need a couple of mixing bowls to combine your ingredients. I recommend having one large bowl for the graham cracker crust and another for layering the toppings. It keeps things organized and makes the process a breeze!
- Measuring cups: Accurate measurements are key to baking success! Make sure you have a set of measuring cups handy for all those delicious ingredients. If you’re like me and love to bake often, investing in a good set will pay off in the long run.
- Spatula or wooden spoon: You’ll need something to mix and spread your ingredients. A spatula is great for folding and scraping, while a wooden spoon is perfect for mixing. Either one will do the trick, so use what you have on hand!
- Parchment paper (optional): If you want to make removing your bars from the baking dish a piece of cake, consider lining the bottom with parchment paper. This little trick makes it super easy to lift the bars out once they’re cooled, and it saves you from any sticky situations!
With these essential tools at your side, you’re all set to create some mouthwatering Hello Dolly Bars that will have your family begging for more. Let’s get baking!
Delicious Variations of Hello Dolly Bars
Now that you’ve mastered the classic Hello Dolly Bars, let’s have some fun with variations! One of the best things about this recipe is its versatility. You can easily switch things up to suit your family’s tastes or to use up what you have in your pantry. Here are a few delicious ideas to get your creative juices flowing:
First up, let’s talk about adding some dried fruits. If you’re looking to introduce a chewy texture and a burst of fruity flavor, consider tossing in some dried cranberries or raisins. They add a lovely sweetness that complements the chocolate and butterscotch beautifully. Plus, it’s a sneaky way to get a bit of fruit into your dessert! Just sprinkle about 1/2 cup of your favorite dried fruit over the layers before pouring on the sweetened condensed milk. Your family will love the added chewiness!
Next, if you’re a fan of rich, deep flavors, why not substitute dark chocolate chips for a more decadent twist? Dark chocolate brings a sophisticated flavor that pairs wonderfully with the sweetness of the butterscotch and coconut. You can use semi-sweet or even bittersweet chocolate chips, depending on how bold you want the chocolate flavor to be. Just remember, the darker the chocolate, the more intense the flavor, so choose what suits your palate best!
And for those of you who might have nut allergies in the family or simply want to create a nut-free version, don’t worry! You can easily omit the nuts altogether or replace them with seeds like sunflower or pumpkin seeds. These seeds will still give you that delightful crunch without the nutty flavor. Just sprinkle about 1 cup of seeds on top of your layers, and you’re good to go! It’s a fantastic way to keep the texture while accommodating dietary needs.
So, whether you’re in the mood for a fruity twist, a rich chocolate experience, or a nut-free option, these variations will keep your Hello Dolly Bars exciting and fresh. Feel free to mix and match these ideas or come up with your own! The beauty of this recipe is that it’s all about what you and your family love. Happy baking, and enjoy experimenting with your delicious creations!
Serving Suggestions
Now that you’ve whipped up a batch of those scrumptious Hello Dolly Bars, let’s talk about how to serve them for maximum enjoyment! After all, presentation and pairing can elevate your dessert experience from good to absolutely delightful.
First up, let’s indulge a little. Imagine this: a warm, gooey Hello Dolly Bar fresh out of the oven, paired with a generous scoop of vanilla ice cream. The creamy, cold ice cream melting into the warm bars creates a heavenly contrast that’s simply irresistible. It’s like a match made in dessert heaven! You can even drizzle a bit of chocolate or caramel sauce on top for that extra touch of decadence. Trust me, your family will be singing your praises!
If you’re looking for a more refined pairing, consider serving your Hello Dolly Bars alongside a steaming cup of coffee or tea. The rich flavors of the bars complement the warmth of your favorite brew beautifully. Whether you prefer a bold cup of black coffee or a soothing herbal tea, this combination makes for a delightful afternoon treat. It’s the perfect way to take a break from your busy day and savor a moment of sweetness.
And let’s not forget about presentation! You can cut your bars into neat squares and arrange them on a pretty platter, dusting them with a little powdered sugar for a touch of elegance. Add some fresh berries or mint leaves for a pop of color, and you’ve got a dessert that looks as good as it tastes. Your guests will be impressed, and you’ll feel like a culinary rockstar!
So, whether you’re indulging in a decadent dessert with ice cream or enjoying a cozy afternoon treat with a warm beverage, these serving suggestions will take your Hello Dolly Bars to the next level. Get ready to impress your family and friends with these delightful pairings!
FAQs About Hello Dolly Bars
As you embark on your delicious journey with Hello Dolly Bars, you might have a few questions swirling around in your mind. Don’t worry; I’ve got you covered! Here are some frequently asked questions that will help you navigate your baking adventure with ease:
Can I make Hello Dolly Bars ahead of time?
Absolutely! One of the best things about these bars is that they can be made a day in advance. Just whip them up, let them cool, and store them in an airtight container. This way, you can have a sweet treat ready to go whenever you need it. Perfect for those busy days when you want to impress without the last-minute rush!
How do I store leftovers?
If you happen to have any leftovers (which is a big if, because they’re so delicious!), simply store them in an airtight container at room temperature. They’ll stay fresh and tasty for up to a week. Just make sure to keep them out of direct sunlight, or they might get a little too warm and gooey!
Can I freeze Hello Dolly Bars?
Yes, you can! These bars freeze beautifully, making them a great option for meal prep or future cravings. Just wrap them tightly in plastic wrap or aluminum foil, then place them in a freezer-safe container. They’ll keep well in the freezer for up to three months. When you’re ready to enjoy them, simply thaw them in the fridge overnight or let them sit at room temperature for a bit. Easy peasy!
With these FAQs in your back pocket, you’re all set to tackle your Hello Dolly Bars with confidence. Happy baking, and enjoy every delicious bite!
Final Thoughts on Hello Dolly Bars
As we wrap up our delicious journey into the world of Hello Dolly Bars, I can’t help but reflect on just how easy and delightful these treats are. Seriously, if you’re a busy woman like me, always on the go and juggling a million things, these bars are a game changer. They’re not just a dessert; they’re a sweet escape that fits perfectly into our hectic lives.
With just a handful of simple ingredients and minimal prep time, you can whip up a batch of these scrumptious bars that will have your family singing your praises. The combination of chocolate, butterscotch, and coconut creates a flavor explosion that’s hard to resist. Plus, the fact that they’re so versatile means you can customize them to suit your family’s tastes or even use up what you have in your pantry. It’s like having a dessert that adapts to your life!
So, I encourage you to give this recipe a try. Whether you’re baking for a special occasion, a potluck, or just to satisfy that sweet tooth after a long day, Hello Dolly Bars are sure to impress. They’re perfect for sharing, but I won’t blame you if you want to keep them all to yourself. I’ve been there, and trust me, it’s hard to resist that gooey goodness!
As you gather your ingredients and get ready to bake, remember that the joy of cooking comes not just from the end result, but from the love and care you put into it. So, roll up your sleeves, have fun in the kitchen, and enjoy the delightful flavors of Hello Dolly Bars with your family. Happy baking!
“`
Print
Hello Dolly Bars: Discover This Irresistible Recipe!
- Total Time: 45 minutes
- Yield: 24 bars 1x
- Diet: Vegetarian
Description
Hello Dolly Bars, also known as Seven-Layer Bars, are a delicious dessert made with layers of chocolate, coconut, and nuts, creating a sweet and satisfying treat.
Ingredients
- 1 cup graham cracker crumbs
- 1/2 cup unsalted butter, melted
- 1 cup sweetened shredded coconut
- 1 cup chocolate chips
- 1 cup butterscotch chips
- 1 cup chopped nuts (walnuts or pecans)
- 1 can (14 oz) sweetened condensed milk
Instructions
- Preheat the oven to 350°F (175°C).
- In a mixing bowl, combine graham cracker crumbs and melted butter, then press the mixture into the bottom of a greased 9×13 inch baking dish.
- Layer the shredded coconut evenly over the graham cracker crust.
- Sprinkle the chocolate chips and butterscotch chips over the coconut.
- Add the chopped nuts on top of the chips.
- Pour the sweetened condensed milk evenly over the entire mixture.
- Bake in the preheated oven for 25-30 minutes, or until the edges are golden brown.
- Allow to cool before cutting into bars and serving.
Notes
- For a gluten-free version, use gluten-free graham crackers.
- Feel free to substitute different types of nuts or add dried fruits for variation.
- Store leftovers in an airtight container at room temperature for up to a week.
- Prep Time: 15 minutes
- Cook Time: 30 minutes
- Category: Dessert
- Method: Baking
- Cuisine: American
Nutrition
- Serving Size: 1 bar
- Calories: 200
- Sugar: 15g
- Sodium: 100mg
- Fat: 10g
- Saturated Fat: 5g
- Unsaturated Fat: 3g
- Trans Fat: 0g
- Carbohydrates: 25g
- Fiber: 1g
- Protein: 2g
- Cholesterol: 15mg
Keywords: Hello Dolly Bars, Seven-Layer Bars, dessert recipe, chocolate bars
