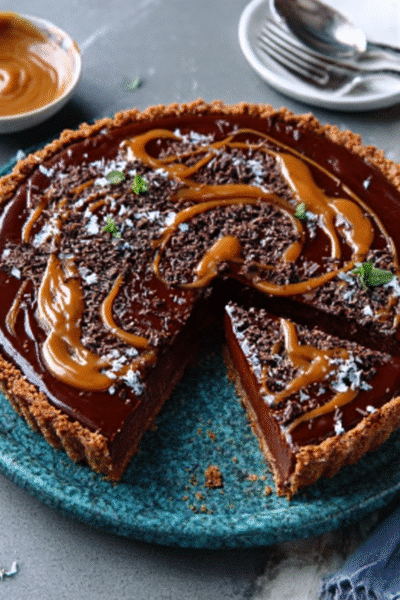
Pearl Necklace Choux: Create Stunning Pastry Art Today!

gutenberg
How to Make Pearl Necklace Choux
Now that you’re all set with the ingredients, let’s dive into the delightful process of making Pearl Necklace Choux. I promise, it’s easier than it sounds! With just a few simple steps, you’ll be on your way to creating these stunning pastries that will have everyone asking for seconds.
Step 1 – Prep Ingredients
First things first, gather all your ingredients and tools. This is a crucial step that can save you from a last-minute scramble. You’ll need:
- A saucepan for boiling the water and butter.
- A mixing bowl for combining your dough.
- A whisk to mix everything together.
- A piping bag or a plastic zip-top bag with the corner snipped off for shaping your choux.
- A baking sheet lined with parchment paper to prevent sticking.
Having everything ready will make the process smoother and more enjoyable. Trust me, I’ve learned this the hard way more than once!
Step 2 – Begin Cooking
Now, let’s get cooking! Preheat your oven to 400°F (200°C). This is the perfect temperature for those little puffs to rise beautifully.
In your saucepan, combine 1 cup of water and 1/2 cup of unsalted butter. Bring this mixture to a boil over medium heat. The moment you see those bubbles, it’s time to move on to the next step. Just be careful not to let it boil over—nobody wants a messy stovetop!
Step 3 – Combine Ingredients
Once your butter has melted and the water is boiling, remove the saucepan from the heat. Now, it’s time to add the magic ingredient: 1 cup of all-purpose flour and 1/4 teaspoon of salt. Stir vigorously until a dough forms. It should come together and pull away from the sides of the pan. If it looks a bit lumpy, don’t worry; it will smooth out in the next step.
Next, let’s add the eggs! Crack 4 large eggs into a bowl and add them one at a time to your dough. Mix well after each addition. This is where the dough transforms into a silky, glossy mixture. It’s like watching a caterpillar turn into a butterfly—so satisfying!
Step 4 – Finish and Serve
Now comes the fun part: piping the dough! Using your piping bag, pipe small rounds onto your prepared baking sheet. Aim for about 1.5 inches in diameter. Don’t worry if they’re not perfect; they’ll puff up beautifully in the oven.
Pop them into your preheated oven and bake for 20-25 minutes until they’re golden brown and puffed up. Resist the urge to open the oven door during the first 15 minutes; we want to keep that heat in for maximum puffiness!
Once they’re done, let them cool completely on a wire rack. This is crucial! If you fill them while they’re still warm, you’ll end up with soggy choux, and nobody wants that. Patience is key here, my friends.
After they’ve cooled, it’s time to fill them with your luscious pastry cream. Use a piping bag to inject the cream into each choux. Then, dip the tops in fondant and sprinkle with edible pearls for that stunning pearl necklace effect. Voilà! You’ve just created a masterpiece!
Introduction to Pearl Necklace Choux
Welcome to the world of Pearl Necklace Choux, where elegance meets simplicity! Imagine a delightful pastry that not only looks like a stunning pearl necklace but also tastes heavenly. These little puffs of joy are perfect for any special occasion, whether it’s a birthday party, a family gathering, or just a cozy afternoon treat with friends.
As a busy woman myself, I know how challenging it can be to juggle work, family, and everything in between. The last thing you want is to spend hours in the kitchen, especially when you want to impress your guests. That’s where Pearl Necklace Choux comes in! This dessert is not only visually striking but also surprisingly easy to make. With just a handful of ingredients and a bit of patience, you can create a show-stopping dessert that will have everyone raving.
What I love most about these pastries is their versatility. You can fill them with a variety of creams, dip them in fondant, and decorate them with edible pearls to create a stunning presentation. Plus, they’re a hit with both kids and adults alike! So, if you’re looking for a way to elevate your dessert game without spending all day in the kitchen, Pearl Necklace Choux is your answer. Let’s dive into this delightful recipe and make some magic happen!
Why You’ll Love This Pearl Necklace Choux
Let me tell you, if you’re looking for a dessert that checks all the boxes, Pearl Necklace Choux is it! First off, the prep time is a mere 30 minutes. That’s right—just half an hour to whip up something that looks like it came straight from a fancy French patisserie. For busy women like us, that’s a game changer!
And let’s talk about cleanup. With just a saucepan, a mixing bowl, and a baking sheet, you won’t be left with a mountain of dishes to tackle afterward. I don’t know about you, but after a long day, the last thing I want to do is scrub pots and pans. This recipe keeps it simple, so you can spend more time enjoying your creation and less time cleaning up.
Now, let’s get to the flavors. The beauty of Pearl Necklace Choux is that it’s family-friendly. The pastry itself is light and airy, while the pastry cream can be customized to suit everyone’s taste buds. Whether your family loves classic vanilla, rich chocolate, or even fruity lemon, you can easily switch things up. I’ve even made a batch with a hint of almond extract, and let me tell you, it was a hit!
But here’s the kicker: you don’t need to be a master baker to impress your guests. Seriously! With this dessert, you can wow your friends and family without needing extensive baking skills. The choux pastry puffs up beautifully in the oven, and once you fill them with cream and add those edible pearls, they look like a million bucks. Your guests will be none the wiser about how easy they were to make!
So, if you’re looking for a dessert that’s quick, easy, and sure to impress, Pearl Necklace Choux is your answer. It’s the perfect way to bring a touch of elegance to any occasion without the stress. Trust me, once you try it, you’ll be hooked!
Ingredients You’ll Need
Before we dive into the baking magic, let’s gather our ingredients for the Pearl Necklace Choux. Here’s what you’ll need:
- 1 cup water: This is the base of our choux pastry. It helps create steam, which is essential for that lovely puffiness.
- 1/2 cup unsalted butter: Butter adds richness and flavor. If you’re looking for a dairy-free option, feel free to swap it out for a dairy-free butter alternative.
- 1 cup all-purpose flour: This is the backbone of our pastry. It gives structure and helps the choux rise. For a healthier twist, you can use whole wheat flour, but keep in mind it may alter the texture slightly.
- 1/4 teaspoon salt: Just a pinch to enhance the flavors. Salt is like the fairy godmother of baking—it makes everything taste better!
- 4 large eggs: Eggs are crucial for binding and creating that airy texture. They help the pastry puff up beautifully. If you’re in a pinch, you can use egg substitutes, but I recommend sticking with real eggs for the best results.
- 1 cup pastry cream: This is where the magic happens! The creamy filling is what makes these pastries so delightful. You can use store-bought or homemade pastry cream, and feel free to experiment with flavors like chocolate or vanilla.
- 1/2 cup fondant: This sweet coating gives our choux that stunning pearl-like finish. If fondant isn’t your thing, melted chocolate or a simple glaze can work just as well.
- Edible pearls for decoration: These little gems are what truly make the Pearl Necklace Choux shine! They add a touch of elegance and whimsy. You can find them at most baking supply stores or online.
And there you have it! Each ingredient plays a vital role in creating these beautiful pastries. Remember, if you’re feeling adventurous, you can always mix and match flavors and textures. The world of baking is your oyster!
For your convenience, I’ve provided printable measurements at the end of this article. So, you can easily keep track of everything while you whip up your Pearl Necklace Choux. Let’s get ready to bake some magic!
How to Make Pearl Necklace Choux
Now that you’re all set with the ingredients, let’s dive into the delightful process of making Pearl Necklace Choux. I promise, it’s easier than it sounds! With just a few simple steps, you’ll be on your way to creating these stunning pastries that will have everyone asking for seconds.
Step 1 – Prep Ingredients
First things first, gather all your ingredients and tools. This is a crucial step that can save you from a last-minute scramble. You’ll need:
- A saucepan for boiling the water and butter.
- A mixing bowl for combining your dough.
- A whisk to mix everything together.
- A piping bag or a plastic zip-top bag with the corner snipped off for shaping your choux.
- A baking sheet lined with parchment paper to prevent sticking.
Having everything ready will make the process smoother and more enjoyable. Trust me, I’ve learned this the hard way more than once!
Step 2 – Begin Cooking
Now, let’s get cooking! Preheat your oven to 400°F (200°C). This is the perfect temperature for those little puffs to rise beautifully.
In your saucepan, combine 1 cup of water and 1/2 cup of unsalted butter. Bring this mixture to a boil over medium heat. The moment you see those bubbles, it’s time to move on to the next step. Just be careful not to let it boil over—nobody wants a messy stovetop!
Step 3 – Combine Ingredients
Once your butter has melted and the water is boiling, remove the saucepan from the heat. Now, it’s time to add the magic ingredient: 1 cup of all-purpose flour and 1/4 teaspoon of salt. Stir vigorously until a dough forms. It should come together and pull away from the sides of the pan. If it looks a bit lumpy, don’t worry; it will smooth out in the next step.
Next, let’s add the eggs! Crack 4 large eggs into a bowl and add them one at a time to your dough. Mix well after each addition. This is where the dough transforms into a silky, glossy mixture. It’s like watching a caterpillar turn into a butterfly—so satisfying!
Step 4 – Finish and Serve
Now comes the fun part: piping the dough! Using your piping bag, pipe small rounds onto your prepared baking sheet. Aim for about 1.5 inches in diameter. Don’t worry if they’re not perfect; they’ll puff up beautifully in the oven.
Pop them into your preheated oven and bake for 20-25 minutes until they’re golden brown and puffed up. Resist the urge to open the oven door during the first 15 minutes; we want to keep that heat in for maximum puffiness!
Once they’re done, let them cool completely on a wire rack. This is crucial! If you fill them while they’re still warm, you’ll end up with soggy choux, and nobody wants that. Patience is key here, my friends.
After they’ve cooled, it’s time to fill them with your luscious pastry cream. Use a piping bag to inject the cream into each choux. Then, dip the tops in fondant and sprinkle with edible pearls for that stunning pearl necklace effect. Voilà! You’ve just created a masterpiece!
Tips for Perfect Results
Now that you’ve mastered the basics of making Pearl Necklace Choux, let’s talk about some tips to ensure your pastries turn out perfectly every time. After all, we want to impress our family and friends with these delightful treats!
First and foremost, make sure your choux pastry is completely cool before filling it. This step is crucial! If you fill them while they’re still warm, you’ll end up with soggy choux, and nobody wants that. I’ve made this mistake before, and let me tell you, it’s a real bummer when your beautiful pastries turn into a gooey mess. So, be patient and let them cool completely on a wire rack. It’s worth the wait!
Next, don’t be afraid to experiment with different flavors of pastry cream. While classic vanilla is always a hit, why not shake things up a bit? You could try chocolate pastry cream for a rich, indulgent twist or lemon-flavored cream for a refreshing zing. I once made a batch with raspberry pastry cream, and it was a showstopper! The vibrant color and fruity flavor were a hit at my family gathering. The possibilities are endless, so get creative!
Lastly, using a piping bag for filling your choux will give you more precise shapes and help you avoid any mess. If you don’t have a piping bag, a plastic zip-top bag with the corner snipped off works just as well. This little trick makes it easier to control the amount of cream you’re adding, ensuring each choux is perfectly filled. Plus, it’s a lot of fun to pipe the cream in—like decorating a cake, but with a lot less pressure!
So, keep these tips in mind as you embark on your Pearl Necklace Choux journey. With a little patience and creativity, you’ll be creating stunning pastries that will have everyone asking for your secret recipe. Happy baking!
Essential Equipment Needed
Before we get our hands dirty with the dough, let’s make sure we have all the right tools at our disposal. Having the right equipment can make a world of difference in your baking experience, especially when it comes to creating those beautiful Pearl Necklace Choux. Here’s what you’ll need:
- Piping bag or plastic zip-top bag: This is essential for shaping your choux. A piping bag gives you more control, but if you don’t have one, a plastic zip-top bag with the corner snipped off works just as well. Trust me, it’s a game changer when it comes to filling those pastries!
- Baking sheet: A sturdy baking sheet is a must for baking your choux. Make sure it’s lined with parchment paper to prevent sticking. I can’t tell you how many times I’ve had to wrestle with stuck pastries—what a mess!
- Saucepan: You’ll need a medium-sized saucepan for boiling the water and butter. It’s the first step in creating that magical dough, so choose one that’s big enough to hold everything without boiling over.
- Mixing bowl: A good mixing bowl is crucial for combining your ingredients. I prefer a medium-sized bowl that’s easy to handle. You’ll be doing a bit of vigorous stirring, so make sure it’s sturdy!
- Whisk: A whisk is your best friend when it comes to mixing the dough. It helps incorporate the eggs smoothly into the mixture, ensuring a silky texture. If you don’t have a whisk, a wooden spoon can work in a pinch, but I highly recommend investing in one!
With these essential tools in hand, you’ll be well on your way to creating stunning Pearl Necklace Choux. Remember, the right equipment not only makes the process easier but also adds to the joy of baking. So, gather your gear, and let’s get ready to whip up some pastry magic!
Delicious Variations of Pearl Necklace Choux
Now that you’ve mastered the classic Pearl Necklace Choux, let’s have some fun with variations! The beauty of this pastry is its versatility. You can easily switch up the flavors and ingredients to create something uniquely yours. Here are some delightful twists to consider:
1. Chocolate Pastry Cream for a Rich Twist: If you or your family are chocolate lovers, this variation is a must-try! Simply replace the vanilla pastry cream with a luscious chocolate pastry cream. To make it, melt some high-quality dark chocolate and fold it into your pastry cream. The result? A rich, decadent filling that will have everyone swooning. Trust me, when you bite into that chocolatey goodness, it’s like a little piece of heaven!
2. Lemon-Flavored Pastry Cream for a Refreshing Option: For those warm summer days or when you want something light and zesty, lemon-flavored pastry cream is the way to go. Just add fresh lemon juice and zest to your pastry cream recipe. The bright, citrusy flavor pairs beautifully with the airy choux pastry, creating a refreshing dessert that’s perfect for any occasion. It’s like a burst of sunshine in every bite!
3. Gluten-Free Flour for a Gluten-Free Version: If you or someone in your family is gluten-sensitive, don’t worry! You can still enjoy these delightful pastries. Simply substitute the all-purpose flour with a gluten-free flour blend. Just make sure to choose a blend that’s designed for baking, as it will help achieve that perfect texture. I’ve made gluten-free choux before, and they turned out just as delicious and puffy as the traditional version!
4. Add a Hint of Vanilla or Almond Extract to the Dough for Extra Flavor: Want to elevate the flavor of your choux pastry? Consider adding a splash of vanilla or almond extract to the dough. Just a teaspoon will do! This little addition can make a world of difference, giving your pastries a lovely aroma and depth of flavor. It’s like adding a secret ingredient that takes your dessert to the next level!
These variations not only keep things exciting but also allow you to cater to different tastes and dietary needs. So, don’t be afraid to get creative in the kitchen! Whether you stick with the classic or try one of these delicious twists, your Pearl Necklace Choux will surely impress. Happy baking!
Serving Suggestions
Now that you’ve created your stunning Pearl Necklace Choux, let’s talk about how to serve them up for maximum enjoyment! Presentation is key, and pairing these delightful pastries with the right accompaniments can elevate your dessert experience to a whole new level. Here are some of my favorite serving suggestions:
1. Pair with a Light Fruit Salad for a Refreshing Contrast: There’s something magical about the combination of creamy and fruity flavors. A light fruit salad made with fresh berries, melons, and a drizzle of honey or a squeeze of lime juice can provide a refreshing contrast to the rich pastry cream. The sweetness of the fruit complements the choux beautifully, making it a perfect pairing for a summer gathering or a light dessert after a hearty meal. Plus, it adds a pop of color to your dessert table!
2. Serve Alongside Coffee or Tea for a Delightful Afternoon Treat: If you’re looking for a cozy afternoon pick-me-up, consider serving your Pearl Necklace Choux with a steaming cup of coffee or a fragrant pot of tea. The rich flavors of coffee or the soothing notes of herbal tea pair wonderfully with the light, airy texture of the choux. It’s the perfect excuse to take a break, relax, and indulge in a little self-care. Trust me, there’s nothing quite like enjoying a sweet treat with a warm beverage in hand!
3. Consider a Scoop of Vanilla Ice Cream for an Indulgent Dessert: For those moments when you want to go all out, why not add a scoop of creamy vanilla ice cream alongside your choux? The cold, velvety ice cream contrasts beautifully with the warm, freshly filled pastries, creating a delightful textural experience. You can even drizzle some chocolate or caramel sauce over the top for an extra touch of decadence. This combination is sure to impress your guests and make any occasion feel special!
These serving suggestions not only enhance the overall experience of enjoying your Pearl Necklace Choux but also allow you to get creative with your presentations. Whether you’re hosting a fancy dinner party or simply treating yourself to a sweet afternoon snack, these pairings will take your dessert to the next level. So, gather your loved ones, serve up those beautiful pastries, and enjoy every delicious bite!
FAQs About Pearl Necklace Choux
Can I make the pastry ahead of time?
Absolutely! One of the beauties of Pearl Necklace Choux is that you can prepare the choux pastry in advance. Just make sure to fill them with the pastry cream right before serving. This way, they’ll stay fresh and delicious, and you won’t have to rush around at the last minute. I often make the pastry a day ahead, and it saves me so much stress!
What can I use instead of fondant?
If fondant isn’t your cup of tea, don’t worry! You can easily swap it out for melted chocolate or a simple glaze. Just melt some chocolate and dip the tops of your choux in it for a rich, decadent finish. Or, if you prefer a lighter option, a glaze made from powdered sugar and a splash of milk or water can work wonders too. It’s all about what you enjoy!
How do I store leftover choux?
Leftover choux? What a rare find! But if you do have some, store them in an airtight container in the refrigerator for up to 2 days. Just keep in mind that the longer they sit, the softer they may become. If you want to keep them crispy, it’s best to fill them just before serving. But hey, even a slightly soft choux is still a treat!
Can I freeze the choux?
Yes, you can freeze the unfilled choux pastry for up to a month! Just make sure they’re completely cool before placing them in an airtight container or a freezer bag. When you’re ready to enjoy them, simply thaw them in the fridge and fill them with your pastry cream. It’s a great way to have a delicious dessert on hand for unexpected guests or a sweet craving!

Final Thoughts on Pearl Necklace Choux
As I sit here reflecting on the delightful journey of creating Pearl Necklace Choux, I can’t help but feel a sense of pride and joy. This pastry is not just a treat; it’s a celebration of creativity and love. The ease of making these stunning little puffs makes them a perfect dessert for any occasion, whether it’s a family gathering, a birthday party, or simply a cozy evening at home with a cup of tea.
What I love most about Pearl Necklace Choux is how they bring people together. There’s something magical about baking that transforms a simple kitchen into a hub of laughter and joy. When you whip up a batch of these elegant pastries, you’re not just creating a dessert; you’re crafting memories. The smiles on your loved ones’ faces as they take that first bite are worth every minute spent in the kitchen.
So, I encourage you to try your hand at this stunning pastry art. Don’t be intimidated by the thought of making choux pastry; it’s easier than it seems! With just a few ingredients and a sprinkle of patience, you can create a dessert that looks and tastes like it came from a fancy bakery. Plus, the satisfaction of saying, “I made that!” is truly unbeatable.
Whether you stick to the classic recipe or experiment with different flavors and fillings, the possibilities are endless. And remember, baking is all about having fun and sharing joy with those you love. So, gather your family, invite some friends over, and let’s make some magic happen in the kitchen together!
Happy baking, my friends! I can’t wait to hear about your adventures with Pearl Necklace Choux. Let’s keep the spirit of baking alive and continue to create delicious memories, one pastry at a time!
“`
Print
Pearl Necklace Choux: Create Stunning Pastry Art Today!
- Total Time: 55 minutes
- Yield: 12 servings 1x
- Diet: Vegetarian
Description
A delightful pastry that resembles a pearl necklace, perfect for special occasions.
Ingredients
- 1 cup water
- 1/2 cup unsalted butter
- 1 cup all-purpose flour
- 1/4 teaspoon salt
- 4 large eggs
- 1 cup pastry cream
- 1/2 cup fondant
- Edible pearls for decoration
Instructions
- Preheat your oven to 400°F (200°C).
- In a saucepan, combine water and butter, and bring to a boil.
- Remove from heat and stir in flour and salt until a dough forms.
- Add eggs one at a time, mixing well after each addition.
- Pipe the dough into small rounds on a baking sheet.
- Bake for 20-25 minutes until golden brown and puffed.
- Let cool completely before filling with pastry cream.
- Dip the tops in fondant and decorate with edible pearls.
Notes
- Ensure the choux pastry is completely cool before filling to prevent sogginess.
- Experiment with different flavors of pastry cream for variety.
- Prep Time: 30 minutes
- Cook Time: 25 minutes
- Category: Dessert
- Method: Baking
- Cuisine: French
Nutrition
- Serving Size: 1 choux
- Calories: 150
- Sugar: 5g
- Sodium: 50mg
- Fat: 7g
- Saturated Fat: 4g
- Unsaturated Fat: 2g
- Trans Fat: 0g
- Carbohydrates: 20g
- Fiber: 1g
- Protein: 3g
- Cholesterol: 50mg
Keywords: Pearl Necklace Choux, pastry, dessert, French pastry
