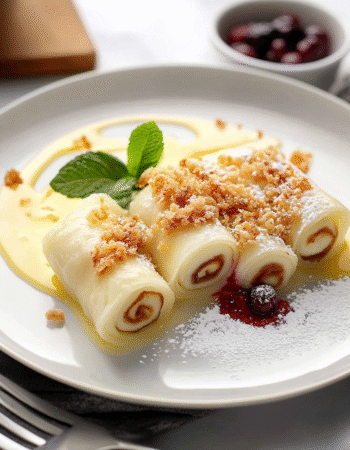
Christmas fudge candy: Discover a delightful recipe!

gutenberg
How to Make Christmas Fudge Candy
Now that you’re all set with the ingredients, let’s dive into the delightful process of making Christmas fudge candy! I promise, it’s as easy as pie—well, maybe easier! This recipe is perfect for those busy days when you want to whip up something sweet without spending hours in the kitchen. So, grab your apron, and let’s get started!
Step 1 – Prep Ingredients
First things first, let’s get organized. Line an 8-inch square baking dish with parchment paper. This little trick makes it super easy to lift the fudge out later. Just leave some overhang—trust me, it’s a game changer!
Next, gather all your ingredients. You’ll need:
- 2 cups semi-sweet chocolate chips
- 1 cup sweetened condensed milk
- 1 teaspoon vanilla extract
- 1/2 cup chopped walnuts (optional)
- 1/2 cup crushed peppermint candies (optional)
- 1/4 teaspoon salt
Having everything ready to go will make the cooking process smooth and stress-free. Plus, it’s a great way to keep the kids involved—let them help measure out the ingredients!
Step 2 – Begin Cooking
Now, let’s get cooking! In a medium saucepan, combine the chocolate chips, sweetened condensed milk, and salt. Place it over low heat. This is where the magic happens! Stir continuously until the chocolate is melted and the mixture is smooth. It’s like watching a beautiful transformation unfold right before your eyes!
As the chocolate melts, the sweet aroma fills the kitchen, and you might find yourself sneaking a taste or two. I won’t tell if you don’t!
Step 3 – Combine Ingredients
Once everything is melted and smooth, remove the saucepan from the heat. Now, it’s time to add a splash of flavor! Stir in the vanilla extract. If you’re feeling adventurous, fold in the chopped walnuts and crushed peppermint candies at this stage. The walnuts add a lovely crunch, while the peppermint gives it that festive flair. It’s like a holiday party in your mouth!
Step 4 – Finish and Serve
Now, pour the fudge mixture into your prepared baking dish. Use a spatula to spread it evenly. Don’t worry if it’s not perfect; it’s going to taste amazing regardless! Once it’s all in the dish, pop it in the refrigerator for at least 2 hours or until it’s firm. This is the hardest part—waiting! But trust me, it’s worth it.
Once set, lift the fudge out of the dish using the parchment paper overhang. Cut it into squares, and voilà! You’ve just made a batch of delicious Christmas fudge candy that’s sure to impress your family and friends.
As you cut the fudge, you might want to sneak a piece for yourself. After all, you deserve a little treat for all your hard work!
Introduction to Christmas Fudge Candy
Ah, Christmas fudge candy! Just the name brings a smile to my face and a warm feeling to my heart. This delightful treat is a holiday staple that has been passed down through generations, and for good reason. It’s rich, creamy, and oh-so-sweet—perfect for satisfying that sweet tooth during the festive season. Whether you’re a seasoned baker or someone who usually sticks to takeout, this recipe is a fantastic way to bring a little homemade magic into your holiday celebrations.
Now, let’s talk about why Christmas fudge candy is so beloved, especially among busy women like us. Between juggling work, family, and all the holiday hustle and bustle, it can feel like there’s barely enough time to breathe, let alone bake. But fear not! This fudge recipe is a lifesaver. It requires minimal effort and time, making it the perfect solution for those of us who want to whip up something special without spending hours in the kitchen.
Picture this: you’ve just come home from a long day, and the last thing you want to do is tackle a complicated dessert. With this Christmas fudge candy, you can have a delicious treat ready to go in just a few simple steps. Plus, it’s a hit with everyone—kids, grandkids, and even the pickiest of eaters. You can customize it with your favorite mix-ins, making it as festive as your heart desires!
So, whether you’re looking to impress guests at a holiday gathering or simply want to indulge in a sweet treat while watching your favorite Christmas movie, this fudge is your go-to recipe. Let’s dive into the details and get ready to create some sweet memories this holiday season!
Why You’ll Love This Christmas Fudge Candy
Let me tell you, this Christmas fudge candy is a game changer! If you’re anything like me, you appreciate recipes that don’t just taste amazing but also fit seamlessly into our busy lives. This fudge is all about quick preparation and minimal cleanup, which is a blessing during the holiday season when our to-do lists seem to grow longer by the minute.
First off, you can whip up this delightful treat in just about 15 minutes of prep time. That’s right—fifteen minutes! With just a few ingredients and a saucepan, you’ll have a luscious fudge mixture ready to chill. And the best part? You won’t be left with a mountain of dirty dishes to tackle afterward. Just one pot, a spatula, and your baking dish. It’s like a holiday miracle in the kitchen!
Now, let’s talk about flavors. This fudge is a crowd-pleaser, appealing to both kids and adults alike. The rich, creamy chocolate is a universal favorite, and when you add in those optional mix-ins like walnuts or crushed peppermint candies, it becomes a festive delight that everyone will love. I can’t tell you how many times I’ve seen my kids sneak into the fridge for a piece (or two) of this fudge when they think I’m not looking. It’s like a sweet little secret that brings joy to our home!
But wait, there’s more! This Christmas fudge candy is incredibly versatile. You can easily customize it to suit your family’s tastes or even the occasion. Want to make it a little more festive? Drizzle some melted white chocolate on top before chilling, and you’ve got a beautiful treat that looks as good as it tastes. Or, if you’re feeling adventurous, swap out the walnuts for mini marshmallows or dried cranberries for a chewy twist. The possibilities are endless!
And let’s not forget about gifting! This fudge makes for a lovely homemade present. Just cut it into squares, package it in a cute tin or box, and you’ve got a thoughtful gift that’s sure to impress. I love making a batch to share with neighbors or friends during the holidays. It’s a sweet way to spread joy and show you care without spending a fortune.
So, whether you’re looking to satisfy your family’s sweet tooth, impress guests at a holiday gathering, or simply enjoy a little indulgence yourself, this Christmas fudge candy is the perfect solution. It’s quick, delicious, and oh-so-versatile—what’s not to love?
Ingredients You’ll Need
Before we dive into the sweet world of Christmas fudge candy, let’s gather our ingredients! This recipe is wonderfully simple, and I bet you already have most of these items in your pantry. Here’s what you’ll need:
- 2 cups semi-sweet chocolate chips: These little morsels are the star of the show! They melt beautifully, creating that rich, creamy base for our fudge. If you’re feeling adventurous, you can swap them for dark chocolate chips for a deeper flavor.
- 1 cup sweetened condensed milk: This is the magic ingredient that gives our fudge its luscious texture. It adds sweetness and creaminess, making every bite melt in your mouth. If you’re looking for a lighter option, you can try using evaporated milk, but the texture will be slightly different.
- 1 teaspoon vanilla extract: A splash of vanilla adds warmth and depth to the fudge. It’s like a cozy hug for your taste buds! You can also experiment with other extracts, like almond or peppermint, to give your fudge a unique twist.
- 1/2 cup chopped walnuts (optional): These add a delightful crunch and a nutty flavor that pairs perfectly with the chocolate. If you or your loved ones have nut allergies, feel free to leave them out or substitute with sunflower seeds for a similar texture.
- 1/2 cup crushed peppermint candies (optional): These little gems bring a festive flair and a refreshing minty taste. They’re perfect for the holiday season! If peppermint isn’t your thing, you can use crushed Oreos or even mini marshmallows for a fun twist.
- 1/4 teaspoon salt: A pinch of salt enhances the sweetness of the chocolate and balances the flavors. It’s a small but mighty ingredient that makes a big difference!
Now that we have our ingredients lined up, let’s talk about some optional substitutions and healthy swaps. If you’re looking to cut down on sugar, you can use sugar-free chocolate chips or even make a batch with unsweetened cocoa powder and a sugar substitute. For a nut-free version, simply omit the walnuts and consider adding in some dried fruit for a chewy texture.
And don’t worry about jotting down these measurements! I’ve got you covered with printable measurements at the end of the article, so you can have everything handy when you’re ready to whip up this delicious Christmas fudge candy.
How to Make Christmas Fudge Candy
Now that you’re all set with the ingredients, let’s dive into the delightful process of making Christmas fudge candy! I promise, it’s as easy as pie—well, maybe easier! This recipe is perfect for those busy days when you want to whip up something sweet without spending hours in the kitchen. So, grab your apron, and let’s get started!
Step 1 – Prep Ingredients
First things first, let’s get organized. Line an 8-inch square baking dish with parchment paper. This little trick makes it super easy to lift the fudge out later. Just leave some overhang—trust me, it’s a game changer!
Next, gather all your ingredients. You’ll need:
- 2 cups semi-sweet chocolate chips
- 1 cup sweetened condensed milk
- 1 teaspoon vanilla extract
- 1/2 cup chopped walnuts (optional)
- 1/2 cup crushed peppermint candies (optional)
- 1/4 teaspoon salt
Having everything ready to go will make the cooking process smooth and stress-free. Plus, it’s a great way to keep the kids involved—let them help measure out the ingredients!
Step 2 – Begin Cooking
Now, let’s get cooking! In a medium saucepan, combine the chocolate chips, sweetened condensed milk, and salt. Place it over low heat. This is where the magic happens! Stir continuously until the chocolate is melted and the mixture is smooth. It’s like watching a beautiful transformation unfold right before your eyes!
As the chocolate melts, the sweet aroma fills the kitchen, and you might find yourself sneaking a taste or two. I won’t tell if you don’t!
Step 3 – Combine Ingredients
Once everything is melted and smooth, remove the saucepan from the heat. Now, it’s time to add a splash of flavor! Stir in the vanilla extract. If you’re feeling adventurous, fold in the chopped walnuts and crushed peppermint candies at this stage. The walnuts add a lovely crunch, while the peppermint gives it that festive flair. It’s like a holiday party in your mouth!
Step 4 – Finish and Serve
Now, pour the fudge mixture into your prepared baking dish. Use a spatula to spread it evenly. Don’t worry if it’s not perfect; it’s going to taste amazing regardless! Once it’s all in the dish, pop it in the refrigerator for at least 2 hours or until it’s firm. This is the hardest part—waiting! But trust me, it’s worth it.
Once set, lift the fudge out of the dish using the parchment paper overhang. Cut it into squares, and voilà! You’ve just made a batch of delicious Christmas fudge candy that’s sure to impress your family and friends.
As you cut the fudge, you might want to sneak a piece for yourself. After all, you deserve a little treat for all your hard work!
Tips for Perfect Results
Now that you’ve mastered the basics of making Christmas fudge candy, let’s talk about a few tips to ensure your fudge turns out perfectly every time. After all, we want to impress our family and friends with our sweet creations, right? Here are some tried-and-true tips that I’ve picked up over the years:
- 1. Use high-quality chocolate for better flavor. This is a biggie! The chocolate is the star of the show, so don’t skimp on quality. I always opt for semi-sweet chocolate chips that are rich and flavorful. Brands like Ghirardelli or Guittard are fantastic choices. Trust me, your taste buds will thank you! The better the chocolate, the more decadent your fudge will be.
- 2. For a festive touch, drizzle melted white chocolate on top before chilling. If you want to take your fudge to the next level, this is a simple yet stunning way to do it! Just melt some white chocolate chips in the microwave or on the stovetop, then use a spoon or a piping bag to drizzle it over the top of your fudge before it sets. It adds a beautiful contrast and a touch of elegance that’s perfect for the holiday season. Plus, it tastes divine!
- 3. Store fudge in an airtight container to maintain freshness. Once your fudge is all set and cut into squares, you’ll want to keep it fresh for as long as possible. The best way to do this is by storing it in an airtight container. If you’re like me and can’t resist sneaking a piece here and there, you might want to keep it in the fridge to help it last longer. Just make sure to let it come to room temperature before serving for the best texture!
By following these tips, you’ll be well on your way to creating the most delicious and impressive Christmas fudge candy. So, roll up your sleeves, get in that kitchen, and let the holiday magic begin!
Essential Equipment Needed
Before we dive into the sweet world of Christmas fudge candy, let’s make sure you have all the right tools at your fingertips. Trust me, having the right equipment can make the process smoother and more enjoyable. Here’s what you’ll need:
- Medium saucepan: This is where the magic happens! A medium saucepan is perfect for melting the chocolate and mixing in the sweetened condensed milk. Make sure it has a heavy bottom to prevent scorching. I’ve learned the hard way that a good saucepan can save you from a burnt mess!
- 8-inch square baking dish: You’ll need this to pour your fudge mixture into. An 8-inch square dish is just the right size for this recipe, allowing the fudge to set perfectly. If you don’t have one, a similar-sized dish will work too—just keep an eye on the thickness of your fudge!
- Parchment paper: This is a game changer! Lining your baking dish with parchment paper makes it super easy to lift the fudge out once it’s set. Plus, it helps with cleanup, so you can spend more time enjoying your delicious creation and less time scrubbing dishes.
- Mixing spoon or spatula: You’ll need a sturdy mixing spoon or a spatula for stirring the chocolate mixture. A silicone spatula is great because it can scrape every last bit of that gooey goodness from the sides of the saucepan. And let’s be honest, we want every morsel of that fudge!
- Knife for cutting: Once your fudge is set and ready to serve, you’ll need a sharp knife to cut it into squares. I recommend using a warm knife (just run it under hot water and dry it off) to make cutting easier and to get those clean edges. It’s all about presentation, right?
With these essential tools in hand, you’re all set to create your very own batch of Christmas fudge candy. It’s time to roll up your sleeves and get cooking—sweet treats await!
Delicious Variations of Christmas Fudge Candy
Now that you’ve mastered the classic Christmas fudge candy, let’s have some fun with variations! One of the best things about this recipe is its versatility. You can easily customize it to suit your taste buds or to impress your holiday guests. Here are a few delightful twists that I absolutely love:
- 1. Add dried cranberries for a tart flavor. If you’re looking to balance the sweetness of the fudge with a little tartness, dried cranberries are your best friend! Just fold in about half a cup of chopped dried cranberries when you mix in the vanilla extract. The bright red color also adds a festive touch, making your fudge not only delicious but visually appealing. It’s like a little burst of holiday cheer in every bite!
- 2. Substitute walnuts with mini marshmallows for a chewy texture. If you have a family that adores marshmallows (and who doesn’t?), this variation is a must-try! Instead of walnuts, toss in a half cup of mini marshmallows. They’ll add a delightful chewiness that contrasts beautifully with the smooth fudge. Plus, it gives the fudge a fun, playful texture that kids will love. Just imagine biting into a piece of fudge and finding those little marshmallow surprises—pure joy!
- 3. Experiment with flavored extracts like almond or peppermint. Want to take your fudge to the next level? Try swapping out the vanilla extract for something a little different. Almond extract adds a lovely nutty flavor that pairs beautifully with chocolate, while peppermint extract can give your fudge a refreshing twist. Just remember, a little goes a long way! Start with half a teaspoon and adjust to your taste. You can even mix and match—how about a chocolate-peppermint-almond fudge? Now that sounds like a holiday treat to remember!
These variations are just the tip of the iceberg! Feel free to get creative and mix in your favorite ingredients. Whether it’s a sprinkle of sea salt on top for a sweet-salty combo or a handful of toffee bits for a crunchy surprise, the possibilities are endless. The best part? You can make a few different batches and have a fudge tasting party with your family. It’s a fun way to celebrate the season and create sweet memories together!
So, roll up your sleeves, gather your ingredients, and let your imagination run wild. Your Christmas fudge candy is about to become the star of the holiday dessert table!
Serving Suggestions
Now that you’ve created your delicious Christmas fudge candy, let’s talk about how to serve it up in style! Presentation can make all the difference, and I’ve got a few delightful serving suggestions that will elevate your fudge from simply tasty to truly festive.
- 1. Pair with hot cocoa or coffee for a cozy treat. There’s something magical about enjoying a piece of rich fudge alongside a warm cup of hot cocoa or freshly brewed coffee. The creamy chocolate in the fudge complements the warmth of the drink perfectly, creating a cozy moment that’s just right for those chilly winter evenings. Imagine curling up on the couch with a blanket, a steaming mug in hand, and a square of fudge to savor. It’s like a warm hug for your taste buds!
- 2. Serve alongside holiday cookies or a fruit platter for a festive dessert table. If you’re hosting a holiday gathering, your Christmas fudge candy can shine as part of a beautiful dessert spread. Arrange your fudge squares on a festive platter, and pair them with an assortment of holiday cookies—think gingerbread, sugar cookies, and peppermint bark. The combination of flavors and textures will delight your guests and create a stunning visual display.
So, whether you’re enjoying a quiet evening at home or hosting a festive gathering, these serving suggestions will help you showcase your Christmas fudge candy in the best light. It’s all about creating those sweet moments and making memories with loved ones during this special time of year. Happy serving!
FAQs About Christmas Fudge Candy
As we dive into the delightful world of Christmas fudge candy, I know you might have a few questions swirling around in your mind. After all, we want to make sure our holiday treats are as perfect as can be! So, let’s tackle some of the most common FAQs I’ve encountered over the years. I hope these answers help you feel more confident as you whip up your own batch of this delicious fudge!
Can I make this fudge ahead of time?
Absolutely! One of the best things about Christmas fudge candy is that it can be made several days in advance. In fact, I often make a batch a week before the holidays to have on hand for unexpected guests or to satisfy my own sweet cravings. Just store it in the refrigerator, and it will stay fresh and delicious. This way, you can enjoy the holiday hustle and bustle without the stress of last-minute baking!
How do I store leftover fudge?
Storing leftover fudge is super simple! Just keep it in an airtight container to maintain its freshness. You can either leave it at room temperature if you plan to eat it within a few days or pop it in the refrigerator for longer-lasting goodness. I recommend placing a piece of parchment paper between layers if you stack them, so they don’t stick together. Trust me, you’ll want to savor every last bite!
Can I freeze Christmas fudge candy?
Yes, you can definitely freeze your Christmas fudge candy! It freezes beautifully, making it a great option for those who like to plan ahead. Just wrap the fudge tightly in plastic wrap or aluminum foil, then place it in a freezer-safe container or bag to prevent freezer burn. When you’re ready to enjoy it, simply thaw it in the refrigerator overnight. It’s like having a little taste of the holidays waiting for you whenever you need a sweet treat!
With these FAQs answered, you’re all set to create your own batch of Christmas fudge candy with confidence. Remember, the joy of making and sharing this treat is what the holidays are all about. So, roll up your sleeves, get in that kitchen, and let the fudge-making magic begin!
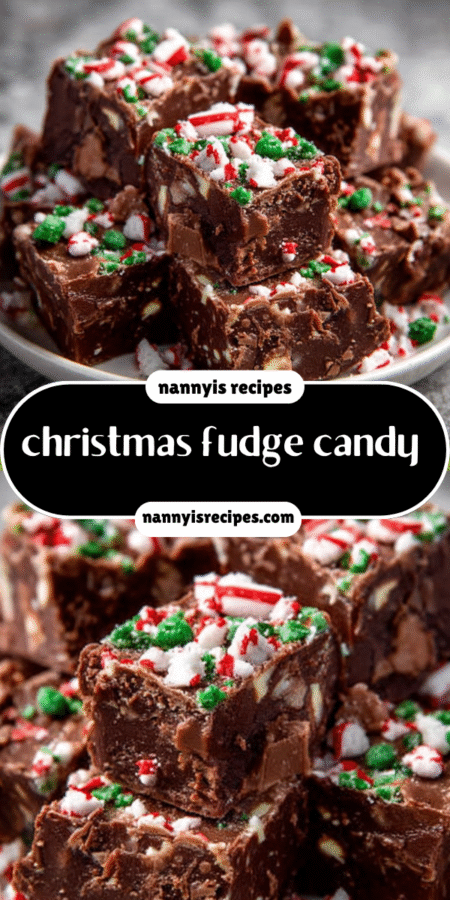
Final Thoughts on Christmas Fudge Candy
As I sit here, savoring a piece of my homemade Christmas fudge candy, I can’t help but reflect on the joy this simple treat brings during the holiday season. There’s something truly magical about gathering in the kitchen, mixing together a few ingredients, and transforming them into a delightful confection that warms the heart and brings smiles to faces. It’s a reminder that the best moments often come from the simplest of things.
Making this fudge is not just about the end result; it’s about the process, the laughter, and the memories created along the way. Whether you’re whipping up a batch for a holiday gathering, sharing it with neighbors, or simply indulging in a sweet treat after a long day, this Christmas fudge candy is a little piece of joy that can brighten anyone’s day. And let’s be honest, who doesn’t need a little extra sweetness during the hustle and bustle of the holidays?
I encourage you to give this recipe a try. It’s easy, quick, and oh-so-delicious! Plus, it’s a fantastic way to involve your family in the kitchen. Let the kids help measure, stir, and sprinkle in their favorite mix-ins. You’ll not only create a tasty treat but also foster a sense of togetherness and holiday spirit. After all, the kitchen is often the heart of the home, and what better way to celebrate the season than by creating something special together?
So, roll up your sleeves, gather your loved ones, and dive into the delightful world of Christmas fudge candy. Share it with friends, package it up as gifts, or simply enjoy it as a sweet indulgence for yourself. Whatever you choose, know that you’re creating sweet memories that will last long after the last bite is gone. Happy fudge-making, and may your holiday season be filled with love, laughter, and, of course, plenty of delicious treats!
“`
Print
Christmas fudge candy: Discover a delightful recipe!
- Total Time: 2 hours 25 minutes
- Yield: 16 servings 1x
- Diet: Vegetarian
Description
A delightful recipe for Christmas fudge candy that is perfect for the holiday season.
Ingredients
- 2 cups semi-sweet chocolate chips
- 1 cup sweetened condensed milk
- 1 teaspoon vanilla extract
- 1/2 cup chopped walnuts (optional)
- 1/2 cup crushed peppermint candies (optional)
- 1/4 teaspoon salt
Instructions
- Line an 8-inch square baking dish with parchment paper, leaving some overhang for easy removal.
- In a medium saucepan over low heat, combine the chocolate chips, sweetened condensed milk, and salt. Stir continuously until the chocolate is melted and the mixture is smooth.
- Remove the saucepan from heat and stir in the vanilla extract. If using, fold in the chopped walnuts and crushed peppermint candies.
- Pour the fudge mixture into the prepared baking dish, spreading it evenly.
- Refrigerate for at least 2 hours or until the fudge is firm.
- Once set, lift the fudge out of the dish using the parchment paper overhang and cut into squares.
Notes
- For a festive touch, drizzle melted white chocolate over the top before chilling.
- Substitute the walnuts with dried cranberries or mini marshmallows for a different flavor and texture.
- Prep Time: 15 minutes
- Cook Time: 10 minutes
- Category: Dessert
- Method: Stovetop
- Cuisine: American
Nutrition
- Serving Size: 1 square
- Calories: 150
- Sugar: 10g
- Sodium: 50mg
- Fat: 8g
- Saturated Fat: 4g
- Unsaturated Fat: 4g
- Trans Fat: 0g
- Carbohydrates: 18g
- Fiber: 1g
- Protein: 2g
- Cholesterol: 5mg
Keywords: christmas fudge candy
