Chocolate San Sebastian Cheesecake: A Decadent Delight!

gutenberg
Why You’ll Love This Chocolate San Sebastian Cheesecake
Let me tell you, this Chocolate San Sebastian Cheesecake is not just any dessert; it’s a game-changer for busy women like us! If you’re juggling work, family, and a million other responsibilities, you’ll appreciate how easy this recipe is to whip up. With just 20 minutes of prep time, you can have a rich, creamy cheesecake baking away while you tackle your to-do list. It’s like having a little slice of heaven waiting for you at the end of a long day!
One of the best parts? Minimal cleanup! I don’t know about you, but after a long day, the last thing I want to do is spend hours scrubbing pots and pans. This recipe uses simple ingredients and straightforward steps, so you can enjoy your dessert without the stress of a messy kitchen. Plus, the flavors are so family-friendly that even the pickiest eaters will be begging for seconds. Trust me, my kids can sniff out a dessert from a mile away, and they absolutely adore this cheesecake!
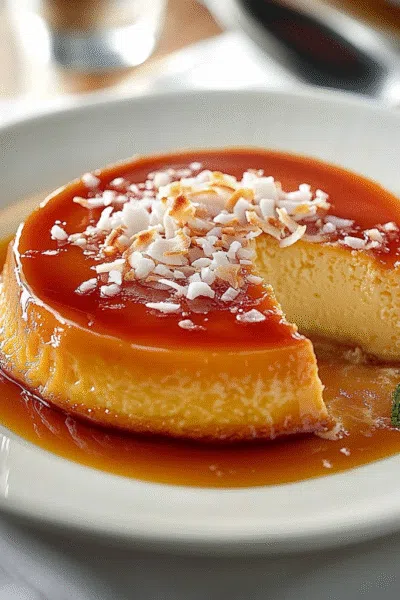
Now, let’s talk about the texture and flavor. This isn’t your average cheesecake; it’s a delightful blend of creamy and decadent, with a rich chocolate flavor that will make any chocolate lover swoon. The top has a beautiful, slightly caramelized finish, while the inside is smooth and velvety. It’s like a warm hug on a plate! And if you’re feeling adventurous, you can even add a hint of espresso powder for an extra depth of flavor. It’s a little secret that elevates this cheesecake to a whole new level.


So, whether you’re planning a family gathering, a cozy dinner with friends, or just want to treat yourself after a long week, this Chocolate San Sebastian Cheesecake is the perfect choice. It’s easy, delicious, and sure to impress anyone who takes a bite. Let’s dive into the ingredients you’ll need to create this decadent delight!
Introduction to Chocolate San Sebastian Cheesecake
Welcome to the world of indulgence with the Chocolate San Sebastian Cheesecake! If you’re a busy woman like me, always on the go and juggling a million things, you know how important it is to carve out a little time for yourself. This cheesecake is the perfect way to do just that. It’s rich, creamy, and oh-so-decadent, making it a delightful treat that you can whip up without breaking a sweat.
Picture this: after a long day of work, errands, and family obligations, you finally get a moment to breathe. What better way to reward yourself than with a slice of this luscious cheesecake? It’s like a little piece of heaven on your plate, and trust me, it’s worth every bite! The best part? You don’t need to be a master chef to make it. With just a handful of ingredients and a bit of time, you can create a dessert that looks and tastes like it came straight from a fancy bakery.
This cheesecake is a dream come true for chocolate lovers. The rich cocoa flavor combined with the creamy texture is simply irresistible. It’s not just a dessert; it’s an experience! Whether you’re hosting a family gathering, celebrating a special occasion, or just treating yourself on a quiet evening, this Chocolate San Sebastian Cheesecake is sure to impress. Your family and friends will be raving about it, and you’ll be the star of the show!
So, let’s get ready to dive into this delightful recipe. I promise you, it’s going to become a staple in your dessert repertoire. Grab your apron, and let’s make some magic happen in the kitchen!
Why You’ll Love This Chocolate San Sebastian Cheesecake
Let me tell you, this Chocolate San Sebastian Cheesecake is not just any dessert; it’s a game-changer for busy women like us! If you’re juggling work, family, and a million other responsibilities, you’ll appreciate how easy this recipe is to whip up. With just 20 minutes of prep time, you can have a rich, creamy cheesecake baking away while you tackle your to-do list. It’s like having a little slice of heaven waiting for you at the end of a long day!
One of the best parts? Minimal cleanup! I don’t know about you, but after a long day, the last thing I want to do is spend hours scrubbing pots and pans. This recipe uses simple ingredients and straightforward steps, so you can enjoy your dessert without the stress of a messy kitchen. Plus, the flavors are so family-friendly that even the pickiest eaters will be begging for seconds. Trust me, my kids can sniff out a dessert from a mile away, and they absolutely adore this cheesecake!
Now, let’s talk about the texture and flavor. This isn’t your average cheesecake; it’s a delightful blend of creamy and decadent, with a rich chocolate flavor that will make any chocolate lover swoon. The top has a beautiful, slightly caramelized finish, while the inside is smooth and velvety. It’s like a warm hug on a plate! And if you’re feeling adventurous, you can even add a hint of espresso powder for an extra depth of flavor. It’s a little secret that elevates this cheesecake to a whole new level.
So, whether you’re planning a family gathering, a cozy dinner with friends, or just want to treat yourself after a long week, this Chocolate San Sebastian Cheesecake is the perfect choice. It’s easy, delicious, and sure to impress anyone who takes a bite. Let’s dive into the ingredients you’ll need to create this decadent delight!
Ingredients You’ll Need
Before we dive into the magic of baking, let’s gather our ingredients for this Chocolate San Sebastian Cheesecake. Each one plays a vital role in creating that rich, creamy texture and decadent flavor that we all crave. Here’s what you’ll need:
- Cream cheese: The star of the show! Cream cheese gives the cheesecake its rich and creamy texture. Make sure it’s softened to room temperature for easy mixing. If you’re looking for a lighter option, you can use low-fat cream cheese without sacrificing too much flavor.
- Granulated sugar: This sweetener balances the rich cocoa flavor and adds sweetness to the cheesecake. If you want to cut down on refined sugar, consider using coconut sugar or a sugar substitute like Stevia. Just keep in mind that the sweetness level may vary, so adjust to taste!
- Eggs: Eggs are essential for binding the ingredients together and giving the cheesecake its structure. They also contribute to that lovely creamy texture. I always use large eggs, but if you’re watching cholesterol, you can swap out one or two eggs for egg whites.
- Vanilla extract: A splash of vanilla adds depth and enhances the overall flavor of the cheesecake. It’s like a warm hug for your taste buds! If you’re feeling adventurous, try using almond extract for a unique twist.
- Heavy cream: This ingredient is what makes the cheesecake ultra-creamy and luscious. If you’re looking for a lighter version, you can substitute half-and-half or even Greek yogurt, but the texture will be slightly different.
- Unsweetened cocoa powder: The key to that rich chocolate flavor! Make sure to use high-quality cocoa powder for the best results. If you want to amp up the chocolatey goodness, you can even melt some dark chocolate and fold it into the batter.
- Salt: Just a pinch of salt enhances the flavors and balances the sweetness. It’s a small but mighty ingredient that shouldn’t be overlooked!
- All-purpose flour (optional): This is optional, but adding a tablespoon of flour can help create a firmer texture if that’s what you prefer. If you’re going gluten-free, feel free to omit it altogether!
- Butter (for greasing the pan): A little butter goes a long way in preventing the cheesecake from sticking to the pan. You can also use cooking spray if you prefer a no-mess option.
Now that we have our ingredients lined up, you’re one step closer to creating this delightful Chocolate San Sebastian Cheesecake. Remember, cooking is all about making it your own, so feel free to experiment with substitutions that suit your taste and dietary needs. Let’s get ready to mix it all together and create something truly special!
How to Make Chocolate San Sebastian Cheesecake
Now that we’ve gathered all our ingredients, it’s time to roll up our sleeves and dive into the delightful process of making this Chocolate San Sebastian Cheesecake. Don’t worry; I’ll guide you through each step, making it as easy as pie—well, cheesecake, actually! Let’s get started!
Step 1 – Prep Ingredients
First things first, let’s get our kitchen ready for some cheesecake magic! Preheat your oven to 400°F (200°C). This is crucial because we want our cheesecake to bake evenly and develop that beautiful, slightly caramelized top.
While the oven is warming up, grab your 9-inch springform pan. Grease the bottom and sides with a little butter to prevent sticking. If you’re like me and want to avoid any potential mess, line the bottom with parchment paper after greasing. This little trick makes it super easy to remove the cheesecake later. Trust me, you’ll thank yourself when it’s time to serve!
Step 2 – Begin Cooking
Now, let’s get mixing! In a large mixing bowl, take your softened cream cheese and whip it until it’s smooth and creamy. I like to use an electric mixer for this part, but a good old-fashioned whisk works too—just be prepared for a bit of a workout!
Once your cream cheese is nice and fluffy, gradually add in the granulated sugar. Mix until it’s well combined and creamy. This is where the magic starts to happen! Next, add the eggs one at a time, mixing well after each addition. This helps to incorporate air into the batter, giving your cheesecake that lovely light texture.
After the eggs are in, it’s time to add the vanilla extract, heavy cream, cocoa powder, and salt. Mix everything together until it’s well combined. You want a smooth, luscious batter that’s just begging to be baked!
Step 3 – Combine Ingredients
Now, let’s fold in the cocoa powder and optional flour. Gently add the cocoa powder to the mixture, being careful not to overmix. We want to keep that airy texture we’ve created! If you’re using flour for a firmer cheesecake, sprinkle it in and fold it gently until just combined. Remember, we’re aiming for a smooth batter, so be patient and take your time.
Once everything is well mixed, it’s time to transfer this heavenly concoction into your prepared springform pan. Use a rubber spatula to scrape every last bit of that delicious batter into the pan. You don’t want to waste any of this chocolatey goodness!
Step 4 – Finish and Serve
Now comes the exciting part—baking! Place your springform pan in the preheated oven and bake for 25-30 minutes. You’ll know it’s done when the top is firm but the center still has a slight wobble. It’s like a gentle dance in the oven, and that’s exactly what we want!
Once the baking time is up, turn off the oven and let the cheesecake rest inside for about 10 minutes. This helps prevent cracking as it cools. After that, carefully remove it from the oven and let it cool to room temperature. Patience is key here, but I promise it’ll be worth it!
Once cooled, pop the cheesecake in the refrigerator for at least 4 hours, but if you can wait overnight, do it! This allows the flavors to meld beautifully and gives you that perfect creamy texture.
When you’re ready to serve, carefully remove the sides of the springform pan. You can garnish your cheesecake with a dollop of whipped cream and some chocolate shavings for that extra touch of elegance. Serve it chilled, and watch as your family and friends swoon over this decadent delight!
And there you have it! Your very own Chocolate San Sebastian Cheesecake is ready to be devoured. Enjoy every bite, and don’t forget to take a moment to appreciate the deliciousness you’ve created!

Tips for Perfect Results
Now that you’re all set to make your Chocolate San Sebastian Cheesecake, let’s talk about some handy tips to ensure your dessert turns out absolutely perfect every time. After all, we want to impress our family and friends, right? Here are some actionable tips that I’ve gathered from my own kitchen adventures!
1. Enhance the Flavor
If you want to take your cheesecake to the next level, consider adding a teaspoon of espresso powder to the batter. It sounds fancy, but it’s super easy! The espresso enhances the chocolate flavor without making it taste like coffee. It’s like a secret ingredient that adds depth and richness. Trust me, your taste buds will thank you!
Another flavor booster is a splash of orange zest. Just a teaspoon can brighten up the chocolate and give it a lovely citrus twist. It’s a delightful surprise that adds a fresh note to the rich cheesecake. You can also experiment with different extracts, like almond or hazelnut, for a unique flavor profile.
2. Speed Up Prep Time
We all know that time is of the essence, especially when you’re juggling a busy schedule. To speed up your prep, consider using a food processor to mix your ingredients. It’s a game-changer! Just toss in the cream cheese, sugar, eggs, and other ingredients, and let the machine do the work. You’ll have a smooth batter in no time, and cleanup is a breeze!
If you don’t have a food processor, no worries! Just make sure your cream cheese is really softened. You can even microwave it for about 10-15 seconds to make mixing easier. Just be careful not to melt it—nobody wants a soupy cheesecake!
3. Easy Storage Solutions
After all that hard work, you might have some leftovers (if you’re lucky!). To store your cheesecake, wrap it tightly in plastic wrap or aluminum foil. This keeps it fresh and prevents any fridge odors from sneaking in. If you want to keep it extra safe, place it in an airtight container. It’ll stay delicious for up to a week in the fridge!
If you’re planning to make this cheesecake ahead of time, you can also freeze it! Just make sure it’s completely cooled before wrapping it up. When you’re ready to enjoy it again, let it thaw in the fridge overnight. It’ll taste just as good as the day you made it!
4. Avoid Cracking
One of the biggest fears when baking a cheesecake is the dreaded cracks on the surface. To avoid this, make sure not to overmix your batter once you add the eggs. Overmixing can incorporate too much air, leading to cracks as it bakes. Also, remember to let the cheesecake cool gradually in the oven after baking. This gentle cooling process helps prevent sudden temperature changes that can cause cracks.
Lastly, if you do end up with a crack or two, don’t fret! You can always cover it up with a generous dollop of whipped cream or a sprinkle of chocolate shavings. It’ll look just as beautiful, and no one will be the wiser!
With these tips in your back pocket, you’re all set to create a stunning Chocolate San Sebastian Cheesecake that will wow everyone at the table. Happy baking, and enjoy every delicious bite!
Essential Equipment Needed
Before we dive into the delicious world of baking our Chocolate San Sebastian Cheesecake, let’s make sure we have all the right tools at our fingertips. Having the right equipment can make the process smoother and more enjoyable. Here’s a handy list of what you’ll need:
- 9-inch springform pan: This is the star of the show! A springform pan allows you to easily remove the cheesecake without damaging it. If you don’t have one, don’t worry! You can use a regular cake pan, but be sure to line the bottom with parchment paper to help with removal.
- Mixing bowls: You’ll need a couple of mixing bowls for combining your ingredients. I recommend having one large bowl for the batter and a smaller one for any additional ingredients. If you’re short on space, a large bowl can do double duty!
- Electric mixer or whisk: An electric mixer makes whipping the cream cheese a breeze, but if you prefer a workout, a good old-fashioned whisk will do just fine. Just be prepared to put in a little elbow grease! If you have a hand mixer, that’s a great middle ground.
- Rubber spatula: This handy tool is perfect for scraping down the sides of your mixing bowl and ensuring you get every last bit of that delicious batter into your pan. Plus, it’s great for folding in ingredients gently without deflating your mixture.
Now, if you’re feeling adventurous and don’t have a springform pan, you can also use a regular cake pan. Just remember to line it well with parchment paper, and when it’s time to serve, you might need to use a knife to gently loosen the edges before flipping it out onto a plate. It’s a little extra work, but totally doable!
With these essential tools in hand, you’re all set to create your Chocolate San Sebastian Cheesecake. Let’s get baking and make some magic happen in the kitchen!
Delicious Variations of Chocolate San Sebastian Cheesecake
Now that you’ve mastered the classic Chocolate San Sebastian Cheesecake, let’s have some fun with it! One of the best things about baking is the ability to get creative and make a recipe your own. Here are some delicious variations that will take your cheesecake to the next level. Trust me, your taste buds will thank you!
1. Add a Citrus Twist with Orange Zest
If you’re looking to brighten up the rich chocolate flavor, consider adding a teaspoon of fresh orange zest to your batter. The citrus notes will create a delightful contrast to the deep cocoa, making each bite feel like a refreshing surprise. It’s like a little burst of sunshine in your cheesecake!
To incorporate the zest, simply use a microplane to grate the outer peel of an orange, being careful to avoid the bitter white pith. Mix it in with the other ingredients, and you’ll have a cheesecake that’s not only delicious but also has a lovely aromatic quality. It’s a perfect way to elevate your dessert for a special occasion or just to treat yourself!
2. Swap Cocoa Powder for Dark Chocolate
If you’re a true chocolate aficionado, why not take it up a notch by swapping out the unsweetened cocoa powder for melted dark chocolate? This will give your cheesecake an even richer flavor and a more luxurious texture. Just imagine the deep, velvety goodness that awaits!
To do this, melt about 6 ounces of high-quality dark chocolate in a microwave or over a double boiler. Allow it to cool slightly before folding it into your batter along with the cream cheese and sugar. This variation will create a cheesecake that’s not only decadent but also has a beautiful, glossy finish. It’s a showstopper that’s sure to impress!
3. Make It Gluten-Free
For those of you who are gluten-sensitive or simply want to make a gluten-free version, it’s super easy! Just omit the all-purpose flour from the recipe. The cheesecake will still turn out creamy and delicious without it. The beauty of this Chocolate San Sebastian Cheesecake is that it’s naturally rich and doesn’t rely heavily on flour for structure.
If you want to add a little extra stability, you can use a gluten-free flour blend or even almond flour. Just keep in mind that the texture may vary slightly, but it will still be a delightful treat that everyone can enjoy. Plus, you’ll be able to share it with friends and family who follow a gluten-free diet!
4. Use Alternative Sweeteners for a Low-Sugar Version
If you’re watching your sugar intake but still want to indulge in a slice of cheesecake, consider using alternative sweeteners. You can easily swap out granulated sugar for options like coconut sugar, monk fruit sweetener, or even Stevia. Just remember that different sweeteners have varying levels of sweetness, so you may need to adjust the amount to suit your taste.
For example, if you’re using Stevia, start with a smaller amount and taste as you go. The goal is to achieve that perfect balance of sweetness without compromising the rich chocolate flavor. This way, you can enjoy your Chocolate San Sebastian Cheesecake guilt-free, and it’ll still be a hit with everyone at the table!
With these delicious variations, you can customize your cheesecake to suit your mood or dietary preferences. Whether you’re adding a citrus twist, going for dark chocolate decadence, making it gluten-free, or opting for a low-sugar version, the possibilities are endless. So, roll up your sleeves and get creative in the kitchen—your taste buds are in for a treat!
Serving Suggestions
Now that you’ve created your stunning Chocolate San Sebastian Cheesecake, it’s time to think about how to serve it up! Presentation can elevate your dessert from delicious to downright spectacular. Plus, pairing it with the right accompaniments can enhance the flavors and make for a truly memorable experience. Here are some practical, family-friendly serving suggestions that will have everyone coming back for seconds!
1. Fresh Berries or Fruit Compote
One of my favorite ways to serve cheesecake is with a side of fresh berries. Think strawberries, raspberries, or blueberries—these little gems add a burst of color and a refreshing contrast to the rich chocolate. The tartness of the berries cuts through the creaminess of the cheesecake, creating a delightful balance of flavors.
If you want to take it a step further, consider making a quick fruit compote. Just simmer your choice of berries with a bit of sugar and a splash of lemon juice until they break down into a luscious sauce. Drizzle this over your cheesecake for an elegant touch that’s sure to impress. It’s like a little party on your plate!
2. A Scoop of Vanilla Ice Cream
Let’s be honest—who doesn’t love ice cream? A scoop of creamy vanilla ice cream is the perfect companion to your Chocolate San Sebastian Cheesecake. The cold, velvety ice cream melts slightly against the warm cheesecake, creating a heavenly combination that’s simply irresistible.
You can even get creative with flavors! Try pairing it with salted caramel ice cream for a sweet and salty twist, or go for a rich chocolate ice cream if you’re feeling extra indulgent. Either way, this classic pairing is sure to be a hit with both kids and adults alike!
3. Coffee or Dessert Wine for Adults
If you’re serving this cheesecake at a gathering with friends or family, consider offering a nice cup of coffee or a glass of dessert wine alongside it. A rich, bold coffee complements the chocolate beautifully, enhancing the flavors and providing a lovely contrast to the creamy texture of the cheesecake.
For those who enjoy a little something special, a sweet dessert wine like Port or a fruity Moscato can elevate your dessert experience to new heights. The sweetness of the wine pairs wonderfully with the rich chocolate, making each bite of cheesecake even more delightful. It’s a sophisticated touch that will have your guests raving about your dessert long after the last slice is gone!
With these serving suggestions, you can create a beautiful and delicious presentation for your Chocolate San Sebastian Cheesecake. Whether you choose to keep it simple with fresh berries, indulge with ice cream, or add a touch of elegance with coffee or dessert wine, your cheesecake is sure to be the star of the show. Enjoy every moment of sharing this decadent delight with your loved ones!
FAQs About Chocolate San Sebastian Cheesecake
As you embark on your journey to create the perfect Chocolate San Sebastian Cheesecake, you might have a few questions along the way. Don’t worry; I’ve got you covered! Here are some common questions I’ve encountered, along with concise answers to help you navigate your cheesecake-making adventure.
Can I make this cheesecake ahead of time?
Absolutely! In fact, making this cheesecake ahead of time is a fantastic idea. It actually tastes even better after chilling in the fridge for a few hours or overnight. Just prepare it as directed, let it cool, and then refrigerate it until you’re ready to serve. This makes it perfect for parties or family gatherings, allowing you to enjoy the moment without the stress of last-minute baking!
How do I know when the cheesecake is done baking?
Great question! The key to knowing when your Chocolate San Sebastian Cheesecake is done is to look for a firm top with a slightly wobbly center. It should be set around the edges but still have a gentle jiggle in the middle. Remember, it will continue to cook a bit as it cools, so don’t overbake it! If you see cracks forming, it’s a sign that it’s been in the oven a tad too long.
What’s the best way to store leftovers?
If you’re lucky enough to have leftovers (which is rare in my house!), the best way to store your cheesecake is to wrap it tightly in plastic wrap or aluminum foil. This keeps it fresh and prevents any fridge odors from seeping in. You can also place it in an airtight container for extra protection. It’ll stay delicious in the fridge for up to a week, but I doubt it will last that long!
Can I freeze the cheesecake?
Yes, you can freeze your Chocolate San Sebastian Cheesecake! Just make sure it’s completely cooled before wrapping it up tightly in plastic wrap and then aluminum foil. This double-wrapping helps prevent freezer burn. When you’re ready to enjoy it again, simply transfer it to the fridge to thaw overnight. It’ll taste just as amazing as the day you made it!
With these FAQs in mind, you’re all set to tackle your cheesecake-making adventure with confidence. Enjoy the process, and remember, the best part is sharing your delicious creation with loved ones!

Final Thoughts on Chocolate San Sebastian Cheesecake
As we wrap up our delightful journey into the world of Chocolate San Sebastian Cheesecake, I can’t help but reflect on just how easy and rewarding this recipe is. Seriously, if you’re looking for a dessert that combines simplicity with decadence, this cheesecake is your answer! It’s like a warm hug for your taste buds, and I promise it will leave you and your loved ones smiling from ear to ear.
One of the things I love most about this cheesecake is its versatility. Whether you’re hosting a family gathering, celebrating a special occasion, or simply treating yourself after a long week, this dessert fits the bill perfectly. It’s a showstopper that requires minimal effort but delivers maximum flavor. Plus, with just 20 minutes of prep time, you can have it baking away while you tackle your to-do list. Talk about a win-win!
And let’s not forget about the joy of sharing. There’s something truly special about gathering around the table with family and friends, indulging in a slice of this rich, creamy cheesecake together. It sparks conversations, creates memories, and brings everyone closer. I can’t tell you how many times I’ve seen my kids’ faces light up when they take that first bite. It’s pure magic!
So, if you haven’t already, I encourage you to give this Chocolate San Sebastian Cheesecake a try. Don’t be intimidated by the idea of baking; it’s easier than you think! With just a few simple ingredients and a little bit of love, you can create a dessert that will impress even the toughest critics. Plus, you’ll have the satisfaction of knowing you made it yourself!
Whether you choose to stick with the classic recipe or experiment with some of the delicious variations we discussed, I’m confident that this cheesecake will become a beloved staple in your dessert repertoire. So grab your apron, gather your ingredients, and let’s make some cheesecake magic happen! You deserve it!
“`
PrintChocolate San Sebastian Cheesecake: A Decadent Delight!
- Total Time: 4 hours 50 minutes
- Yield: 8 servings 1x
- Diet: Vegetarian
Description
A rich and creamy Chocolate San Sebastian Cheesecake that is a decadent delight for chocolate lovers.
Ingredients
- 16 ounces cream cheese, softened
- 1 cup granulated sugar
- 3 large eggs
- 1 teaspoon vanilla extract
- 1 cup heavy cream
- 1/2 cup unsweetened cocoa powder
- 1/4 teaspoon salt
- 1 tablespoon all-purpose flour (optional, for a firmer texture)
- 1 tablespoon butter (for greasing the pan)
Instructions
- Preheat your oven to 400°F.
- Grease a 9-inch springform pan with butter and line the base with parchment paper.
- In a mixing bowl, whip the softened cream cheese until smooth.
- Gradually add the granulated sugar and mix until creamy.
- Add the eggs one at a time, mixing well after each addition.
- Fold in the vanilla extract, heavy cream, cocoa powder, and salt.
- If desired, add the flour and mix gently until just combined.
- Transfer the batter into the prepared springform pan.
- Bake for 25-30 minutes, until the top is firm but the center is slightly wobbly.
- Turn off the oven and let the cheesecake rest inside for 10 minutes.
- Remove from the oven and allow to cool to room temperature.
- Refrigerate for a minimum of 4 hours, ideally overnight, before serving.
- Serve chilled, optionally garnished with whipped cream and chocolate shavings.
Notes
- For an extra depth of flavor, mix in a teaspoon of espresso powder into the batter.
- Prep Time: 20 minutes
- Cook Time: 30 minutes
- Category: Dessert
- Method: Baking
- Cuisine: Spanish
Nutrition
- Serving Size: 1 slice
- Calories: 360
- Sugar: 8g
- Fat: 32g
- Carbohydrates: 8g
- Protein: 7g
Keywords: Chocolate San Sebastian Cheesecake, Decadent Cocoa Cream Cheesecake