Black Velvet Cake: Discover the Spooky Sweet Delight!
gutenberg
Why You’ll Love This Black Velvet Cake
Let me tell you, if you’re a busy woman juggling work, family, and a million other responsibilities, this Black Velvet Cake is about to become your new best friend in the kitchen. Seriously, it’s like a culinary superhero swooping in to save the day! With a quick prep time and minimal cleanup, you can whip up this delightful dessert without feeling like you’ve just run a marathon.
First off, let’s talk about the flavors. This cake is rich, decadent, and oh-so-chocolatey, making it a hit with both adults and kids alike. I mean, who can resist a slice of velvety chocolate goodness? It’s perfect for family gatherings, birthday parties, or even just a cozy night in with a good book. And let’s be honest, we all deserve a little indulgence now and then, right?
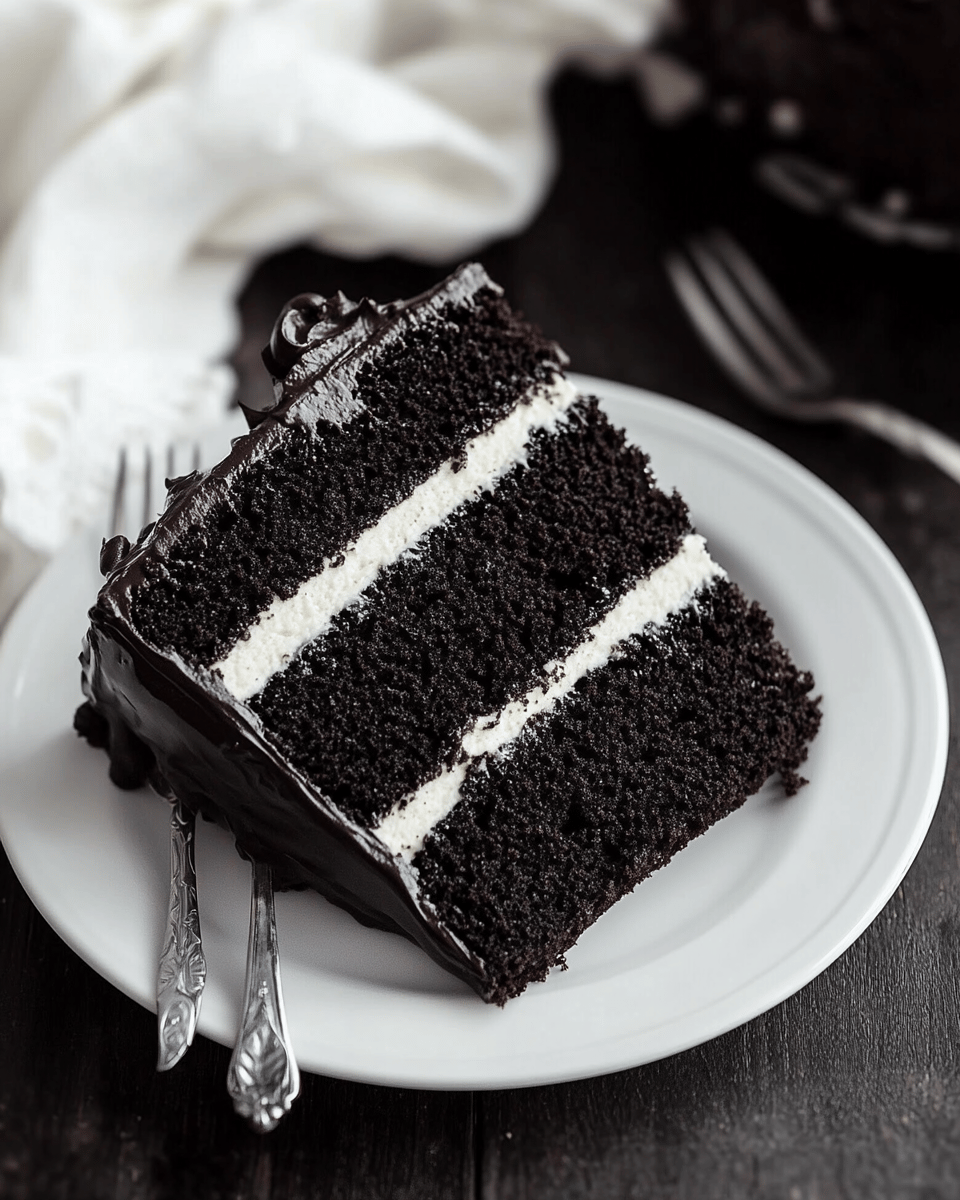
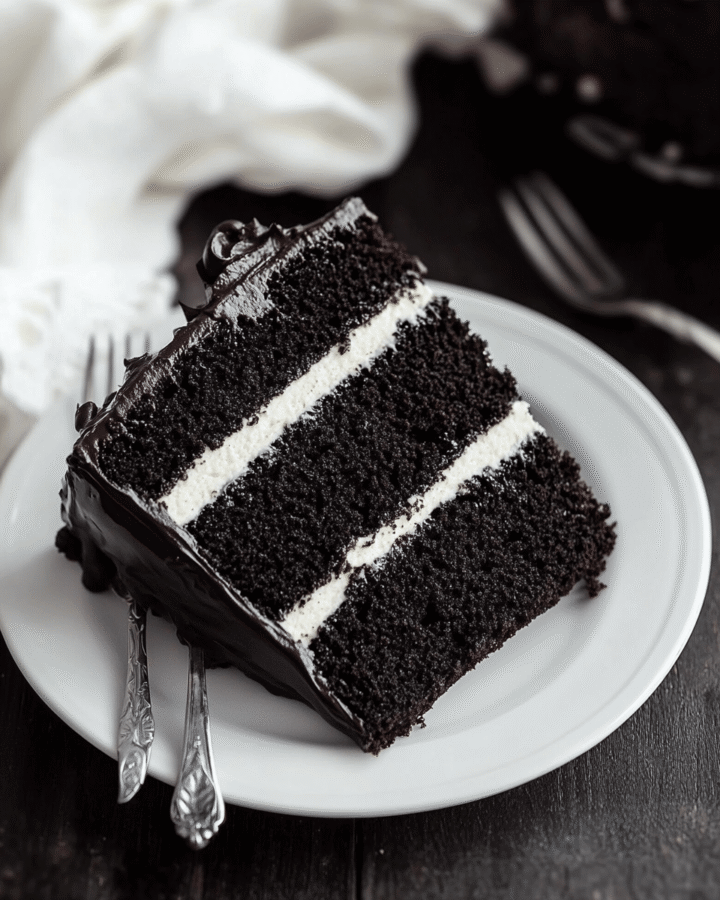
But what really sets this cake apart is its stunning visual appeal. The deep, dark color of the cake is striking, making it a showstopper at any gathering. Imagine walking into a room with this beauty on the table, and everyone’s eyes lighting up with excitement. It’s like the cake version of a grand entrance! Plus, it’s dye-free, so you can feel good about serving it to your loved ones. No artificial colors here, just pure, rich chocolate flavor.
Now, I know what you might be thinking: “But I don’t have time to bake!” Trust me, I get it. Between work, family, and everything else life throws at us, it can feel overwhelming to even think about baking. But this cake is designed with busy lives in mind. The prep time is just 45 minutes, and while it’s baking, you can tackle a few other tasks or simply take a breather. And the best part? The cleanup is a breeze! You won’t be left with a mountain of dishes to wash afterward.
So, whether you’re looking to impress guests or just want to treat yourself and your family, this Black Velvet Cake is the answer. It’s a delightful blend of convenience, flavor, and visual appeal that will make your baking experience enjoyable and rewarding. Trust me, once you try it, you’ll be hooked!
Introduction to Black Velvet Cake
Welcome to the world of Black Velvet Cake, a dessert that’s as unique as it is delicious! If you’ve never heard of it before, let me paint a picture for you. Imagine a cake that’s as dark as a moonless night, with layers of velvety chocolate that melt in your mouth. It’s not just a cake; it’s an experience, a celebration of flavors that will leave you and your loved ones craving more.
Now, I know what you might be thinking: “Isn’t this just another chocolate cake?” Oh, my friend, it’s so much more than that! This cake stands out with its rich black cocoa powder, giving it a depth of flavor that’s simply irresistible. Plus, it’s dye-free, which means you can indulge without the guilt of artificial colors. It’s a healthier choice that doesn’t skimp on taste, making it perfect for those of us who want to enjoy dessert without compromising our values.
For busy American women aged 40 to 70, this cake is a game-changer, especially during festive occasions. Whether you’re hosting a family gathering, a birthday party, or just a cozy get-together with friends, the Black Velvet Cake is sure to impress. It’s the kind of dessert that sparks joy and conversation, bringing everyone together around the table. And let’s be honest, who doesn’t love a cake that looks as good as it tastes?
What I adore about this cake is its versatility. You can dress it up for special occasions or keep it simple for a casual family dinner. It’s a dessert that fits seamlessly into your busy life, allowing you to create sweet memories without the stress. So, if you’re looking for a showstopper that’s easy to make and even easier to enjoy, look no further than the Black Velvet Cake. Trust me, once you take that first bite, you’ll understand why it’s become a beloved favorite in my kitchen!
Ingredients You’ll Need
Before we dive into the baking magic, let’s gather our ingredients for this delightful Black Velvet Cake. Here’s what you’ll need:
- All-purpose flour
- Granulated sugar
- Black cocoa powder
- Baking soda
- Baking powder
- Salt
- Vegetable oil
- Eggs
- Pure vanilla extract
- Full-fat buttermilk
- Hot coffee or hot water
- Unsalted butter
- Powdered sugar
- Whole milk
Now, let’s break down the role of each ingredient, so you know exactly what’s going into your cake and why it matters:
- All-purpose flour: This is the backbone of your cake, providing structure and stability. You can substitute it with a gluten-free flour blend if you need a gluten-free option.
- Granulated sugar: This sweetener not only adds sweetness but also helps with the cake’s texture, making it moist and tender. If you’re looking to cut back on sugar, you can try using coconut sugar or a sugar substitute, but keep in mind it may alter the flavor slightly.
- Black cocoa powder: This is the star of the show! It gives the cake its rich, dark color and deep chocolate flavor. If you can’t find black cocoa powder, you can use regular cocoa powder, but the cake won’t be as dark or have that unique taste.
- Baking soda and baking powder: These leavening agents work together to help your cake rise and become fluffy. Make sure they’re fresh for the best results!
- Salt: Just a pinch enhances all the flavors in your cake. It’s like a secret ingredient that brings everything together.
- Vegetable oil: This adds moisture to the cake, keeping it soft and tender. You can substitute it with melted coconut oil or even applesauce for a lighter option.
- Eggs: They provide structure and richness. If you’re looking for an egg-free version, you can use flax eggs (1 tablespoon of ground flaxseed mixed with 2.5 tablespoons of water per egg) or applesauce.
- Pure vanilla extract: This adds a lovely depth of flavor. If you’re out of vanilla, you can use almond extract for a different twist.
- Full-fat buttermilk: This ingredient adds moisture and a slight tang, which balances the sweetness. If you don’t have buttermilk, you can make your own by adding a tablespoon of vinegar to a cup of milk and letting it sit for 15 minutes.
- Hot coffee or hot water: This helps to enhance the chocolate flavor and keeps the cake moist. If you’re not a coffee drinker, hot water works just fine!
- Unsalted butter: This is used in the frosting, providing a creamy texture. You can use margarine if you prefer, but the flavor will differ slightly.
- Powdered sugar: This sweetens the frosting and gives it that smooth, spreadable consistency. If you want a less sweet frosting, you can reduce the amount of sugar.
- Whole milk: This is used to adjust the consistency of the frosting. You can substitute it with almond milk or any other milk of your choice.
And there you have it! Each ingredient plays a vital role in creating the perfect Black Velvet Cake. If you’re ready to get started, don’t worry about jotting down measurements right now. I’ve got you covered with printable measurements at the end of this article. Let’s get baking!
How to Make Black Velvet Cake
Alright, my fellow baking enthusiasts! It’s time to roll up our sleeves and dive into the delicious world of Black Velvet Cake. Don’t worry; I’ll guide you through each step, making it as easy as pie—well, cake, actually! Let’s get started!
Step 1 – Prep Ingredients
First things first, let’s get our kitchen ready for some baking magic. Preheat your oven to 350ºF (that’s 175ºC for my metric friends). While that’s warming up, grab your cake pans—either three 6-inch or two 8-inch pans will do. Spray the sides with cooking spray and line the bottoms with wax paper or parchment paper. This little trick ensures your cake layers come out without a hitch!
Now, gather all your ingredients and tools. You’ll need a stand mixer, mixing bowls, a spatula, and a sifter. Having everything at your fingertips will make the process smoother than a fresh batch of buttercream!
Step 2 – Begin Cooking
Once your oven is preheated and your pans are ready, it’s time to mix things up! In the bowl of your stand mixer, combine all the dry ingredients: all-purpose flour, granulated sugar, black cocoa powder, baking soda, baking powder, and salt. Give it a quick stir on low speed for about 30 seconds to ensure everything is well combined.
Next, it’s time to add the wet ingredients. Pour in the vegetable oil, crack in the eggs, add the pure vanilla extract, and pour in the buttermilk. Mix on low speed until just combined—don’t overdo it! We want a tender cake, not a tough one.
Step 3 – Combine Ingredients
Now comes the fun part! Gradually add the hot water (or hot coffee if you’re feeling fancy) to the mixture. This step is crucial as it helps to enhance the chocolate flavor and keeps the cake moist. Mix until everything is smooth and well combined—about 2 minutes should do the trick.
Once your batter is ready, it’s time to pour it into the prepared pans. Fill them no more than 2/3 full to allow room for rising. Pop them in the oven and bake for 32-36 minutes. You’ll know they’re done when a toothpick inserted into the center comes out clean. While they’re baking, take a moment to enjoy the heavenly aroma wafting through your kitchen!
Step 4 – Finish and Serve
Once your cake layers are baked to perfection, let them cool completely in the pans for about 10 minutes. Then, carefully transfer them to a wire rack to cool completely. While they’re cooling, let’s whip up that luscious black buttercream!
In your stand mixer, beat the unsalted butter on medium speed until it’s creamy and light in color—about 4 minutes. Gradually add half of the powdered sugar, mixing on low until just incorporated. Then, sift in the black cocoa powder and add the vanilla, whole milk, and salt. Mix on low until everything is combined and smooth.
Once your cake layers are cool, it’s time to assemble! Level the layers to your desired height, then fill and stack them with that rich black buttercream. Don’t forget to crumb coat the cake with more buttercream to seal in those crumbs. Pop the crumb-coated cake in the fridge for about 20-30 minutes to let the frosting firm up.
Finally, use the remaining black buttercream to create a smooth finish on the cake. If you’re feeling creative, add some lambeth piping and sprinkle with round black sprinkles for that extra flair. And there you have it—a stunning Black Velvet Cake that’s sure to impress!
Now, all that’s left is to slice it up and enjoy! Whether you’re serving it at a gathering or indulging in a slice with your afternoon coffee, this cake is bound to be a hit. Happy baking!
Tips for Perfect Results
Now that you’re all set to create your very own Black Velvet Cake, let me share some tried-and-true tips that will help you achieve perfect results every time. Trust me, these little nuggets of wisdom can make a world of difference in your baking journey!
- 1. Use Room Temperature Ingredients: This is a game-changer! When your ingredients are at room temperature, they mix together more easily, creating a smoother batter. It’s like giving your cake a warm hug before it goes into the oven! So, take those eggs and buttermilk out of the fridge about 30 minutes before you start baking. You’ll be amazed at how much better your cake turns out!
- 2. Sift Cocoa Powder: Nobody wants clumps in their frosting, right? Sifting the black cocoa powder before adding it to your buttercream will help eliminate any lumps and ensure a silky-smooth texture. It’s a simple step that can elevate your frosting from good to absolutely divine. Plus, it’s a great way to get a little workout in—who knew baking could be a full-body experience?
- 3. Refrigerate the Cake After Frosting: Once you’ve frosted your Black Velvet Cake, pop it in the fridge for about 30 minutes. This will help the frosting set and create a beautiful, smooth finish. It’s like giving your cake a little spa treatment! Plus, it makes slicing easier, so you can serve those perfect pieces to your family and friends without any fuss.
By following these tips, you’ll be well on your way to creating a stunning and delicious Black Velvet Cake that will have everyone asking for seconds. Happy baking, and remember, the kitchen is your playground—so have fun with it!
Essential Equipment Needed
Before we dive into the deliciousness of Black Velvet Cake, let’s make sure you have all the right tools at your fingertips. Trust me, having the right equipment can make your baking experience smoother and more enjoyable. Here’s a handy list of what you’ll need:
- Stand Mixer: This is your best friend in the kitchen! A stand mixer makes mixing the batter and frosting a breeze. If you don’t have one, a hand mixer will work too, but be prepared for a little more elbow grease!
- Cake Pans (6-inch or 8-inch): Depending on how tall you want your cake to be, you can use either size. I love the 6-inch pans for a more petite cake that’s perfect for smaller gatherings, but the 8-inch pans are great for larger celebrations. Just remember to adjust your baking time if you change the size!
- Parchment Paper or Wax Paper: This little trick is a lifesaver! Lining the bottoms of your cake pans with parchment or wax paper ensures that your cake layers come out easily without sticking. It’s like giving your cake a VIP pass to the party!
- Mixing Bowls: You’ll need a few mixing bowls for combining your dry and wet ingredients. I recommend having a couple of different sizes on hand. It’s always nice to have a large bowl for mixing the batter and a smaller one for the frosting.
- Spatula: A good spatula is essential for scraping down the sides of your mixing bowl and spreading frosting smoothly on your cake. I prefer a silicone spatula because it’s flexible and makes it easy to get every last bit of batter out of the bowl. Plus, it’s dishwasher safe—win-win!
- Sifter: This is a must-have for ensuring your dry ingredients are lump-free. Sifting the cocoa powder before adding it to your frosting will give you that silky-smooth texture we all crave. If you don’t have a sifter, a fine-mesh strainer works just as well!
With these essential tools in your kitchen arsenal, you’ll be well-equipped to tackle the Black Velvet Cake recipe with confidence. So gather your gear, and let’s get ready to bake something truly special!
Delicious Variations of Black Velvet Cake
Now that you’ve mastered the classic Black Velvet Cake, let’s have some fun with variations! After all, who says you can’t play around with a beloved recipe? These delightful twists will keep your baking exciting and cater to different tastes and dietary needs. So, grab your apron, and let’s get creative!
- 1. Fruity Filling: If you’re looking to add a burst of flavor, consider adding a layer of raspberry or cherry filling between the cake layers. The tartness of the fruit perfectly complements the rich chocolate, creating a delightful contrast that will have everyone raving. You can use store-bought fruit preserves or make your own by simmering fresh or frozen berries with a bit of sugar until they break down into a luscious sauce. Just spread a thin layer of the filling on top of the buttercream between the layers, and watch your cake transform into a fruity masterpiece!
- 2. Gluten-Free Option: For those who need to avoid gluten, fear not! You can easily substitute the all-purpose flour with a gluten-free flour blend. Just make sure to choose a blend that includes xanthan gum, as it helps mimic the texture of traditional flour. The Black Velvet Cake will still be rich and delicious, and your gluten-free friends will be thrilled to indulge in a slice without worry. Just remember to double-check that all your other ingredients are gluten-free as well!
- 3. Flavorful Extracts: Want to switch things up a bit? Try using different flavored extracts in your cake and frosting! While pure vanilla extract is a classic choice, almond extract can add a lovely nutty flavor that pairs beautifully with chocolate. You could even experiment with orange or peppermint extracts for a seasonal twist. Just a teaspoon or two can elevate your Black Velvet Cake to new heights, making it a unique treat that your family and friends won’t forget.
These variations not only keep your baking fresh and exciting but also allow you to cater to different tastes and dietary preferences. So, whether you’re adding a fruity layer, going gluten-free, or experimenting with flavors, your Black Velvet Cake will always be a hit. Happy baking, and don’t forget to share your delicious creations with loved ones!
Serving Suggestions
Now that you’ve created this stunning Black Velvet Cake, let’s talk about how to serve it up for maximum enjoyment! After all, presentation and pairing can elevate your dessert experience from delightful to downright unforgettable.
First up, let’s talk about indulgence. There’s something magical about pairing a rich chocolate cake with a scoop of creamy vanilla ice cream. Picture this: a warm slice of Black Velvet Cake fresh from the oven, topped with a generous scoop of vanilla ice cream that slowly melts into the cake, creating a luscious, gooey delight. It’s like a match made in dessert heaven! The coolness of the ice cream perfectly balances the warmth of the cake, making each bite a heavenly experience. Trust me, your family will be begging for seconds!
If ice cream isn’t your thing, whipped cream is another fantastic option. A dollop of freshly whipped cream adds a light, airy touch that complements the dense, rich chocolate of the cake. You can even jazz it up by adding a sprinkle of cocoa powder or a drizzle of chocolate sauce on top. It’s a simple yet elegant way to elevate your dessert presentation, making it feel extra special. Plus, who doesn’t love a little whipped cream on their cake? It’s like the cherry on top of a sundae!
Now, let’s not forget about the cozy vibes that come with a warm cup of coffee or tea. Serving your Black Velvet Cake alongside a steaming mug of your favorite brew creates a comforting dessert experience that’s perfect for any occasion. The rich flavors of the cake pair beautifully with the boldness of coffee or the soothing notes of tea. It’s like wrapping yourself in a warm blanket on a chilly day—pure bliss!
For a little twist, consider infusing your coffee with a splash of flavored creamer or serving a spiced chai tea alongside the cake. The aromatic spices will enhance the chocolatey goodness of the cake, creating a delightful harmony of flavors. It’s a simple way to impress your guests and make your dessert table feel like a cozy café!
So, whether you choose to indulge with ice cream, whip up some cream, or sip on a warm beverage, these serving suggestions will take your Black Velvet Cake to the next level. Remember, dessert is all about enjoyment, so don’t be afraid to get creative and make it your own. Happy serving, and may your cake bring joy to every gathering!
FAQs About Black Velvet Cake
As you embark on your baking adventure with Black Velvet Cake, you might have a few questions swirling around in your mind. Don’t worry; I’ve got you covered! Here are some frequently asked questions that will help you navigate this delicious recipe with ease.
What is black cocoa powder?
Ah, the secret ingredient that makes this cake so special! Black cocoa powder is a unique type of cocoa that’s processed to have a deep, dark color and a rich, intense flavor. It’s what gives the Black Velvet Cake its striking appearance and that luxurious chocolate taste. Think of it as the dark knight of cocoa powders—bold and full of character! If you can’t find black cocoa powder, don’t fret; you can substitute it with regular cocoa powder, but the cake won’t be quite as dark or have that signature flavor.
Can I make this cake ahead of time?
Absolutely! One of the best things about the Black Velvet Cake is its make-ahead potential. You can bake the cake layers in advance and store them properly. Just let them cool completely, wrap them tightly in plastic wrap, and store them at room temperature for up to two days. If you want to keep them longer, pop them in the freezer for up to two months. When you’re ready to frost and serve, just let them thaw in the fridge overnight. It’s a fantastic way to save time, especially if you’re preparing for a special occasion!
Is this cake suitable for special diets?
Yes, indeed! The Black Velvet Cake can be adapted to accommodate various dietary needs. If you’re looking for a gluten-free option, simply swap out the all-purpose flour for a gluten-free flour blend. Just make sure it contains xanthan gum for the best texture. For those who need a dairy-free version, you can use almond milk or coconut milk in place of buttermilk and substitute the butter in the frosting with a dairy-free alternative. With a few simple tweaks, everyone can enjoy this delightful cake!
Final Thoughts on Black Velvet Cake
As I sit here, reflecting on the journey of creating this Black Velvet Cake, I can’t help but smile. It’s not just a cake; it’s a delightful experience that brings joy to both the baker and those lucky enough to enjoy a slice. The ease of making this cake is truly remarkable. With just a few simple steps, you can whip up a dessert that looks and tastes like it came straight from a fancy bakery. It’s like having a secret weapon in your baking arsenal!
What I love most about the Black Velvet Cake is its ability to impress. Whether you’re hosting a festive gathering, celebrating a birthday, or simply treating your family to something special, this cake is sure to be the star of the show. Its rich, velvety layers and striking dark color make it a visual masterpiece that will have everyone reaching for their cameras before they reach for a fork!
And let’s not forget about the flavor. The combination of black cocoa powder and rich chocolate buttercream creates a taste sensation that’s both indulgent and satisfying. It’s a cake that appeals to chocolate lovers of all ages, making it a perfect choice for family gatherings where everyone has different tastes. Plus, the fact that it’s dye-free means you can feel good about serving it to your loved ones. It’s a win-win!
So, if you’re looking for a dessert that’s easy to make, visually stunning, and absolutely delicious, I wholeheartedly encourage you to try your hand at this Black Velvet Cake. Don’t be surprised if it becomes a staple in your baking repertoire! With its unique flavor and eye-catching appearance, it’s bound to become a favorite among your family and friends.
Remember, baking is all about creating memories and sharing joy. So, roll up your sleeves, gather your ingredients, and let the magic happen. I can’t wait for you to experience the delight of this spooky sweet treat. Happy baking, and may your Black Velvet Cake bring smiles and sweet moments to your table!
“`
Print
Black Velvet Cake: Discover the Spooky Sweet Delight!
- Total Time: 77 mins
- Yield: 15 slices 1x
- Diet: Vegetarian
Description
Discover the spooky sweet delight of Black Velvet Cake, a 100% dye-free dessert featuring velvety black cocoa layers and rich black chocolate buttercream.
Ingredients
- 2 Cups (265g) all purpose flour
- 1 2/3 Cups (340g) granulated sugar
- 2/3 Cup (80g) black cocoa powder
- 2 tsp baking soda
- 1 tsp baking powder
- 1/2 tsp salt
- 1/2 Cup (120ml) vegetable oil
- 2 large eggs, room temperature
- 1 1/2 tsp pure vanilla extract
- 1 Cup (240ml) full-fat buttermilk, room temperature
- 1 Cup (240ml) hot coffee or hot water
- 2 Cups (452g) unsalted butter, room temperature
- 5 Cups (600g) powdered sugar
- 1 Cup (112g) black cocoa powder
- 4 Tbsp whole milk, room temperature
- 2 tsp pure vanilla extract
- 1/4 tsp salt, or to taste
Instructions
- Preheat the oven to 350ºF and prepare three 6-inch or two 8-inch cake pans by spraying the sides with cooking spray and fitting the bottoms with a wax paper or parchment cake circle.
- Place all of the dry ingredients into the bowl of a stand mixer and stir on low for 30 seconds to fully combine them. Add the vegetable oil, eggs, vanilla, and buttermilk and mix on low until just combined. With the mixer still on low, add the hot water in a slow stream, then turn the mixer to medium and beat until smooth, about 2 minutes.
- Pour into prepared cake pans no more than 2/3 full and bake for 32-36 minutes, until a toothpick inserted comes out clean. Cool completely before frosting.
- In a stand mixer fitted with a paddle attachment, whip the butter on medium speed until creamy and light in color, about 4 minutes. Scrape down the bowl and paddle, then add half of the powdered sugar. Mix on low speed until just incorporated, then add the rest of the powdered sugar.
- With the mixer still in the off position, sift in the black cocoa powder and add the vanilla, milk, and salt. Mix on low until all ingredients are thoroughly combined, about 2 minutes.
- Once the cake layers have cooled completely, level them to your desired height. Fill and stack the layers with black buttercream, then crumb coat the cake with more black buttercream.
- Refrigerate the crumb coated cake for 20-30 minutes to let the frosting firm up. To create the design, use the black buttercream to create a smooth finish on the cake, then refrigerate it for at least 30 minutes.
- Use the rest of the black buttercream to create lambeth piping and accent with round black sprinkles where desired.
Notes
- DIY Buttermilk recipe: add 1 Tbsp of white vinegar to a jar and top it with 1 Cup of whole milk. Stir and let sit for 15 minutes before using in the recipe.
- For the darkest black buttercream, use extra dark black cocoa powder.
- The Black Velvet Cake layers can be made ahead and stored at room temperature for up to two days or in the freezer for up to two months.
- The Black Buttercream can be made ahead and stored at room temperature for up to 1 day or in the refrigerator for up to two weeks.
- Prep Time: 45 mins
- Cook Time: 32 mins
- Category: Dessert
- Method: Baking
- Cuisine: American
Nutrition
- Serving Size: 1 slice
- Calories: Unknown
- Sugar: Unknown
- Sodium: Unknown
- Fat: Unknown
- Saturated Fat: Unknown
- Unsaturated Fat: Unknown
- Trans Fat: Unknown
- Carbohydrates: Unknown
- Fiber: Unknown
- Protein: Unknown
- Cholesterol: Unknown
Keywords: Black Velvet Cake, spooky dessert, chocolate cake


