Bannock (Indigenous Fry Bread) Recipe for Deliciousness
gutenberg
Why You’ll Love This Bannock (Indigenous Fry Bread)
Let me tell you, if you’re a busy woman juggling work, family, and everything in between, you’re going to fall head over heels for this Bannock (Indigenous Fry Bread). Seriously, it’s like a warm hug on a plate! With a prep time of just 15 minutes and a cook time that’s equally quick, you can whip up this delightful bread in no time. It’s perfect for those evenings when you’re racing against the clock but still want to serve something delicious and satisfying.
One of the best things about Bannock is its versatility. You can serve it as a side dish, a snack, or even a main course, depending on how you dress it up. I’ve seen families devour it plain, while others pile on toppings like honey, jam, or even savory chili. It’s a crowd-pleaser that appeals to all ages, from picky eaters to adventurous foodies. Trust me, your kids (and maybe even your partner) will be begging for seconds!
And let’s not forget about the cleanup. With just a few simple ingredients and minimal kitchen tools required, you won’t be left with a mountain of dishes to tackle afterward. I don’t know about you, but after a long day, the last thing I want to do is spend an hour scrubbing pots and pans. This recipe is as easy on the eyes as it is on the taste buds!
Now, if you’re anything like me, you love to get creative in the kitchen. The beauty of Bannock is that it’s a blank canvas just waiting for your personal touch. Want to add a sprinkle of cinnamon for a sweet twist? Go for it! Feeling adventurous? Toss in some herbs or spices to give it a savory kick. The possibilities are endless, and that’s what makes this recipe so special. You can customize it to fit your family’s tastes and dietary needs, making it a go-to meal for any occasion.
So, whether you’re looking for a quick weeknight dinner solution, a fun cooking project with the kids, or a way to impress your friends at your next gathering, Bannock (Indigenous Fry Bread) is the answer. It’s not just food; it’s a way to bring a piece of Indigenous culture into your home while creating delicious memories around the dinner table. Let’s dive into the ingredients you’ll need to get started!
Introduction to Bannock (Indigenous Fry Bread)
Ah, Bannock! Just saying the word brings a smile to my face. This traditional Indigenous fry bread is not just a recipe; it’s a piece of history, a warm embrace from the past that has found its way into our modern kitchens. Originating from Indigenous cultures across North America, Bannock has been a staple for generations, often made during gatherings and celebrations. It’s a bread that tells stories, and now, it’s your turn to create your own.
What I love most about Bannock is its incredible versatility. You can enjoy it sweet or savory, as a side dish or a main event. It’s like a blank canvas, ready for your culinary creativity! Whether you’re slathering it with honey for breakfast or pairing it with a hearty chili for dinner, Bannock adapts to whatever you’re in the mood for. It’s the kind of dish that can fit into any meal, making it a fantastic option for busy women like us who are always on the go.
Speaking of busy, let’s be real: life can get hectic. Between work, family commitments, and everything else on our plates, finding time to cook can feel like a daunting task. That’s where this Bannock (Indigenous Fry Bread) recipe shines! With just a handful of ingredients and a quick cooking process, you can whip up this delightful bread in no time. It’s perfect for those evenings when you want something delicious but don’t have hours to spend in the kitchen.
So, if you’re looking for a way to bring a taste of tradition into your home while keeping things simple and satisfying, you’ve come to the right place. Let’s roll up our sleeves and dive into the world of Bannock, where every bite is a celebration of culture and flavor!
Ingredients You’ll Need
Alright, let’s get down to the nitty-gritty! To make your very own Bannock (Indigenous Fry Bread), you’ll need just a handful of simple ingredients. Trust me, you probably have most of these in your pantry already. Here’s what you’ll need:
- 2 cups all-purpose flour: This is the star of the show! All-purpose flour gives Bannock its lovely texture. If you’re feeling adventurous, you can swap it out for whole wheat flour for a nuttier flavor and a bit more fiber.
- 1 tablespoon baking powder: This little powerhouse is what makes your Bannock rise and get that fluffy goodness. Without it, you’d be left with a dense pancake instead of the delightful bread we’re aiming for!
- 1 teaspoon salt: Salt is essential for flavor. It enhances the taste of the bread and balances the sweetness if you choose to add sugar. Don’t skip it, or your Bannock might taste a bit flat.
- 1 tablespoon sugar (optional): This is totally up to you! If you’re leaning towards a sweeter version of Bannock, toss in some sugar. It’s perfect if you plan to serve it with honey or jam. If you’re going savory, feel free to leave it out.
- 2 tablespoons vegetable oil or melted butter: This adds richness and moisture to the dough. You can use any neutral oil you have on hand, or go for melted butter for that extra flavor kick. Just be careful not to use too much, or your Bannock might end up greasy!
- 3/4 cup water (adjust as needed): Water is what brings everything together. You might need a little more or less depending on the humidity in your kitchen. Start with 3/4 cup and add a splash more if the dough feels too dry.
- Oil for frying: You’ll need enough oil to fry your Bannock. About 1/2 inch in the skillet should do the trick. You can use vegetable oil, canola oil, or even olive oil if you prefer. Just remember, the oil should be hot enough to sizzle when you drop in the dough!
And there you have it! A simple list of ingredients that come together to create something truly special. If you’re looking for printable measurements, don’t worry! I’ve got you covered at the end of this article. Now, let’s get ready to roll up our sleeves and make some delicious Bannock!
How to Make Bannock (Indigenous Fry Bread)
Now that we’ve gathered our ingredients, it’s time to roll up our sleeves and get cooking! Making Bannock (Indigenous Fry Bread) is a straightforward process that even the busiest of us can manage. I promise, you’ll be amazed at how quickly you can whip this up. Let’s dive into the steps!
Step 1 – Prep Ingredients
First things first, let’s get organized! Gather all your ingredients and tools. You’ll need:
- A large mixing bowl
- A measuring cup and spoons
- A clean surface for kneading
- A skillet or frying pan for cooking
- A slotted spoon for removing the fried bread
- Paper towels for draining
Once you have everything in place, take a moment to clear your workspace. A tidy kitchen makes for a happy cook, and trust me, you’ll want to enjoy every moment of this process!
Step 2 – Begin Cooking
Now, let’s get mixing! In your large mixing bowl, combine the dry ingredients: the flour, baking powder, salt, and sugar (if you’re using it). Give it a good stir with a whisk or a fork to ensure everything is well blended. This is where the magic begins!
Next, add the vegetable oil or melted butter to the dry mixture. Using your hands or a fork, mix it all together until it resembles coarse crumbs. It should look a bit like sand on the beach—crumbly and inviting. This step is crucial because it helps to incorporate the fat into the flour, which will give your Bannock that lovely texture we all crave.
Step 3 – Combine Ingredients
Now comes the fun part! Gradually add the water to your mixture, stirring as you go. You want to form a soft dough, so don’t dump all the water in at once. Start with 3/4 cup and add a little more if needed. The dough should be slightly sticky but manageable.
Once you’ve got your dough, it’s time to knead! Turn it out onto a floured surface and gently knead it for about a minute. You’re not making a workout here—just enough to bring it together and smooth it out. After kneading, let the dough rest for about 10-15 minutes. This little break allows the gluten to relax, making your Bannock even fluffier!
Step 4 – Finish and Serve
Alright, the moment we’ve all been waiting for! After your dough has rested, it’s time to shape it. Divide the dough into six equal pieces. Roll each piece into a ball and then flatten it into a round about 1/2 inch thick. Think of them as little pillows of joy just waiting to be fried!
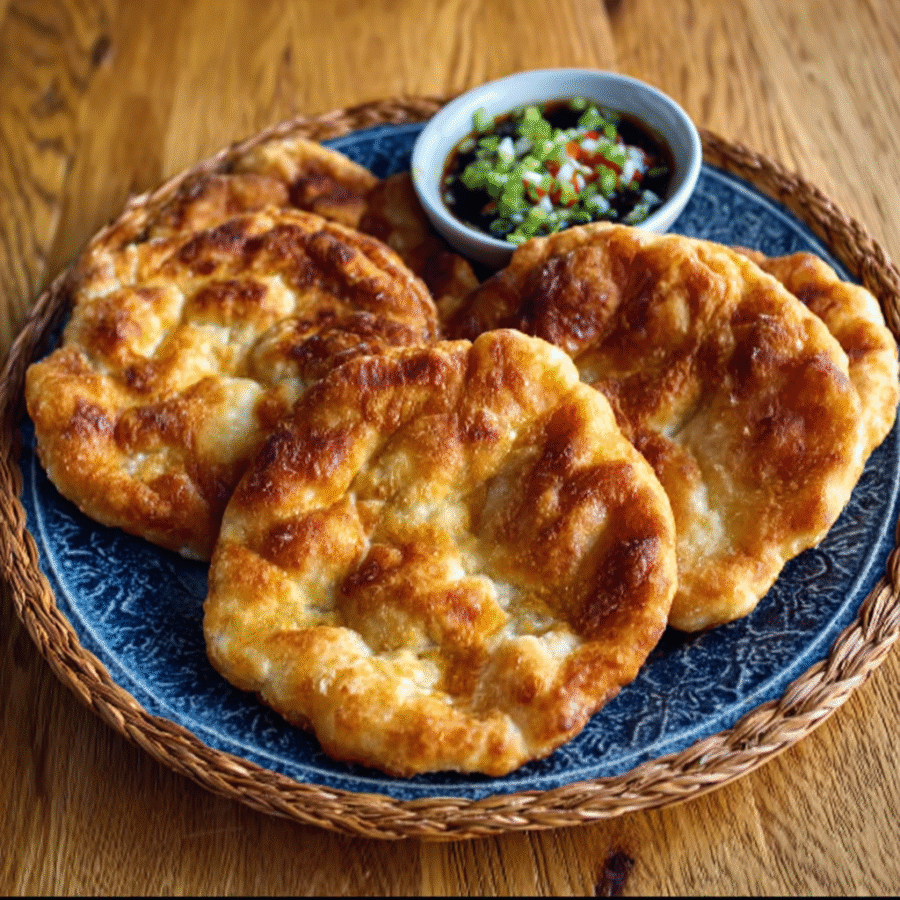
Now, heat about 1/2 inch of oil in your skillet over medium heat. You want it hot enough that a drop of water sizzles when it hits the oil. Carefully place the dough rounds into the skillet, making sure not to overcrowd them. Fry each piece for about 2-3 minutes on each side, or until they’re golden brown and cooked through. The aroma will be heavenly, and you might find it hard to resist sneaking a taste!
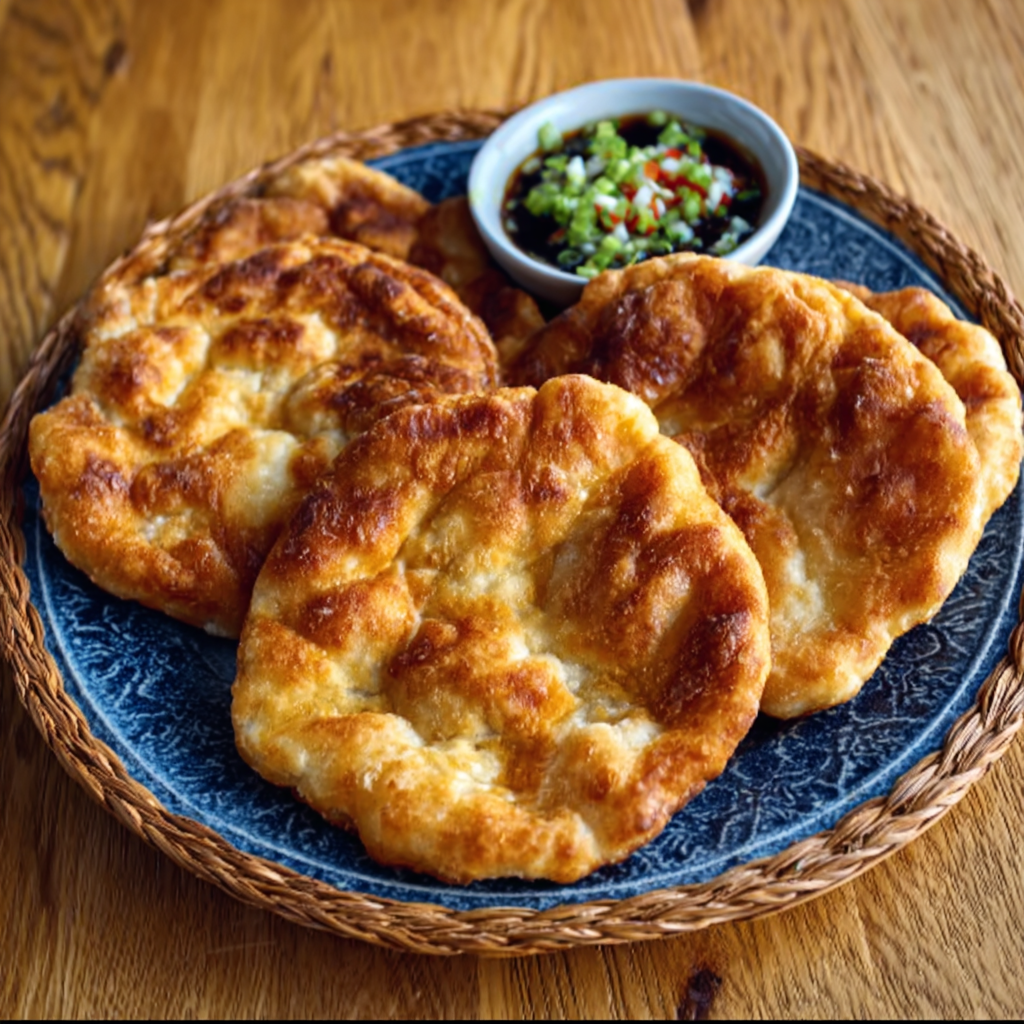
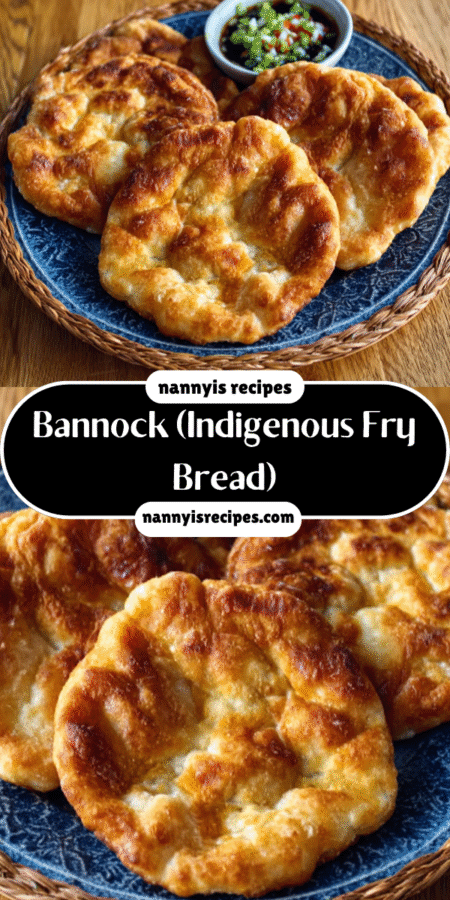
Once they’re done, use a slotted spoon to remove the Bannock from the oil and let them drain on paper towels. Serve them warm, either plain or with your favorite toppings. Whether you go sweet with honey or jam, or savory with chili or beans, I guarantee you’ll be in for a treat!
And there you have it! A simple, delicious recipe for Bannock (Indigenous Fry Bread) that’s perfect for any occasion. Now, let’s move on to some tips for perfect results!
Tips for Perfect Results
Now that you’re all set to make your Bannock (Indigenous Fry Bread), let’s talk about a few tips that will help you achieve perfect results every time. Trust me, these little nuggets of wisdom can make a world of difference in your cooking experience!
- 1. Use a thermometer to check oil temperature for frying. This is a game-changer! If you want your Bannock to be perfectly golden and crispy, the oil needs to be at the right temperature. Ideally, you want it to be around 350°F (175°C). If you don’t have a thermometer, you can drop a small piece of dough into the oil. If it sizzles and rises to the surface, you’re good to go! If it sinks and doesn’t bubble, the oil isn’t hot enough yet. Nobody wants soggy bread, right?
- 2. Let the dough rest for better texture. I know, waiting can be tough, especially when you’re hungry! But letting the dough rest for 10-15 minutes is crucial. This little break allows the gluten to relax, which results in a softer, fluffier texture. Think of it as giving your dough a mini spa day! It’s worth the wait, I promise.
- 3. Experiment with different frying oils for unique flavors. While vegetable oil is a classic choice, don’t be afraid to get creative! Try using olive oil for a richer taste or coconut oil for a hint of sweetness. Each oil brings its own personality to the table, and you might just discover a new favorite. Plus, it’s a fun way to add a twist to your Bannock without changing the recipe!
With these tips in your back pocket, you’re well on your way to making the best Bannock (Indigenous Fry Bread) ever. So, roll up those sleeves, get cooking, and enjoy the deliciousness that awaits!
Essential Equipment Needed
Before we dive into the delicious world of Bannock (Indigenous Fry Bread), let’s make sure you have all the essential equipment ready to go. Trust me, having the right tools on hand can make your cooking experience smoother and more enjoyable. Here’s what you’ll need:
- Large mixing bowl: This is where the magic begins! A good-sized mixing bowl will give you enough space to combine your ingredients without making a mess. I always opt for a bowl that’s sturdy and easy to grip, especially when I’m mixing up a storm!
- Skillet or frying pan: You’ll need a reliable skillet for frying your Bannock. A cast-iron skillet is my personal favorite because it retains heat beautifully, giving your bread that perfect golden crust. But any frying pan will do the trick—just make sure it’s deep enough to hold the oil!
- Measuring cups and spoons: Precision is key in baking, even when it comes to something as forgiving as Bannock. Having a set of measuring cups and spoons will ensure you get the right amounts of flour, baking powder, and other ingredients. Plus, it makes you feel like a pro in the kitchen!
- Slotted spoon for removing fried bread: This handy tool is essential for lifting your Bannock out of the hot oil without making a mess. The slots allow excess oil to drain off, so your bread stays light and fluffy. If you don’t have a slotted spoon, a regular one will work in a pinch—just be extra careful!
- Paper towels for draining: After frying, you’ll want to place your Bannock on paper towels to absorb any excess oil. This step is crucial for keeping your bread from becoming greasy. I like to keep a stack of paper towels nearby, ready to catch those golden beauties as they come out of the skillet!
With these essential tools at your side, you’re all set to create some mouthwatering Bannock (Indigenous Fry Bread). So, gather your equipment, and let’s get cooking!
Delicious Variations of Bannock (Indigenous Fry Bread)
Now that you’ve mastered the basic recipe for Bannock (Indigenous Fry Bread), let’s have some fun with variations! The beauty of this dish lies in its versatility, and I’m excited to share a few creative twists that will keep your family coming back for more. Whether you’re in the mood for something sweet or savory, there’s a variation here for everyone!
- 1. Sweet Cinnamon Bannock: If you’re looking to satisfy your sweet tooth, why not add a little warmth to your Bannock? Simply mix in 1/2 teaspoon of cinnamon to the dry ingredients before you combine everything. This will infuse your bread with a delightful hint of spice that pairs perfectly with toppings like honey or maple syrup. Imagine biting into a warm piece of Bannock, the cinnamon wafting through the air, and drizzling it with a touch of honey—pure bliss!
- 2. Savory Herb Bannock: For those who prefer a savory twist, you can easily transform your Bannock into a flavorful side dish. Just mix in your favorite herbs or spices into the dough before frying. Think garlic powder, onion powder, or even dried herbs like rosemary or thyme. These additions will elevate your Bannock to a whole new level, making it a fantastic accompaniment to soups, stews, or even a hearty salad. Your family will be asking for this savory version at every meal!
- 3. Gluten-Free Bannock: If you or someone in your family is gluten-sensitive, don’t worry! You can still enjoy the deliciousness of Bannock by using gluten-free flour as a substitute for all-purpose flour. There are many great gluten-free blends available that work wonderfully in this recipe. Just keep in mind that the texture might be slightly different, but the flavor will still shine through. It’s a great way to ensure everyone at the table can enjoy this traditional dish!
These variations are just the tip of the iceberg! Feel free to get creative and experiment with different flavors and ingredients. The beauty of Bannock is that it’s a blank canvas, ready for your culinary imagination. So, roll up your sleeves, try out these delicious twists, and let your family discover their new favorite version of this beloved bread!
Serving Suggestions
Now that you’ve whipped up a batch of delicious Bannock (Indigenous Fry Bread), it’s time to talk about how to serve it! This bread is incredibly versatile, and the right pairing can elevate your meal from good to absolutely unforgettable. Here are some of my favorite serving suggestions that will have your family coming back for seconds (or thirds!).
- 1. Sweet Treats: If you’re in the mood for something sweet, Bannock pairs beautifully with honey, jam, or maple syrup. Imagine tearing off a warm piece of Bannock, drizzling it with golden honey, and savoring that delightful combination of flavors. It’s like a cozy breakfast hug! You can also serve it with fruit preserves or a dollop of whipped cream for a delightful dessert. Trust me, your taste buds will thank you!
- 2. Hearty Meals: For a more substantial meal, serve your Bannock alongside chili, beans, or soups. The fluffy texture of the bread is perfect for soaking up all those delicious flavors. Picture a steaming bowl of chili on a chilly evening, with a piece of warm Bannock to dip in. It’s comfort food at its finest! You can even use it as a base for a savory stew, creating a satisfying and filling dish that will warm you from the inside out.
- 3. Fresh and Balanced: If you’re looking to keep things light and fresh, enjoy your Bannock with a side salad or fresh vegetables. A crisp garden salad with a tangy vinaigrette complements the richness of the bread perfectly. You can also serve it with sliced cucumbers, cherry tomatoes, or a medley of roasted veggies for a colorful and nutritious meal. This way, you get the best of both worlds—delicious Bannock and a healthy side!
These serving suggestions are just the beginning! Feel free to mix and match based on your family’s preferences and what you have on hand. The beauty of Bannock is that it can adapt to any meal, making it a fantastic addition to your culinary repertoire. So, gather your loved ones around the table, serve up some warm Bannock, and enjoy the deliciousness together!
FAQs About Bannock (Indigenous Fry Bread)
As you embark on your journey to make Bannock (Indigenous Fry Bread), you might have a few questions swirling around in your mind. Don’t worry; I’ve got you covered! Here are some frequently asked questions that will help you understand this delightful bread even better.
What is the origin of Bannock?
Bannock has a rich history that dates back to Indigenous cultures across North America. Originally, it was made by Indigenous peoples using simple ingredients like flour, water, and salt, often cooked over an open fire. The word “bannock” itself is believed to have Scottish origins, but the bread has been embraced and adapted by various Indigenous communities, each adding their unique twist to the recipe.
For many Indigenous peoples, Bannock is more than just a food; it’s a symbol of resilience and cultural identity. It has been served at gatherings, celebrations, and community events, bringing people together around the table. Today, Bannock continues to hold cultural significance while also finding its way into modern kitchens, allowing us to appreciate and honor its heritage. So, when you make Bannock, you’re not just cooking; you’re participating in a beautiful tradition that spans generations!
Can I make Bannock in the oven?
Absolutely! While frying is the traditional method for making Bannock, you can also bake it in the oven if you prefer a healthier option or want to avoid frying altogether. To bake your Bannock, simply preheat your oven to 425°F (220°C). After shaping your dough into rounds, place them on a baking sheet lined with parchment paper. Brush the tops with a little oil or melted butter for a golden finish, and bake for about 15-20 minutes or until they’re puffed and lightly browned.
Baking will give you a different texture—more like a biscuit than the crispy fried version—but it’s still delicious! Plus, it’s a great way to enjoy Bannock without the extra oil. So, whether you choose to fry or bake, you can enjoy this delightful bread in a way that suits your taste and lifestyle.
How do I store leftover Bannock?
If you happen to have any leftover Bannock (which is rare, trust me!), storing it properly will help maintain its deliciousness. Allow the bread to cool completely before storing it. You can wrap it in plastic wrap or aluminum foil and place it in an airtight container. It will keep well at room temperature for a day or two, but if you want to extend its shelf life, pop it in the fridge. Just remember, it’s best enjoyed fresh!
When you’re ready to enjoy your leftovers, you can reheat them in a skillet over low heat for a few minutes on each side, or pop them in the toaster for a quick warm-up. If you’re feeling adventurous, you can even turn leftover Bannock into a tasty breakfast by toasting it and topping it with eggs or avocado. The possibilities are endless!
So, there you have it! These FAQs should help you feel more confident as you dive into the world of Bannock (Indigenous Fry Bread). Whether you’re making it for the first time or perfecting your technique, I hope you enjoy every delicious bite!
Final Thoughts on Bannock (Indigenous Fry Bread)
As I sit here reflecting on the journey of making Bannock (Indigenous Fry Bread), I can’t help but smile. This simple yet delicious recipe has a way of bringing warmth and joy into the kitchen. It’s incredible how something so easy to make can also be so satisfying. With just a handful of ingredients and a quick cooking process, you can create a dish that not only fills the belly but also nourishes the soul.
What I love most about Bannock is its ability to adapt to our busy lives. Whether you’re whipping it up for a quick weeknight dinner, serving it at a family gathering, or even enjoying it as a snack, this bread fits seamlessly into any occasion. It’s like a culinary chameleon, ready to take on whatever flavor profile you desire. Plus, the minimal cleanup means you can spend more time enjoying your meal and less time scrubbing dishes—now that’s a win in my book!
I wholeheartedly encourage you to give this recipe a try. Don’t be intimidated by the idea of making fry bread; it’s truly a straightforward process that anyone can master. And once you do, I promise you’ll be hooked! The joy of pulling a golden piece of Bannock from the skillet, the aroma wafting through your kitchen, and the smiles on your family’s faces as they take their first bites—these are the moments that make cooking so rewarding.
As you embark on your Bannock-making adventure, I’d love to hear about your experiences! Did you try any fun variations? What toppings did you choose? Sharing our culinary journeys not only inspires others but also helps us connect over the love of food. So, grab your apron, gather your loved ones, and let’s celebrate the joy of bringing a traditional dish into our modern kitchens. Happy cooking!
“`
Print
Bannock (Indigenous Fry Bread) Recipe for Deliciousness
- Total Time: 30 minutes
- Yield: 6 servings 1x
- Diet: Vegetarian
Description
A traditional recipe for Bannock, also known as Indigenous Fry Bread, that is easy to make and delicious.
Ingredients
- 2 cups all-purpose flour
- 1 tablespoon baking powder
- 1 teaspoon salt
- 1 tablespoon sugar (optional)
- 2 tablespoons vegetable oil or melted butter
- 3/4 cup water (adjust as needed)
- Oil for frying
Instructions
- In a large mixing bowl, combine the flour, baking powder, salt, and sugar (if using). Mix well.
- Add the vegetable oil or melted butter to the dry ingredients and mix until crumbly.
- Gradually add water, stirring until a soft dough forms. You may need to adjust the water slightly to achieve the right consistency.
- Turn the dough onto a floured surface and knead gently for about 1 minute until smooth. Let the dough rest for 10-15 minutes.
- Divide the dough into 6 equal pieces and shape each piece into a flat round about 1/2 inch thick.
- In a large skillet, heat about 1/2 inch of oil over medium heat. Once hot, carefully place the dough rounds in the skillet, cooking in batches if necessary.
- Fry each piece for about 2-3 minutes on each side or until golden brown and cooked through. Remove and drain on paper towels.
- Serve warm, either plain or with toppings like honey, jam, or savory options like chili or beans.
Notes
- For a sweeter variation, add 1/2 teaspoon of cinnamon to the dry ingredients and serve with maple syrup.
- To make a savory version, mix in chopped herbs or spices like garlic powder or onion powder into the dough before frying.
- Prep Time: 15 minutes
- Cook Time: 15 minutes
- Category: Bread
- Method: Frying
- Cuisine: Indigenous
Nutrition
- Serving Size: 1 piece
- Calories: 180
- Sugar: 0g
- Sodium: Salt content varies
- Fat: 7g
- Saturated Fat: Varies based on oil used
- Unsaturated Fat: Varies based on oil used
- Trans Fat: 0g
- Carbohydrates: 30g
- Fiber: Varies
- Protein: 3g
- Cholesterol: 0mg
Keywords: Bannock, Indigenous Fry Bread, Fry Bread Recipe
