Peanut Butter Banana Cream Pie Jars: An Easy Delight!

gutenberg
Why You’ll Love This Peanut Butter Banana Cream Pie Jars
Let me tell you, if you’re a busy woman juggling work, family, and everything in between, you’re going to adore these Peanut Butter Banana Cream Pie Jars. Seriously, they’re like a little hug in a cup! Not only are they incredibly easy to whip up, but they also deliver a flavor punch that will have your family begging for seconds.
First off, let’s talk about the prep time. You can have these delightful jars ready in just 20 minutes! That’s less time than it takes to scroll through social media, right? And the best part? There’s no baking involved! Just layer, chill, and enjoy. It’s a no-fuss dessert that fits perfectly into your busy schedule.
Now, I know what you might be thinking: “Will my family actually eat this?” Oh, absolutely! The combination of creamy peanut butter, sweet bananas, and crunchy graham crackers is a crowd-pleaser. Even my picky eaters—who would rather eat cardboard than try something new—devour these jars like they’re the last dessert on Earth. Trust me, you’ll be the hero of dessert time!
These jars are also incredibly versatile. Whether you’re hosting a casual family dinner, a birthday party, or just want to treat yourself after a long week, they fit the bill. You can even make them ahead of time for a potluck or a picnic. Just grab a few jars, and you’re good to go! Plus, they look so cute lined up on a table, don’t you think?
And let’s not forget about the cleanup. With just a few bowls and spoons to wash, you’ll have more time to relax with your loved ones instead of scrubbing pots and pans. It’s a win-win situation!
So, if you’re looking for a dessert that’s quick, easy, and absolutely delicious, look no further than these Peanut Butter Banana Cream Pie Jars. They’re sure to become a staple in your dessert rotation, and you’ll find yourself making them again and again!
Introduction to Peanut Butter Banana Cream Pie Jars
Welcome to the world of Peanut Butter Banana Cream Pie Jars—a dessert that’s as delightful as it is easy to make! Picture this: layers of creamy peanut butter, sweet bananas, and crunchy graham crackers, all nestled in a charming little jar. It’s like a mini celebration of flavors that you can whip up in no time!
Now, I know what you’re thinking. “Another dessert? I barely have time to breathe!” But trust me, these jars are a game-changer for busy American women like us, especially those of us aged 40 to 70 who are juggling work, family, and a million other responsibilities. With just 20 minutes of prep time and no baking required, you can create a dessert that feels indulgent without the fuss.
Imagine coming home after a long day, and instead of slumping on the couch with a bag of chips, you can treat yourself to a delicious dessert that you made yourself. It’s like a little victory! Plus, the flavors are so comforting and familiar—who doesn’t love the classic combo of peanut butter and banana? It’s a nostalgic taste that brings back memories of childhood snacks and family gatherings.
These jars are perfect for any occasion, whether you’re hosting a casual dinner, celebrating a birthday, or just want to enjoy a sweet treat after a long week. They’re versatile enough to impress guests yet simple enough to make on a whim. And let’s be honest, they look adorable lined up on your kitchen counter or dessert table, don’t they?
So, if you’re ready to dive into a dessert that’s not only easy to prepare but also bursting with flavor, let’s get started on these Peanut Butter Banana Cream Pie Jars. You’ll be amazed at how something so simple can bring so much joy to your day!
Why You’ll Love This Peanut Butter Banana Cream Pie Jars
Let me tell you, if you’re a busy woman juggling work, family, and everything in between, you’re going to adore these Peanut Butter Banana Cream Pie Jars. Seriously, they’re like a little hug in a cup! Not only are they incredibly easy to whip up, but they also deliver a flavor punch that will have your family begging for seconds.
First off, let’s talk about the prep time. You can have these delightful jars ready in just 20 minutes! That’s less time than it takes to scroll through social media, right? And the best part? There’s no baking involved! Just layer, chill, and enjoy. It’s a no-fuss dessert that fits perfectly into your busy schedule.
Now, I know what you might be thinking: “Will my family actually eat this?” Oh, absolutely! The combination of creamy peanut butter, sweet bananas, and crunchy graham crackers is a crowd-pleaser. Even my picky eaters—who would rather eat cardboard than try something new—devour these jars like they’re the last dessert on Earth. Trust me, you’ll be the hero of dessert time!
These jars are also incredibly versatile. Whether you’re hosting a casual family dinner, a birthday party, or just want to treat yourself after a long week, they fit the bill. You can even make them ahead of time for a potluck or a picnic. Just grab a few jars, and you’re good to go! Plus, they look so cute lined up on a table, don’t you think?
And let’s not forget about the cleanup. With just a few bowls and spoons to wash, you’ll have more time to relax with your loved ones instead of scrubbing pots and pans. It’s a win-win situation!
So, if you’re looking for a dessert that’s quick, easy, and absolutely delicious, look no further than these Peanut Butter Banana Cream Pie Jars. They’re sure to become a staple in your dessert rotation, and you’ll find yourself making them again and again!
Ingredients You’ll Need
Alright, let’s dive into the deliciousness! To create these Peanut Butter Banana Cream Pie Jars, you’ll need a handful of simple ingredients that you probably already have in your pantry. Here’s what you’ll need:
- Smooth peanut butter: This is the star of the show! It adds that creamy, nutty flavor we all love. If you’re looking for a lighter option, feel free to use light peanut butter. It works just as well!
- Confectioners’ sugar: This sweet powder helps to create a smooth and creamy peanut butter filling. It’s what gives the dessert that delightful sweetness without being too overpowering.
- Pure vanilla extract: A splash of vanilla adds warmth and depth to the flavor. Trust me, it makes a world of difference! If you’re out of vanilla, you can skip it, but I wouldn’t recommend it.
- Heavy cream: This is what makes the filling light and fluffy. Whipping it up creates those lovely soft peaks that make each bite feel indulgent. If you want a lighter version, you can use whipped topping instead.
- Ripe bananas, sliced: Bananas bring natural sweetness and a lovely texture to the jars. Make sure they’re ripe for the best flavor! If bananas aren’t your thing, you can swap them out for berries or other fruits.
- Crushed graham crackers: These provide a crunchy base that contrasts beautifully with the creamy filling. You can crush them yourself or buy pre-crushed ones to save time. If you’re gluten-free, look for gluten-free graham crackers!
- Melted unsalted butter: This helps to bind the graham cracker crumbs together, creating a delicious crust. If you’re looking for a healthier option, you can use coconut oil instead.
- Mini chocolate chips (optional): These are the cherry on top! They add a little extra sweetness and a fun texture. If you’re not a chocolate fan, feel free to leave them out.
- Whipped cream for garnish (optional): A dollop of whipped cream on top makes everything look fancy and adds a lightness to the dessert. You can use store-bought or make your own!
Each ingredient plays a vital role in creating the perfect balance of flavors and textures in your Peanut Butter Banana Cream Pie Jars. Plus, they’re all easy to find and won’t break the bank! So gather your ingredients, and let’s get ready to create something delicious!
How to Make Peanut Butter Banana Cream Pie Jars
Now that we’ve gathered all our ingredients, it’s time to roll up our sleeves and get to the fun part—making these Peanut Butter Banana Cream Pie Jars! I promise, it’s as easy as pie (pun intended!). Just follow these simple steps, and you’ll have a delightful dessert ready to chill in no time.
Step 1 – Prep Ingredients
First things first, let’s get our ingredients prepped. Grab a sturdy zip-top bag and toss in your graham crackers. Now, channel your inner chef and crush those crackers into fine crumbs. You can use a rolling pin, a meat mallet, or even your hands if you’re feeling adventurous! Aim for a texture that resembles wet sand—this will help create that perfect crust.
While you’re at it, melt your unsalted butter in a microwave-safe bowl. Just pop it in the microwave for about 30 seconds, and you’ll have melted butter ready to go. It’s like magic! Once the butter is melted, set it aside to cool slightly while you finish crushing those crackers.
Step 2 – Begin Mixing
Now that our graham crackers are crushed and our butter is melted, it’s time to mix them together. In a medium bowl, combine the crushed graham crackers with the melted butter. Stir until all the crumbs are evenly coated and resemble that wet sand texture we talked about. This mixture is going to be the base of our jars, so make sure it’s well combined!
Next, grab your dessert cups or jars. I love using mason jars for this because they’re cute and easy to stack. But any small cups will do! Place a generous layer of the graham cracker mixture at the bottom of each jar. Press it down gently with the back of a spoon to create a solid base. This is where the magic begins!
Step 3 – Combine Ingredients
Now, let’s whip up that creamy peanut butter filling! In a separate large bowl, pour in your heavy cream. Using a whisk or an electric mixer, whip the cream until it forms soft peaks. This step is crucial because it gives our filling that light and fluffy texture. If you’re using an electric mixer, it should only take a couple of minutes—easy peasy!
Once your cream is whipped, it’s time to fold in the star ingredients: smooth peanut butter, confectioners’ sugar, and pure vanilla extract. Gently fold these into the whipped cream using a spatula. Be careful not to deflate the cream; we want to keep that airy texture! Keep folding until everything is smoothly blended and you can’t see any streaks of peanut butter. It should look like a creamy dream!
Step 4 – Finish and Serve
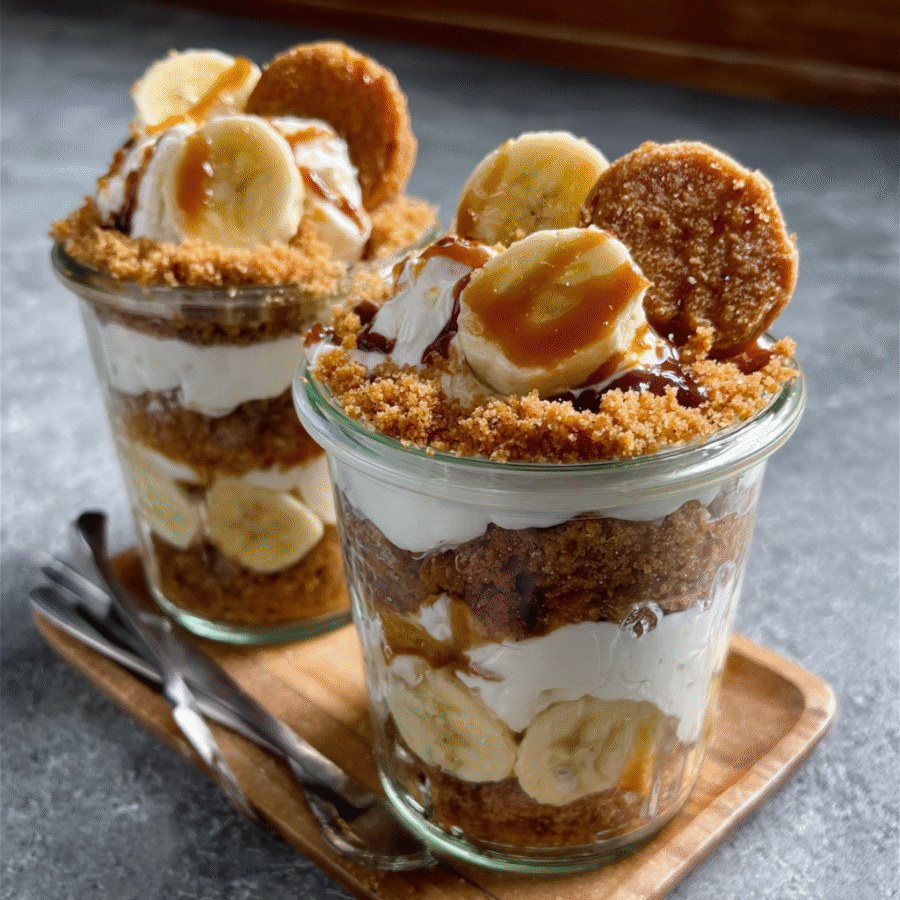
Now comes the fun part—layering! Grab your jars and start with a layer of the peanut butter cream. Spoon it over the graham cracker base, filling each jar about halfway. Then, it’s time to add those lovely banana slices. Arrange them on top of the peanut butter cream, creating a beautiful layer of sweetness.
Repeat the layering process: add more graham cracker mixture, followed by another layer of the peanut butter cream, and finish with more banana slices until the jars are filled to the top. If you’re feeling a little extra, sprinkle some mini chocolate chips over the last layer of banana slices for that added touch of indulgence. Who can resist a little chocolate, right?
Finally, top each jar with a swirl of whipped cream for a delightful finish. You can use store-bought whipped cream or make your own if you’re feeling fancy. Once you’ve topped them off, place the jars in the refrigerator for at least an hour. This chilling time allows all those delicious flavors to meld together beautifully.
And there you have it! Your Peanut Butter Banana Cream Pie Jars are ready to be enjoyed. They’re perfect for a sweet treat after dinner or a delightful surprise for guests. Trust me, once you make these, you’ll be the dessert queen in your household!
Tips for Perfect Results
Now that you’re all set to make your Peanut Butter Banana Cream Pie Jars, let’s talk about some handy tips to ensure your dessert turns out absolutely perfect every time. After all, we want to impress our family and friends, right? Here are some tried-and-true tips that I’ve learned along the way:
- Use chilled bowls for whipping cream: This little trick can make a world of difference! When you whip your heavy cream in a chilled bowl, it helps the cream whip up faster and achieve those lovely soft peaks. Just pop your mixing bowl in the freezer for about 10 minutes before you start. It’s like giving your cream a refreshing spa day!
- Allow the jars to chill longer: While the recipe suggests chilling for at least an hour, I highly recommend letting them sit in the fridge for a few hours, or even overnight if you can wait! This extra time allows all those delicious flavors to meld together beautifully, making each bite even more delightful. Plus, it gives you a chance to sneak in a little “me time” while you wait!
- Store in airtight containers: If you happen to have leftovers (which is rare, but it can happen!), make sure to store your jars in airtight containers. This will keep them fresh and prevent any unwanted odors from sneaking in. Just be sure to enjoy them within a few days—if they last that long!
By following these simple tips, you’ll elevate your Peanut Butter Banana Cream Pie Jars to a whole new level of deliciousness. Trust me, your family will be raving about them, and you’ll feel like a kitchen superstar!
Essential Equipment Needed
Before we dive into making our Peanut Butter Banana Cream Pie Jars, let’s make sure we have all the right tools on hand. The good news? You probably already have most of these items in your kitchen! Here’s a handy list of the essential equipment you’ll need:
- Mixing bowls: You’ll need a couple of mixing bowls—one for the graham cracker mixture and another for whipping the cream. If you don’t have a fancy set, any sturdy bowl will do! Just make sure it’s big enough to hold all your ingredients without spilling over.
- Whisk or electric mixer: A whisk is perfect for whipping cream by hand, but if you’re short on time (and who isn’t?), an electric mixer will do the job in a snap! If you don’t have either, you can even use a fork to whip the cream, though it might take a bit more elbow grease.
- Measuring cups and spoons: Accurate measurements are key to achieving the perfect balance of flavors in your jars. Grab your measuring cups for the peanut butter and cream, and measuring spoons for the sugar and vanilla. If you’re in a pinch, you can use a regular coffee mug or a tablespoon from your silverware drawer—just keep in mind that it might not be as precise!
- Dessert cups or jars: This is where the magic happens! You can use small mason jars, dessert cups, or even clear plastic cups if you’re serving a crowd. The key is to choose something that showcases those beautiful layers. If you don’t have any jars, you can also use small bowls—just make sure they’re cute enough to impress your guests!
With these essential tools at your disposal, you’re all set to create your Peanut Butter Banana Cream Pie Jars. Remember, it’s not about having the fanciest equipment; it’s about making something delicious with what you have. So, let’s get cooking!
Delicious Variations of Peanut Butter Banana Cream Pie Jars
Now that you’ve mastered the classic Peanut Butter Banana Cream Pie Jars, let’s have some fun with variations! One of the best things about this dessert is its versatility. You can easily tweak the ingredients to suit your taste or dietary needs. Here are some delightful variations that I think you’ll love:
- Swap bananas for berries: If you’re in the mood for something a little different, try swapping out the bananas for fresh berries! Strawberries, blueberries, or raspberries can add a burst of color and a refreshing twist. Just layer them in between the peanut butter cream and graham cracker base. The tartness of the berries pairs beautifully with the creamy peanut butter, creating a delightful contrast that’s sure to impress!
- Use almond butter instead of peanut butter: For those who might be looking for a nutty alternative, almond butter is a fantastic option! It has a slightly different flavor profile but still delivers that creamy goodness we all crave. Plus, it’s a great way to mix things up if you’re a fan of almonds. Just make sure to choose a smooth variety for the best texture!
- Create a gluten-free version: If you or someone in your family is gluten-sensitive, don’t worry! You can easily make these jars gluten-free by using gluten-free graham crackers. There are plenty of delicious options available in stores now, and they work just as well in this recipe. Just crush them up and follow the same steps. You won’t even miss the regular ones!
- Add a hint of spice: For a little extra flavor, consider adding a pinch of cinnamon or nutmeg to the peanut butter cream. It adds warmth and depth that can elevate the entire dessert. Just a sprinkle will do—too much can overpower the other flavors!
- Try a chocolate twist: If you’re a chocolate lover (and who isn’t?), you can mix in some cocoa powder with the peanut butter cream for a chocolatey version. Or, simply layer in some chocolate pudding between the layers for an extra indulgent treat. You can even use chocolate graham crackers for the base if you want to go all out!
These variations not only keep things exciting but also allow you to cater to different tastes and dietary preferences. So, whether you’re in the mood for something fruity, nutty, or even a little spicy, you can easily customize your Peanut Butter Banana Cream Pie Jars to suit your cravings. Get creative and have fun with it—after all, cooking is all about experimenting and finding what you love!
Serving Suggestions
Now that you’ve created your delightful Peanut Butter Banana Cream Pie Jars, let’s talk about how to serve them up for maximum enjoyment! Presentation can make all the difference, and pairing these jars with the right accompaniments can elevate your dessert experience to a whole new level. Here are some practical, family-friendly serving suggestions that I think you’ll love:
- Serve with a side of fresh fruit salad: Nothing complements the creamy, rich flavors of the jars quite like a refreshing fruit salad. Toss together some seasonal fruits like strawberries, blueberries, and kiwi for a colorful and vibrant side. The natural sweetness and acidity of the fruit will balance out the richness of the peanut butter and banana, making for a well-rounded dessert experience. Plus, it adds a pop of color to your table!
- Pair with a glass of cold milk: There’s something so nostalgic about enjoying a sweet treat with a glass of cold milk. It’s like a match made in heaven! The creaminess of the milk pairs perfectly with the peanut butter and banana flavors, making each bite even more satisfying. If you want to get a little fancy, consider using chocolate milk for an extra indulgent twist. Your taste buds will thank you!
- Enjoy with a cup of coffee: If you’re a coffee lover like me, serving your jars with a warm cup of coffee can create a delightful contrast. The rich, bold flavors of coffee complement the sweetness of the dessert beautifully. Plus, it’s a great way to unwind after a long day. Just imagine curling up on the couch with your favorite mug in one hand and a jar of creamy goodness in the other—pure bliss!
- Top with a sprinkle of nuts: For an added crunch, consider sprinkling some chopped nuts on top of your jars before serving. Chopped peanuts, walnuts, or even pecans can add a delightful texture that contrasts with the creaminess of the filling. It’s a simple touch that can take your dessert to the next level!
- Make it a dessert bar: If you’re hosting a gathering or family dinner, why not turn your Peanut Butter Banana Cream Pie Jars into a fun dessert bar? Set out a variety of toppings like mini chocolate chips, shredded coconut, or even caramel sauce, and let everyone customize their jars to their liking. It’s a fun way to get everyone involved and makes for a memorable dessert experience!
With these serving suggestions, you can create a delightful dessert experience that your family and friends will love. Whether you’re keeping it simple with a glass of milk or going all out with a dessert bar, your Peanut Butter Banana Cream Pie Jars are sure to be a hit. So, gather your loved ones, serve up those jars, and enjoy every delicious bite together!
FAQs About Peanut Butter Banana Cream Pie Jars
As you embark on your journey to create these delightful Peanut Butter Banana Cream Pie Jars, you might have a few questions swirling around in your mind. Don’t worry; I’ve got you covered! Here are some common questions I’ve encountered, along with concise answers to help you out:
- Can I make these jars ahead of time?
Absolutely! In fact, making them ahead of time is a great idea. You can prepare the jars a day in advance and let them chill in the refrigerator. This not only saves you time but also allows the flavors to meld together beautifully. Just be sure to cover them tightly with plastic wrap or a lid to keep them fresh! - How long do they last in the fridge?
Your Peanut Butter Banana Cream Pie Jars will typically last about 3 to 4 days in the fridge. Just make sure to store them in airtight containers to maintain their freshness. After that, the bananas may start to brown, and the texture might change a bit, so it’s best to enjoy them within that timeframe! - Can I use other types of nut butter?
Yes, you can! If you’re not a fan of peanut butter or have a nut allergy, feel free to swap it out for almond butter, cashew butter, or even sunflower seed butter for a nut-free option. Just keep in mind that the flavor will change slightly, but it will still be delicious! Each nut butter brings its own unique taste, so get creative!
These FAQs should help clear up any uncertainties you might have as you prepare your Peanut Butter Banana Cream Pie Jars. Remember, cooking is all about experimenting and having fun, so don’t hesitate to make this recipe your own!
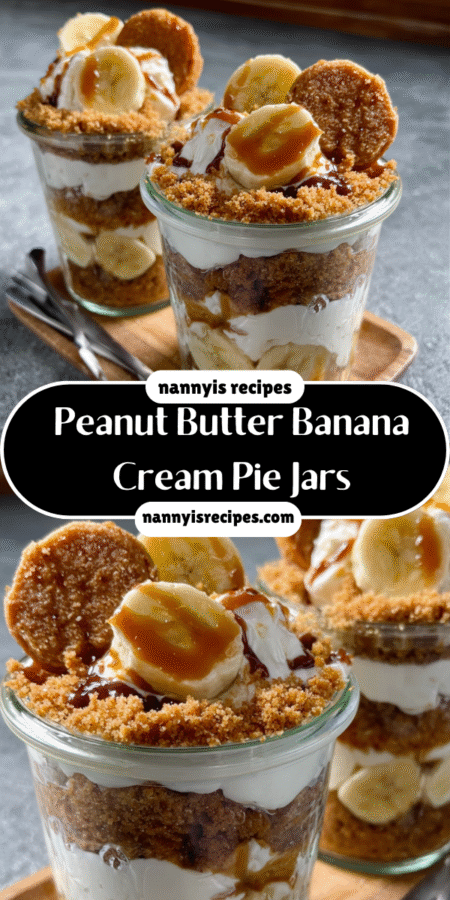
Final Thoughts on Peanut Butter Banana Cream Pie Jars
As we wrap up our journey into the delightful world of Peanut Butter Banana Cream Pie Jars, I can’t help but reflect on just how easy and delicious this recipe truly is. Seriously, it’s like a little slice of heaven in a jar! With minimal effort and a handful of simple ingredients, you can create a dessert that not only satisfies your sweet tooth but also brings a smile to your family’s faces.
What I love most about these jars is their versatility. Whether you’re whipping them up for a casual weeknight treat or impressing guests at a gathering, they fit the bill perfectly. Plus, the no-bake aspect means you can spend less time in the kitchen and more time enjoying the company of your loved ones. It’s a win-win situation!
So, if you haven’t already, I wholeheartedly encourage you to give these Peanut Butter Banana Cream Pie Jars a try. Trust me, once you take that first creamy, dreamy bite, you’ll be hooked! And don’t forget to get creative with your own variations—whether it’s swapping in different fruits or adding a sprinkle of nuts, the possibilities are endless.
And here’s the best part: I’d love to hear about your experiences! Did you make any fun twists on the recipe? How did your family react? Sharing our cooking adventures is what makes this journey so special. So, grab your jars, get mixing, and let the deliciousness unfold. Happy cooking, my friends!
“`
Print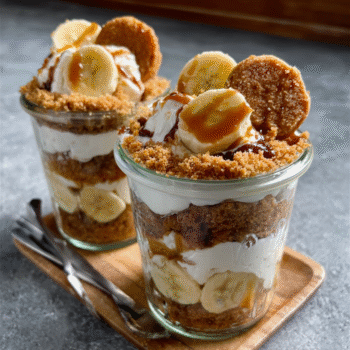
Peanut Butter Banana Cream Pie Jars: An Easy Delight!
- Total Time: 1 hour 20 minutes
- Yield: 4 servings 1x
- Diet: Vegetarian
Description
A delightful and easy-to-make dessert featuring layers of peanut butter cream, bananas, and graham crackers, perfect for any occasion.
Ingredients
- 1 cup smooth peanut butter
- 1 cup confectioners’ sugar
- 1 teaspoon pure vanilla extract
- 1 cup heavy cream
- 2 ripe bananas, sliced
- 1 cup crushed graham crackers
- 2 tablespoons melted unsalted butter
- 1/4 cup mini chocolate chips (optional)
- Whipped cream for garnish (optional)
Instructions
- Begin by mixing the crushed graham crackers with the melted butter in a bowl until the crumbs are fully coated and resemble wet sand.
- Take small dessert cups or jars and place a generous layer of the graham cracker mixture at the bottom of each.
- In a separate bowl, whip the heavy cream until it forms soft peaks, then carefully fold in the peanut butter, confectioners’ sugar, and vanilla extract until everything is smoothly blended.
- Layer the peanut butter cream over the graham cracker base in each cup, filling them about halfway.
- Arrange a layer of banana slices atop the peanut butter cream.
- Repeat the layering process: add more graham cracker mixture, followed by another layer of the peanut butter cream, and finish with more banana slices until the cups are filled to the top.
- If you like, sprinkle mini chocolate chips over the last layer of banana slices for an extra treat.
- Top each cup with a swirl of whipped cream for a delightful finish.
- Place the cups in the refrigerator for at least an hour to let the flavors come together beautifully.
Notes
- For a lighter twist, consider using light peanut butter and whipped topping.
- You can also swap out bananas for berries or other fruits to create a unique flavor experience.
- Prep Time: 20 minutes
- Cook Time: 0 minutes
- Category: Dessert
- Method: No-bake
- Cuisine: American
Nutrition
- Serving Size: 1 cup
- Calories: 450
- Sugar: 20g
- Sodium: 200mg
- Fat: 30g
- Saturated Fat: 10g
- Unsaturated Fat: 15g
- Trans Fat: 0g
- Carbohydrates: 30g
- Fiber: 2g
- Protein: 10g
- Cholesterol: 30mg
Keywords: Peanut Butter Banana Cream Pie Jars, Peanut Butter Banana Delight Cups
