No bake biscoff desserts that wow your taste buds!

Why You’ll Love This No Bake Biscoff Dessert
Let’s be real for a moment: life can get hectic. Between juggling work, family, and everything in between, finding time to whip up a dessert can feel like climbing a mountain. That’s where these no bake Biscoff desserts come to the rescue! In just 15 minutes of prep time, you can create a dessert that not only looks impressive but tastes like a slice of heaven.
Imagine this: you’ve just come home from a long day at work, and the last thing you want to do is spend hours in the kitchen. But then, you remember this delightful dessert waiting for you. With minimal cleanup and no oven required, it’s a win-win situation! Plus, the flavors of Biscoff cookies combined with creamy goodness are sure to please even the pickiest eaters in your family.
Speaking of flavors, let’s talk about the star of the show: Biscoff cookies. These little gems are like a hug for your taste buds. Their unique caramelized flavor adds a delightful twist to any dessert, making it feel indulgent without being overly complicated. Trust me, once you take a bite, you’ll understand why they’re a favorite among dessert lovers.
And let’s not forget about the cream cheese and whipped cream combo! It’s like a fluffy cloud of deliciousness that complements the crunchy cookie crust perfectly. This dessert is not just a treat; it’s an experience that brings smiles to faces and joy to gatherings.
So, whether you’re looking to impress guests at a dinner party or simply want to treat your family after a busy week, this no bake Biscoff dessert is your go-to solution. It’s quick, easy, and oh-so-delicious—what’s not to love?
Introduction to No Bake Biscoff Desserts
Hey there, fellow dessert lovers! If you’re anything like me, you know that life can sometimes feel like a whirlwind. Between work commitments, family activities, and the never-ending to-do lists, finding time to bake can seem like a luxury we just can’t afford. That’s where the magic of no bake Biscoff desserts comes in! These delightful treats are not only a breeze to whip up, but they also deliver on flavor and presentation, making them perfect for busy women like us.
No bake desserts are a game-changer. They allow you to create something sweet and satisfying without the hassle of preheating the oven or worrying about timing. Just mix, layer, and chill! It’s as simple as that. And let’s be honest, who doesn’t love a dessert that requires minimal effort but still wows everyone at the table? With just a few ingredients and a little bit of time, you can have a show-stopping dessert ready to impress your family or guests.
Now, let’s talk about the star of the show: Biscoff cookies. Oh, these little wonders are like a sweet symphony for your taste buds! With their unique caramelized flavor and crunchy texture, they elevate any dessert experience to a whole new level. Imagine the rich, buttery taste of Biscoff cookies mingling with creamy fillings and luscious toppings. It’s a match made in dessert heaven! Whether you’re a long-time fan or new to the Biscoff craze, you’re in for a treat.
So, if you’re looking for a way to satisfy your sweet tooth without spending hours in the kitchen, these no bake Biscoff desserts are just what you need. They’re quick, easy, and oh-so-delicious—perfect for busy moms, working professionals, or anyone who wants to indulge in a little sweetness without the fuss. Let’s dive into this delightful world of no bake desserts and discover how to create something truly special!
Why You’ll Love This No Bake Biscoff Dessert
Let’s be real for a moment: life can get hectic. Between juggling work, family, and everything in between, finding time to whip up a dessert can feel like climbing a mountain. That’s where these no bake Biscoff desserts come to the rescue! In just 15 minutes of prep time, you can create a dessert that not only looks impressive but tastes like a slice of heaven.
Imagine this: you’ve just come home from a long day at work, and the last thing you want to do is spend hours in the kitchen. But then, you remember this delightful dessert waiting for you. With minimal cleanup and no oven required, it’s a win-win situation! Plus, the flavors of Biscoff cookies combined with creamy goodness are sure to please even the pickiest eaters in your family.
Speaking of flavors, let’s talk about the star of the show: Biscoff cookies. These little gems are like a hug for your taste buds. Their unique caramelized flavor adds a delightful twist to any dessert, making it feel indulgent without being overly complicated. Trust me, once you take a bite, you’ll understand why they’re a favorite among dessert lovers.
And let’s not forget about the cream cheese and whipped cream combo! It’s like a fluffy cloud of deliciousness that complements the crunchy cookie crust perfectly. This dessert is not just a treat; it’s an experience that brings smiles to faces and joy to gatherings.
So, whether you’re looking to impress guests at a dinner party or simply want to treat your family after a busy week, this no bake Biscoff dessert is your go-to solution. It’s quick, easy, and oh-so-delicious—what’s not to love?
Ingredients You’ll Need
Alright, let’s get down to the nitty-gritty of what you’ll need to whip up these fabulous no bake Biscoff desserts. The best part? Most of these ingredients are pantry staples, so you might already have them on hand! Here’s what you’ll need:
- 1 1/2 cups Biscoff cookie crumbs: These are the star of the show! The crunchy, caramelized flavor of Biscoff cookies adds a delightful sweetness and texture to your dessert. If you can’t find Biscoff cookies, feel free to use any similar spiced cookie or even graham crackers for a different twist.
- 1/4 cup melted butter: This helps bind the cookie crumbs together, creating a deliciously rich crust. You can substitute with coconut oil for a dairy-free option, or even use unsweetened applesauce for a healthier alternative.
- 8 oz cream cheese, softened: Cream cheese gives the filling that luscious, creamy texture we all love. If you’re looking for a lighter option, low-fat cream cheese works just as well without sacrificing flavor.
- 1/2 cup powdered sugar: This sweetens the filling and gives it that delightful sweetness. If you’re watching your sugar intake, you can use a sugar substitute like stevia or monk fruit sweetener, but keep in mind that it may alter the texture slightly.
- 1 cup whipped cream: This adds a light, airy quality to the filling, making it feel indulgent without being too heavy. You can use store-bought whipped cream or whip your own from heavy cream. For a healthier twist, try using Greek yogurt for a tangy flavor and added protein!
- Biscoff spread for drizzle: This is the cherry on top! Drizzling Biscoff spread over the dessert not only enhances the flavor but also makes it look absolutely stunning. If you’re feeling adventurous, try using chocolate or caramel sauce instead for a different flavor profile.
And there you have it! Each ingredient plays a crucial role in creating this delightful dessert. Remember, if you have any dietary restrictions or preferences, feel free to mix and match with these substitutions. The beauty of cooking is that you can make it your own!
For those who love to keep things organized, I’ve got you covered! Printable measurements and a handy shopping list are provided at the end of this article, so you can easily gather everything you need without any fuss. Now, let’s get ready to dive into the fun part—making this delicious no bake Biscoff dessert!
How to Make No Bake Biscoff Desserts
Now that we’ve gathered all our ingredients, it’s time to roll up our sleeves and get to the fun part—making these scrumptious no bake Biscoff desserts! Trust me, this process is as easy as pie (or should I say, as easy as no-bake dessert?). Let’s dive in!
Step 1 – Prep Ingredients
First things first, let’s get everything ready. Start by gathering all your ingredients on the counter. You’ll want to have your Biscoff cookies, melted butter, cream cheese, powdered sugar, whipped cream, and that heavenly Biscoff spread within arm’s reach.
Now, let’s crush those Biscoff cookies! You can do this in a food processor for a quick and easy method, or if you’re feeling a bit nostalgic, place them in a zip-top bag and crush them with a rolling pin. It’s a great way to relieve some stress after a long day! Aim for fine crumbs—think of it as creating a sandy beach for your dessert crust.
Once you’ve got your cookie crumbs ready, set them aside and let’s move on to the next step!
Step 2 – Begin Cooking
Now that our ingredients are prepped, it’s time to create the crust. In a mixing bowl, combine your crushed Biscoff cookies with the melted butter. Use a spatula or a fork to mix them together until the crumbs are evenly coated and resemble wet sand. This is what will hold our dessert together, so make sure it’s well mixed!
Next, grab a 9-inch dish or pan (a glass dish works beautifully here) and press the cookie mixture firmly into the bottom. You want to create an even layer, so don’t be shy—use your hands or the back of a measuring cup to really pack it down. This crust is the foundation of your dessert, and a good base will make all the difference!
Once you’ve got that crust looking fabulous, set it aside while we whip up the creamy filling.
Step 3 – Combine Ingredients
Now for the fun part—making the filling! In a large mixing bowl, beat the softened cream cheese with the powdered sugar until it’s smooth and creamy. You can use an electric mixer for this, or if you’re feeling strong, a whisk will do the trick (just be prepared for a little arm workout!).
Once your cream cheese mixture is nice and fluffy, it’s time to fold in the whipped cream. Gently add the whipped cream to the cream cheese mixture, and using a spatula, fold it in carefully. You want to keep that light, airy texture, so be gentle! It’s like wrapping a cozy blanket around your filling.
And just like that, you’ve created a luscious, creamy filling that’s going to take this dessert to the next level!
Step 4 – Finish and Serve
Now that we have our crust and filling ready, it’s time to bring it all together. Grab your crust and pour the creamy filling over it, spreading it out evenly with a spatula. This is where the magic happens! You’ll want to make sure every inch of that crust is covered in creamy goodness.
And for the grand finale, drizzle some Biscoff spread over the top. You can warm it slightly in the microwave for about 10 seconds to make it easier to drizzle. Just imagine that rich, caramel flavor cascading down the sides—yum!
Now, cover your dessert with plastic wrap and pop it in the fridge to chill for at least 2 hours. This step is crucial, as it allows the flavors to meld together and the filling to set up nicely. While you wait, you can kick back, relax, and maybe even treat yourself to a little snack (you deserve it!).
Once the time is up, slice into your beautiful no bake Biscoff dessert, and get ready for the oohs and aahs from your family or guests. Trust me, they won’t believe you whipped this up in no time at all!
Tips for Perfect Results
Now that you’re all set to create your no bake Biscoff desserts, let’s talk about a few tips that will help you achieve perfect results every time. After all, we want to impress our family and friends, right? Here are some tried-and-true tips that I’ve learned along the way:
1. Use high-quality Biscoff cookies for the best flavor. This might seem like a no-brainer, but trust me, the quality of your cookies can make a world of difference. Opt for authentic Biscoff cookies if you can find them. Their unique caramelized flavor is what makes this dessert so special. If you’re in a pinch, any similar spiced cookie will do, but nothing beats the original!
2. Chill the dessert longer for a firmer texture. While the recipe calls for a minimum of 2 hours in the fridge, I often find that letting it chill for 3 to 4 hours (or even overnight) yields a firmer, more sliceable dessert. Plus, it gives the flavors more time to meld together, making each bite even more delicious. If you can resist the temptation, let it sit overnight for the best results!
3. Consider adding a pinch of salt to enhance sweetness. It might sound counterintuitive, but a tiny pinch of salt can elevate the flavors in your dessert. It balances the sweetness and brings out the rich, caramel notes of the Biscoff cookies. Just a little sprinkle in the cream cheese mixture can make a big difference, so don’t skip this step!
4. Store leftovers in an airtight container in the fridge for up to 3 days. If you’re lucky enough to have leftovers (which is rare in my house!), make sure to store them properly. An airtight container will keep your dessert fresh and delicious for up to three days. Just be warned: the longer it sits, the more tempting it becomes, so you might find yourself sneaking bites here and there!
With these tips in your back pocket, you’re well on your way to creating a stunning and scrumptious no bake Biscoff dessert that will have everyone asking for seconds. Happy baking (or should I say, happy no-baking)!
Essential Equipment Needed
Before we dive into the delicious world of no bake Biscoff desserts, let’s make sure you have all the right tools at your fingertips. Trust me, having the right equipment can make the process smoother and more enjoyable. Here’s a handy list of what you’ll need:
- Mixing bowls: You’ll need a couple of mixing bowls in different sizes. One for the crust and another for the creamy filling. I love using glass bowls because they’re sturdy and you can see what’s inside, but any mixing bowl will do!
- Electric mixer or whisk: An electric mixer will save you time and effort when beating the cream cheese and powdered sugar together. However, if you’re feeling a bit nostalgic or want a little arm workout, a good old-fashioned whisk works just as well. Just be prepared to put in some elbow grease!
- 9-inch dish or pan: A 9-inch dish is perfect for this dessert, giving you enough space to layer the crust and filling beautifully. A glass or ceramic dish not only looks lovely but also helps with even chilling. If you don’t have a 9-inch dish, a similar-sized pan will work too—just adjust your layers accordingly!
- Rubber spatula: This is a must-have for folding in the whipped cream and spreading the filling evenly over the crust. A rubber spatula is gentle on your mixtures and helps you scrape every last bit from the bowl, ensuring nothing goes to waste!
- Measuring cups and spoons: Accurate measurements are key to a successful dessert. Make sure you have a set of measuring cups for dry ingredients and measuring spoons for those smaller quantities. If you’re like me and love to bake often, investing in a good set will pay off in the long run!
With these essential tools in your kitchen arsenal, you’re all set to create a stunning no bake Biscoff dessert that will impress everyone. So gather your equipment, roll up your sleeves, and let’s get to making something delicious!
Delicious Variations of No Bake Biscoff Desserts
Now that you’ve mastered the classic no bake Biscoff desserts, let’s have some fun with variations! The beauty of this dessert is its versatility. You can easily switch things up to suit your taste or to impress your family and friends with something new. Here are a few delicious twists that I absolutely love:
1. Add chocolate chips for a chocolatey twist. If you’re a chocolate lover like me, this variation is a must-try! Simply fold in a cup of mini chocolate chips into the cream cheese mixture before layering it over the crust. The combination of rich chocolate and the caramelized flavor of Biscoff cookies is pure bliss. It’s like a party in your mouth! You can even sprinkle some extra chocolate chips on top for a beautiful finish.
2. Incorporate peanut butter for a nutty flavor. For those who adore the sweet and salty combo, adding peanut butter is a game-changer. Just mix in about 1/2 cup of creamy peanut butter into the cream cheese mixture. This will give your dessert a delightful nutty flavor that pairs perfectly with the Biscoff cookies. You can also drizzle some extra peanut butter on top for that extra touch of indulgence. Trust me, your taste buds will thank you!
3. Use Greek yogurt instead of cream cheese for a lighter option. If you’re looking to lighten things up a bit, swapping out cream cheese for Greek yogurt is a fantastic option. It still provides that creamy texture but with added protein and less fat. Just make sure to use plain Greek yogurt to keep the flavors balanced. This variation is perfect for those who want to indulge without the guilt. Plus, it’s a great way to sneak in some extra nutrition!
4. Create a layered dessert with fruit like bananas or strawberries. Want to add a fresh twist? Layering in some fruit is a delightful way to elevate your no bake Biscoff dessert. Slice up some ripe bananas or fresh strawberries and layer them between the crust and the cream filling. Not only does this add a pop of color, but it also brings a refreshing contrast to the rich flavors. You can even top it off with a few slices of fruit for a beautiful presentation. It’s like a little burst of sunshine in every bite!
These variations are just the tip of the iceberg! Feel free to get creative and experiment with your favorite flavors. The best part about cooking is making it your own, and these no bake Biscoff desserts are the perfect canvas for your culinary creativity. So, gather your ingredients, try out these variations, and watch as your family and friends rave about your delicious creations!
Serving Suggestions
Now that you’ve created this stunning no bake Biscoff dessert, it’s time to think about how to serve it up for maximum enjoyment! Presentation can elevate any dish, and with a few simple additions, you can turn your dessert into a showstopper. Here are some delightful serving suggestions that I absolutely love:
1. Pair with fresh fruit like berries or banana slices. Fresh fruit adds a burst of color and a refreshing contrast to the rich, creamy filling of your dessert. Think about serving it with a handful of juicy strawberries, plump blueberries, or even some sliced bananas. The natural sweetness of the fruit complements the caramelized flavor of the Biscoff cookies beautifully. Plus, it adds a touch of healthiness to your indulgent treat—win-win!
2. Serve alongside a scoop of vanilla ice cream. If you really want to take your dessert to the next level, consider adding a scoop of creamy vanilla ice cream on the side. The cold, velvety ice cream pairs perfectly with the rich flavors of the Biscoff dessert, creating a delightful contrast in temperature and texture. You can even drizzle a little extra Biscoff spread over the ice cream for that extra touch of indulgence. Trust me, your taste buds will be dancing with joy!
3. Offer a cup of coffee or tea for a delightful dessert experience. There’s something so comforting about enjoying a sweet treat with a warm beverage. Consider serving your no bake Biscoff dessert alongside a steaming cup of coffee or a soothing cup of tea. The rich flavors of coffee or the aromatic notes of tea will enhance the overall experience, making it feel like a cozy café moment right in your own home. Plus, it’s a great way to unwind after a busy day!
These serving suggestions not only enhance the presentation of your dessert but also create a delightful experience for you and your loved ones. Whether you’re hosting a gathering or simply treating yourself after a long day, these little touches can make all the difference. So, get creative, have fun with your presentation, and enjoy every delicious bite of your no bake Biscoff dessert!
FAQs About No Bake Biscoff Desserts
As a busy home cook, I know that questions can pop up when you’re trying out a new recipe, especially one as delightful as these no bake Biscoff desserts. So, let’s tackle some of the most common queries I’ve encountered along the way. I hope these answers help you feel more confident in your dessert-making journey!
Can I make this dessert ahead of time?
Absolutely! In fact, making this dessert a day in advance is a fantastic idea. It allows the flavors to meld beautifully, and the longer chilling time can enhance the overall texture. Just be sure to store it in the fridge, covered with plastic wrap or in an airtight container, to keep it fresh. This way, you can enjoy a stress-free dessert on the day of your gathering or family dinner!
How long does it take to set?
Patience is key when it comes to this dessert! It requires at least 2 hours to chill and set properly in the fridge. However, if you can wait a bit longer—say, 3 to 4 hours or even overnight—you’ll be rewarded with a firmer texture that’s easier to slice. Trust me, the wait is worth it!
Can I freeze this dessert?
While the idea of freezing a dessert might sound tempting, I wouldn’t recommend it for this particular recipe. Freezing can alter the texture of the cream filling, making it grainy or watery once thawed. Instead, enjoy it fresh from the fridge! If you do have leftovers, just store them in the fridge for up to 3 days, and you’ll still have a delicious treat to enjoy.
With these FAQs in mind, you’re all set to create your own no bake Biscoff desserts with confidence! If you have any other questions or tips to share, feel free to drop them in the comments. Happy no-baking!
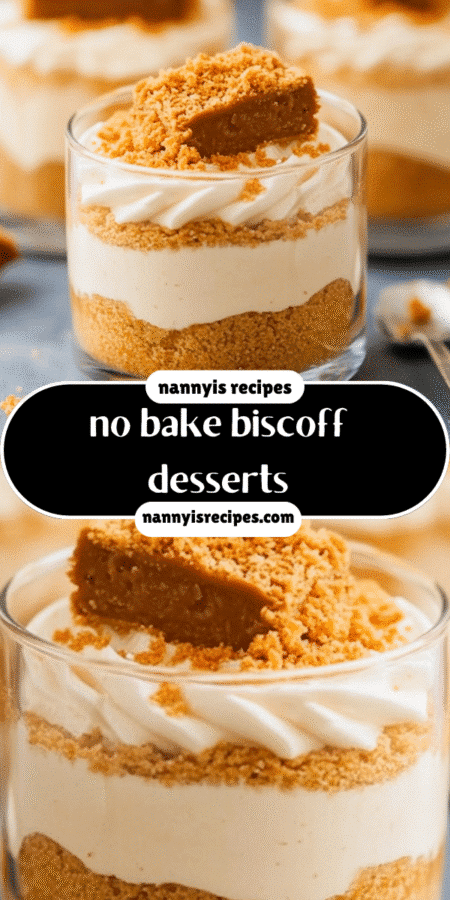
Final Thoughts on No Bake Biscoff Desserts
As I sit here reflecting on the delightful journey of creating these no bake Biscoff desserts, I can’t help but smile. This dessert is not just a recipe; it’s a celebration of simplicity and flavor that fits perfectly into our busy lives. With just a handful of ingredients and minimal prep time, you can whip up something that feels indulgent and special without the fuss of traditional baking.
For busy women like us—whether you’re a working mom, a professional juggling deadlines, or simply someone who values their time—this dessert is a lifesaver. It’s the kind of treat that allows you to indulge your sweet tooth without sacrificing your precious time. Imagine coming home after a long day, knowing that a delicious dessert is just a few minutes away. It’s like having a little piece of joy waiting for you in the fridge!
And let’s not forget the joy it brings to gatherings. Whether it’s a family dinner, a potluck with friends, or a simple weekend treat, this no bake Biscoff dessert is sure to impress. Picture the smiles on your loved ones’ faces as they take their first bite, their eyes lighting up with delight. It’s those moments of connection and happiness that make cooking worthwhile. Plus, you’ll be the star of the show, and who doesn’t love that?
So, I encourage you to give this recipe a try for your next family gathering or as a sweet reward after a hectic week. You deserve it! Embrace the ease and deliciousness of this no bake dessert, and let it bring a little extra sweetness to your life. Trust me, once you experience the joy of making and sharing this dessert, you’ll find yourself coming back to it time and time again.
Happy no-baking, my friends! May your kitchens be filled with laughter, love, and of course, plenty of Biscoff goodness!
“`
Print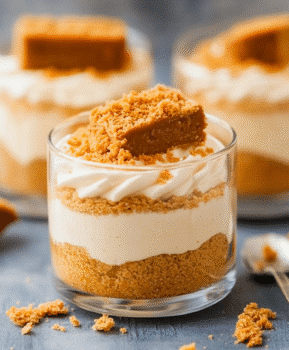
No bake biscoff desserts that wow your taste buds!
- Total Time: 2 hours 15 minutes
- Yield: 6 servings 1x
- Diet: Vegetarian
Description
A delicious no-bake dessert featuring Biscoff cookies that is sure to impress your taste buds.
Ingredients
- 1 1/2 cups Biscoff cookie crumbs
- 1/4 cup melted butter
- 8 oz cream cheese, softened
- 1/2 cup powdered sugar
- 1 cup whipped cream
- Biscoff spread for drizzle
Instructions
- Mix crumbs and butter; press into a dish.
- Beat cream cheese and sugar, then fold in whipped cream.
- Layer over crust and drizzle with Biscoff. Chill for 2 hours.
Notes
- Serves 6
- Prep Time: 15 minutes
- Cook Time: 0 minutes
- Category: Dessert
- Method: No-Bake
- Cuisine: American
Nutrition
- Serving Size: 1 serving
- Calories: 380
- Sugar: 16g
- Sodium: 200mg
- Fat: 26g
- Saturated Fat: 15g
- Unsaturated Fat: 0g
- Trans Fat: 0g
- Carbohydrates: 32g
- Fiber: 1g
- Protein: 4g
- Cholesterol: 60mg
Keywords: no bake biscoff desserts
